My MCP Connectors
Description
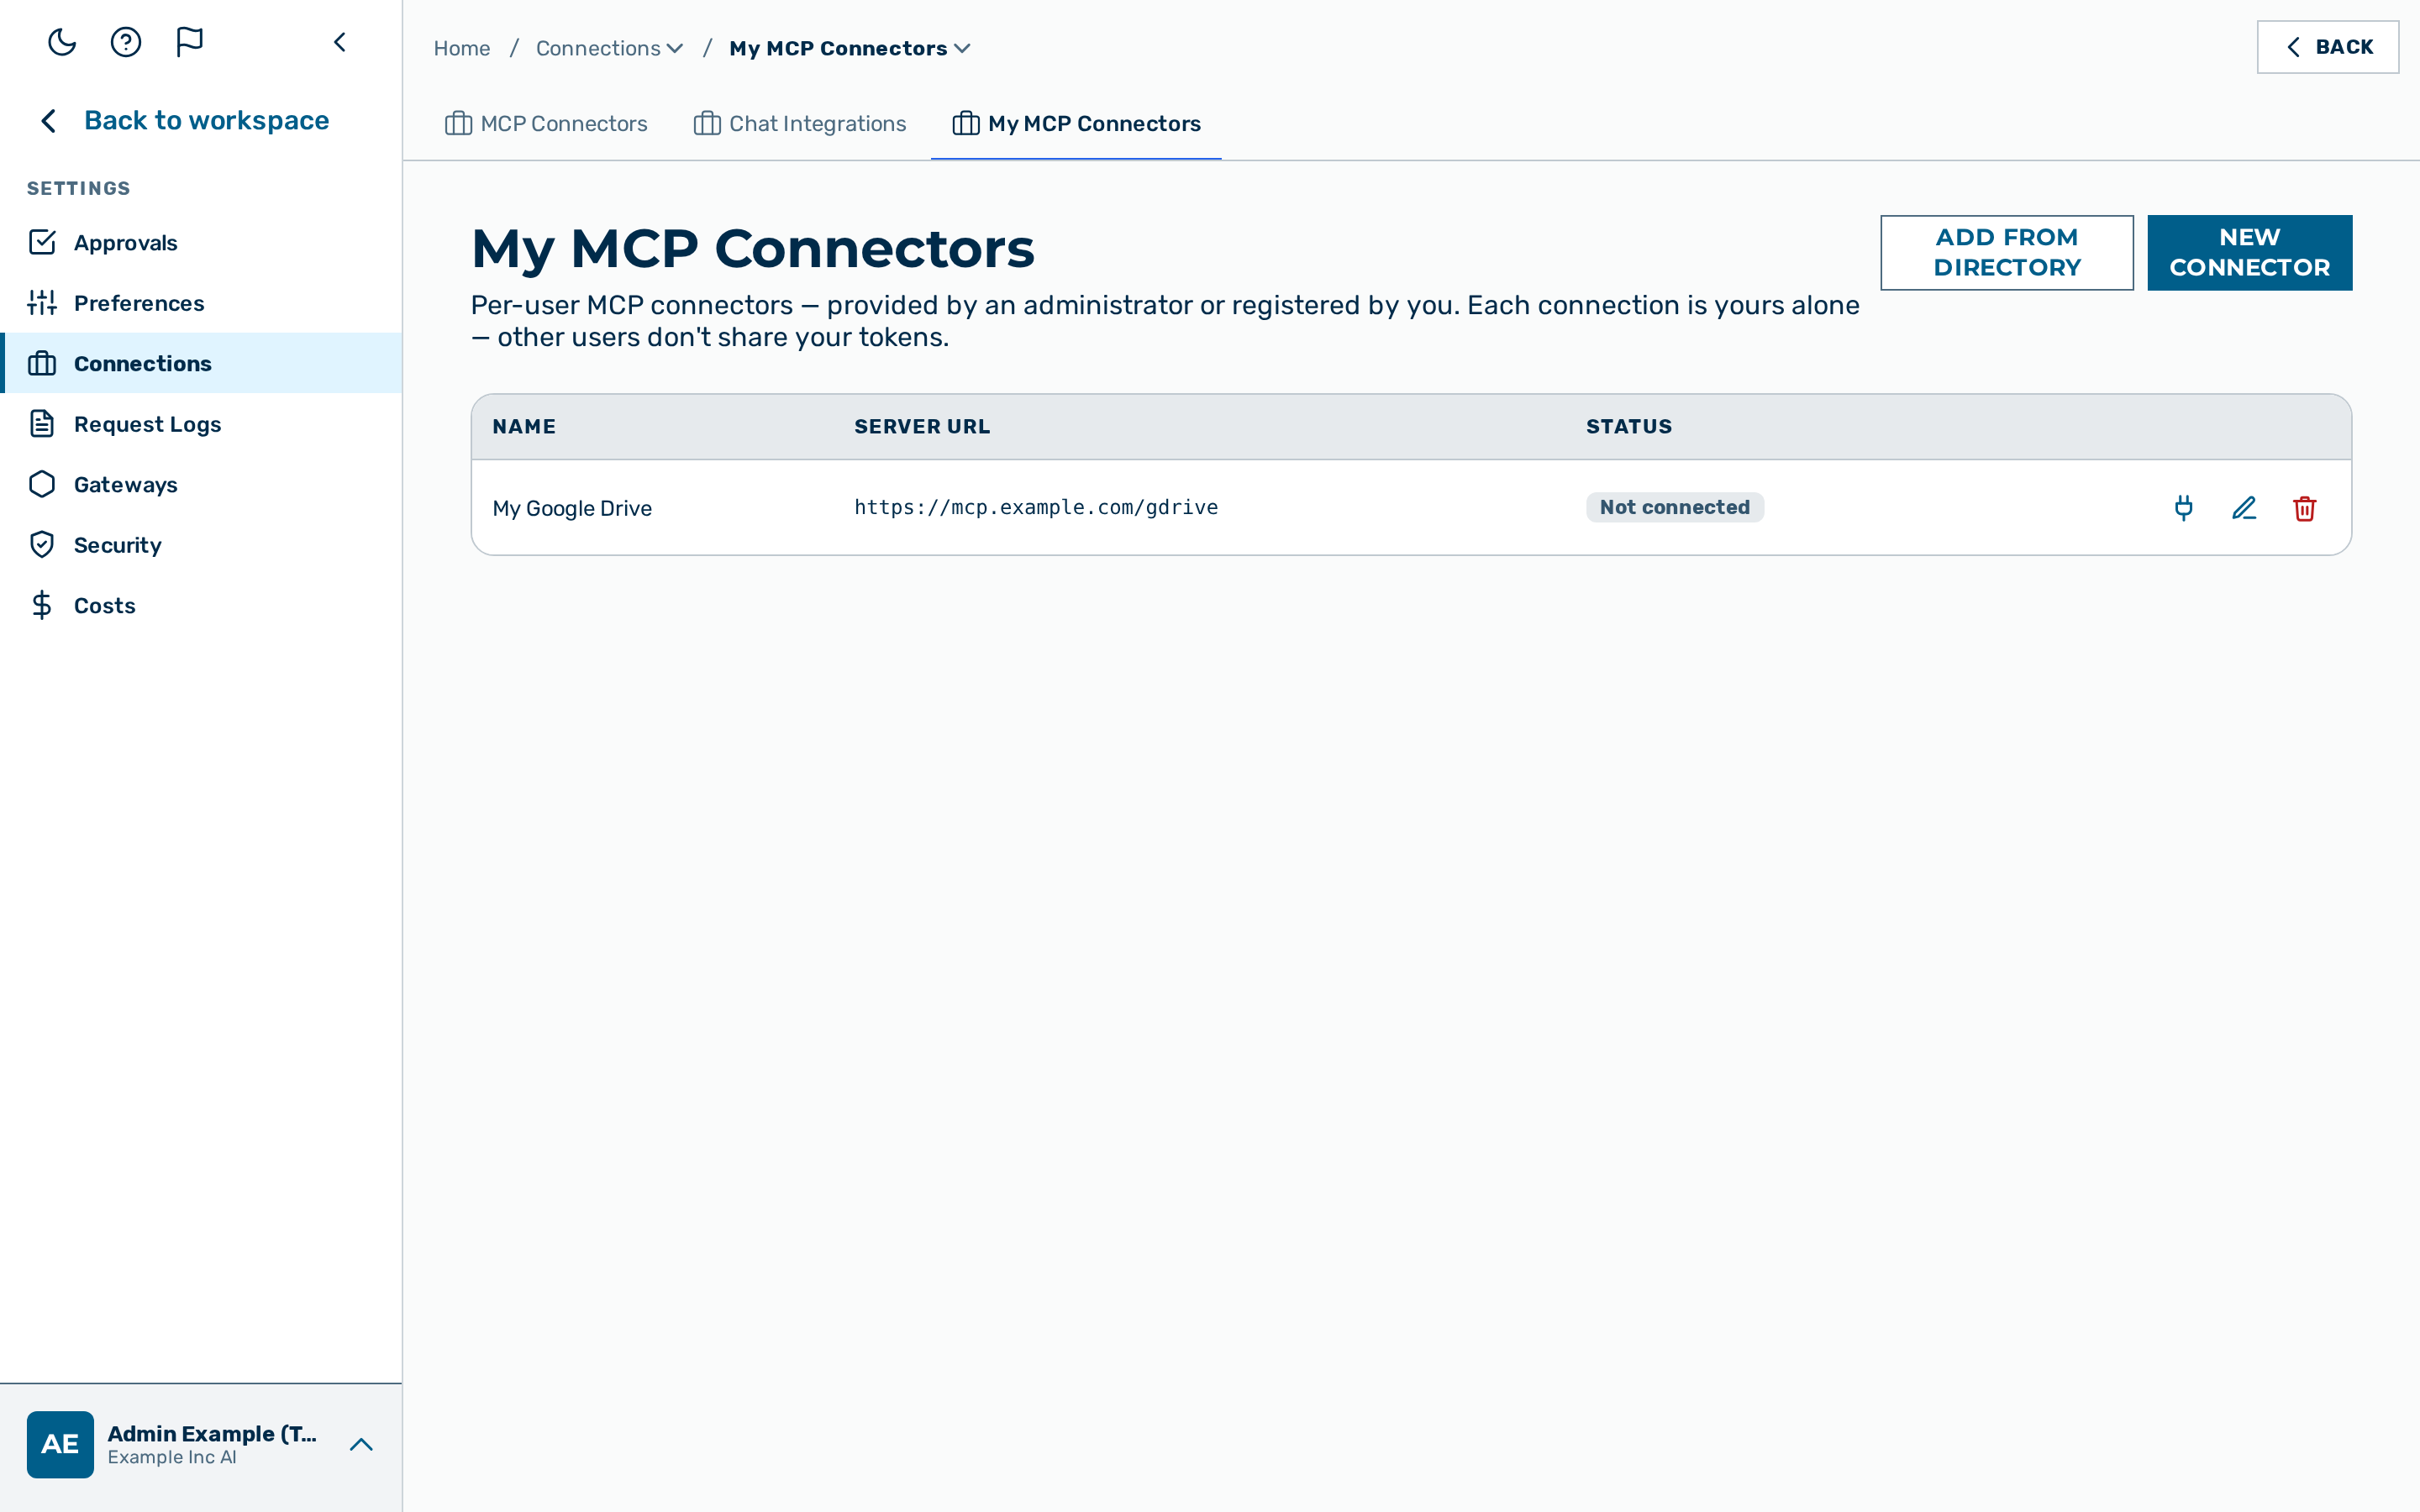
The My MCP Connectors view lists the per-user MCP connectors available to the signed-in user — both those an admin made available and those the user registers — and lets the user supply a personal credential for each one. A user can register their own user-scoped connector from the directory with Add from directory, or by URL with New connector. The directory shows only the connectors a platform admin has activated for the deployment (the default active set is Gmail and Slack) — a platform admin sees every catalogue entry, each flagged with its active state, and controls the active set from the Feature Flags card (active_mcp_connectors). A connector you register yourself may only point at a public address: a private or internal address (such as 10.x, 192.168.x, or localhost) is rejected when you save — the dialog stays open, shows server_url must be a public address (private/internal addresses aren't allowed), and keeps your input so you can correct it. The same applies to OAuth URLs you enter, which must also use https://. An administrator can register internal addresses on the MCP Connectors tab. The view is the My MCP Connectors tab of Settings › Connections, reached from the user-block menu at the bottom of the left sidebar → Settings → Connections (route /connectors unchanged). It is shown to all roles: an admin manages the tenant's connectors on the MCP Connectors tab and their own personal credentials here; for non-admin roles it is the only Connections tab, so the page shows without a tab strip.
A per-user connector points at an external tool server that implements the Model Context Protocol. Each user connects with a personal credential. The credential belongs to the user alone; other users do not share the token.
The My MCP Connectors view is distinct from the admin MCP Connectors view. The admin MCP Connectors view (/mcp) registers the connectors and sets a single shared credential for tenant-scoped connectors. The My MCP Connectors view (/connectors) holds the personal credential for user-scoped connectors. See MCP Connectors for the admin view.
The table lists three columns and an action column: Name, Server URL, Status, and per-row actions. The Status column shows one of Connected, Not connected, Ready, or Reconnect needed. Ready is shown for a connector that needs no credential (authentication None): it is usable in Chat as created, without a Connect step — the AI sees its tools in the next message exactly like a Connected connector's. Each row shows a Connect or Disconnect button; a connector whose credential has expired shows Reconnect; and a connector you registered yourself also shows Edit and Delete. When no per-user connectors exist, the view shows the message No per-user connectors are set up for this tenant yet. Register one with + New connector or Add from directory, or an administrator can provide one under MCP Connectors.
💡 Note: When a tool call needs a credential that is not yet set, the Chat view shows a message with a link to this view. For a token-based connector the link opens the Connect dialog for the matching connector; a connector that uses OAuth redirects to the provider to sign in.
💡 Note: At most 8 connectors are used in any one message. Each connected connector adds a round-trip and extra context to the request, so this ceiling keeps a message fast and affordable. If you have more than 8 connectors connected, the Chat composer shows a notice such as 12 connectors connected — only 8 are used per message. and the message uses the first eight; disconnect the ones you do not need for the message so the connectors you want are among the eight.
Connecting a connector
Proceed as follows to connect a connector:
- Locate the connector in the table.
- Click on the Connect button in the row.
- The Connect
dialog opens. - Paste the credential in the Access token field.
- The token is the value obtained from the provider, for example a Google OAuth access token.
- If required, enter the expiry in the Expires at (optional) field.
- Leave the field blank for a token that does not expire.
- Click on the Connect button.
-> On save, the gateway verifies the credential against the connector (a tools/list handshake) before storing it. Only a credential the provider accepts is stored and the status changes to Connected; the AI discovers the connector's tools in the next chat session.
💡 Note: Verification is fail-closed — nothing is stored until it passes:
- If the provider rejects the token, the dialog reports that the connector rejected the credential (check the token and try again) and the row does not become Connected.
- If the connector cannot be reached to verify, you are told to try again (a connectivity issue, kept distinct from a bad token).
A credential that later stops working — the provider rejects it on a subsequent call — flips the row to Reconnect needed on its own, rather than showing a stale "Connected"; it self-heals on the next successful call.
Connecting a connector with OAuth
A connector that uses OAuth does not take a pasted token. Instead, the gateway sends the user to the provider to sign in, and stores the returned credential for the user. The stored credential belongs to the user alone.
Proceed as follows to connect a connector with OAuth:
- Locate the connector in the table.
- Click on the Connect button in the row.
- The browser opens the sign-in page of the provider.
- Sign in at the provider and approve the requested access.
- The provider returns the browser to the My MCP Connectors view.
-> The connector status changes to Connected, and the view shows the message Connector connected.
💡 Note: For a connector that supports automatic registration, leave the OAuth fields blank when registering the connector. The gateway registers itself with the provider on the first connection. The directory card of such a connector shows the badge Connects automatically.
💡 Note: The gateway refreshes the access token automatically for the lifetime of the connection. The user does not re-enter the credential between sessions.
Reconnecting a connector
The gateway prompts for a reconnection when the stored credential can no longer be refreshed. The status of the connector changes to Reconnect needed, or the Chat view shows a message with a link to this view.
Proceed as follows to reconnect a connector:
- Locate the connector in the table.
- Click on the Reconnect button in the row.
- The browser opens the sign-in page of the provider.
- Sign in at the provider and approve the requested access.
-> The connector status changes to Connected.
Disconnecting a connector
Proceed as follows to disconnect a connector:
- Locate the connector in the table.
- Click on the Disconnect button in the row.
- A confirmation dialog opens.
- Confirm the disconnection.
-> The connector status changes to Not connected. The personal credential is removed.