Custom PII Blacklist
The Custom PII Blacklist is a Tier 1 (in-process, sub-millisecond) guardrail that masks admin-defined sensitive terms before they reach the model and restores them in the response. It is suited for protecting client names, internal project codenames, employee surnames, and any other terms that must not appear in prompts sent to external AI providers.
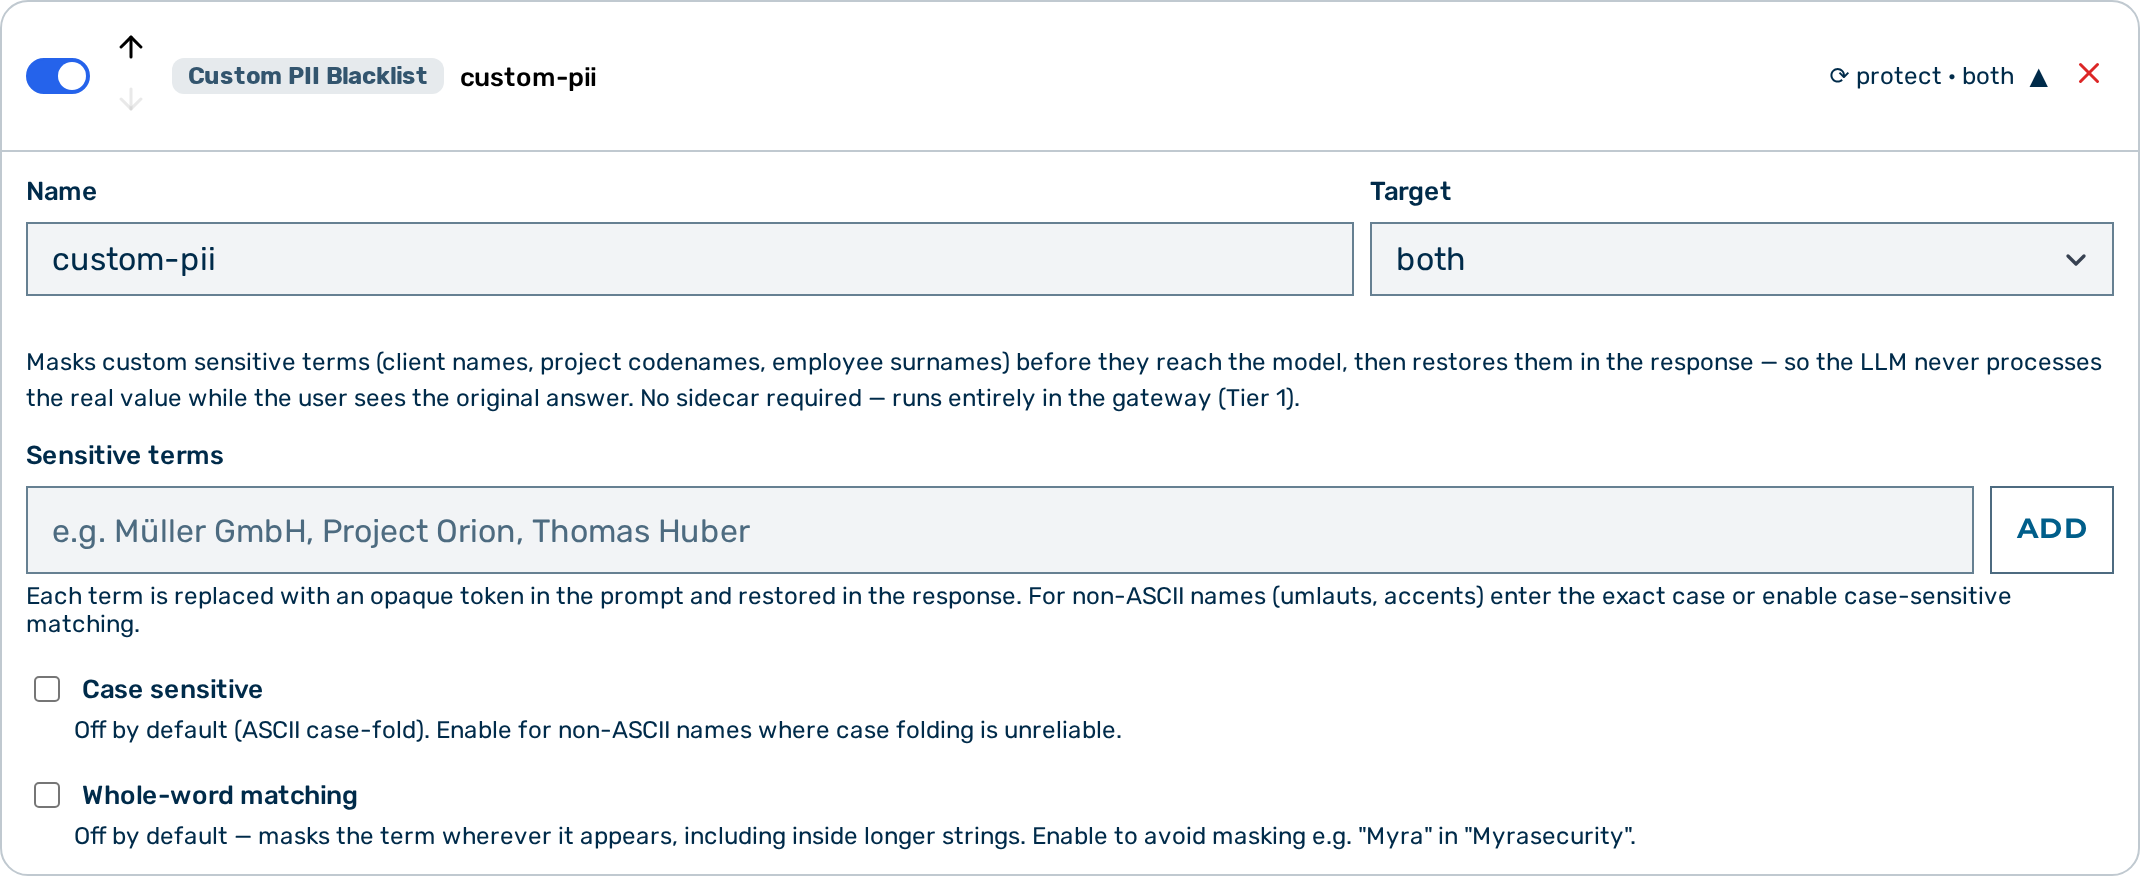 Custom PII Blacklist editor
⚠️ Caution: A Custom PII guardrail with no usable keywords masks nothing — it is stored and listed, but the gateway returns
passfor it on every request.GET /admin/v1/gateways/<ID>/detectorsreports such a detector asactive: falsewithinactive_reason: "no_keywords", and the Guardrail Builder badges it No keywords.
When to use the Custom PII Blacklist
Use the Custom PII Blacklist when you need to prevent specific, known strings from reaching the model — and when you need the model response to contain the original values again. Unlike the Keyword guardrail, which blocks or flags traffic, the Custom PII Blacklist is transparent to both the caller and the model: the caller sends the original text, the model sees masked tokens, and the caller receives the original text in the response.
For NLP-based PII detection (email addresses, card numbers, names inferred from context), use the NLP PII Detector or PII Protector instead.
How it works
The guardrail intercepts each request and response in two phases.
Request phase: Each keyword in the keywords list is replaced with an opaque token in the format [MYRA-CUSTOM:SALT:N], where SALT is derived from the request identifier and N is a sequential counter. Only the user message text and the top-level prompt are scanned — a keyword appearing in a system/assistant message or a non-text content block is not masked. The request body with masked values is forwarded to the model.
Response phase: Every token in the model response is replaced with the original keyword value before the response is returned to the caller — in one left-to-right pass over the response, so a restored keyword value is never rescanned for further tokens (a [MYRA-CUSTOM:…] token inside a keyword's value is rendered as [redacted]; see PII Protector — Restore is one pass, one level).
A [MYRA-CUSTOM:…] token survives a later PII Protector scan on the same request intact: the NER detector clips its spans to the prose around the request's own tokens, so a keyword protected here is never re-masked into an unrestorable token and round-trips verbatim through that scan. The same protection holds between two Custom PII detectors: when a second Custom PII detector runs over text that already contains the first detector's [MYRA-CUSTOM:…] tokens, a keyword occurrence that intersects such a token is skipped — a keyword hit inside a token is not a real hit — so the first detector's token stays byte-intact and its value round-trips verbatim. A keyword occurrence lying wholly in real text is still redacted; only a match overlapping a token's synthetic bytes is left as-is (for a keyword whose literal contains a bracket and straddles a token edge, the real-text remainder outside the token is not re-scanned, but the token is never corrupted).
The token mapping persists for the lifetime of the request. When the request egresses to an external AI provider the model never receives the original keyword values. A request served wholly by a first-party local (Myra/EU) model is not masked — the keywords reach the local model as-is, since the data never leaves Myra (see PII Protector — Local model legs are not masked).
💡 Note: The masking is fully reversible within a single request. Stored logs contain the masked form (tokens, not original values) when
log_payloads: trueis configured.💡 Note: For non-ASCII names (for example, names containing accented characters or non-Latin scripts), either enable the Case sensitive option and enter the exact capitalisation, or disable the Case sensitive option and enter a lowercase form — case-folding covers ASCII and the Latin-1 Supplement (so
MÜLLERfolds tomüller), but not other scripts.
Configuration reference
| Field | Type | Default | Description |
|---|---|---|---|
type |
string | — | Must be "custom_pii" |
name |
string | — | Human-readable label for this guardrail instance |
target |
string | "request" |
Set to "both" so masked terms are restored in the response. The default of "request" masks the request but leaves the masked tokens un-restored in the response. |
keywords |
array of strings | [] |
Sensitive terms to mask. Each string must appear verbatim in the request. |
case_sensitive |
boolean | false |
When false, matching is case-insensitive across ASCII and Latin-1 accented letters (Ä↔ä); other scripts are not folded. When true, only the exact capitalisation matches. |
whole_word |
boolean | false |
When true, a keyword only matches when surrounded by non-word characters. When false, substring matches also apply. |
💡 Note: The Custom PII Blacklist does not have an
actionfield. Masking is always active and cannot be configured to block or flag. A write that introduces or changes anactionother than"scrub"is rejected with400; a value already stored on that detector is carried through so an older configuration stays saveable.GET /gateways/{id}/detectorsreports this detector's action as"scrub"regardless of what is stored — see the PII Protector note for the full rule.
Example configuration
Mask client names in a customer support gateway
{
  "type": "custom_pii",
  "name": "client-name-mask",
  "target": "both",
  "keywords": ["Acme Corp", "Globex", "Initech"],
  "case_sensitive": false,
  "whole_word": true
}
Mask internal codenames with exact case
{
  "type": "custom_pii",
  "name": "project-codename-mask",
  "target": "both",
  "keywords": ["Project Nightingale", "Operation Keystone"],
  "case_sensitive": true,
  "whole_word": true
}
Configuring the Custom PII Blacklist
Proceed as follows to configure the Custom PII Blacklist in the Guardrail Builder:
- Open the gateway detail page and scroll down to the Guardrails card.
- Click on the + Custom PII Blacklist button.
- A collapsed Custom PII Blacklist card appears at the bottom of the list.
- Click on the card to expand it.
- Enter a name in the Name text field.
- Enter each sensitive term in the Sensitive terms text field and click on the Add button.
- The term is added to the keyword list below the field.
- If required, enable the Case sensitive toggle for exact-case matching.
- If required, enable the Whole-word matching toggle to prevent substring matches.
- Click on the Save Guardrails button.
-> The Custom PII Blacklist is saved and appears in the execution plan.
Pipeline position
The Custom PII Blacklist is Tier 1 — it runs in-process with no external calls. All Tier 1 guardrails run before any Tier 2 guardrail.
The masking and restoration phases operate independently of other guardrails in the pipeline. Other Tier 1 guardrails that run after the Custom PII Blacklist inspect the already-masked request body — the original keyword values are not visible to them.