Agents
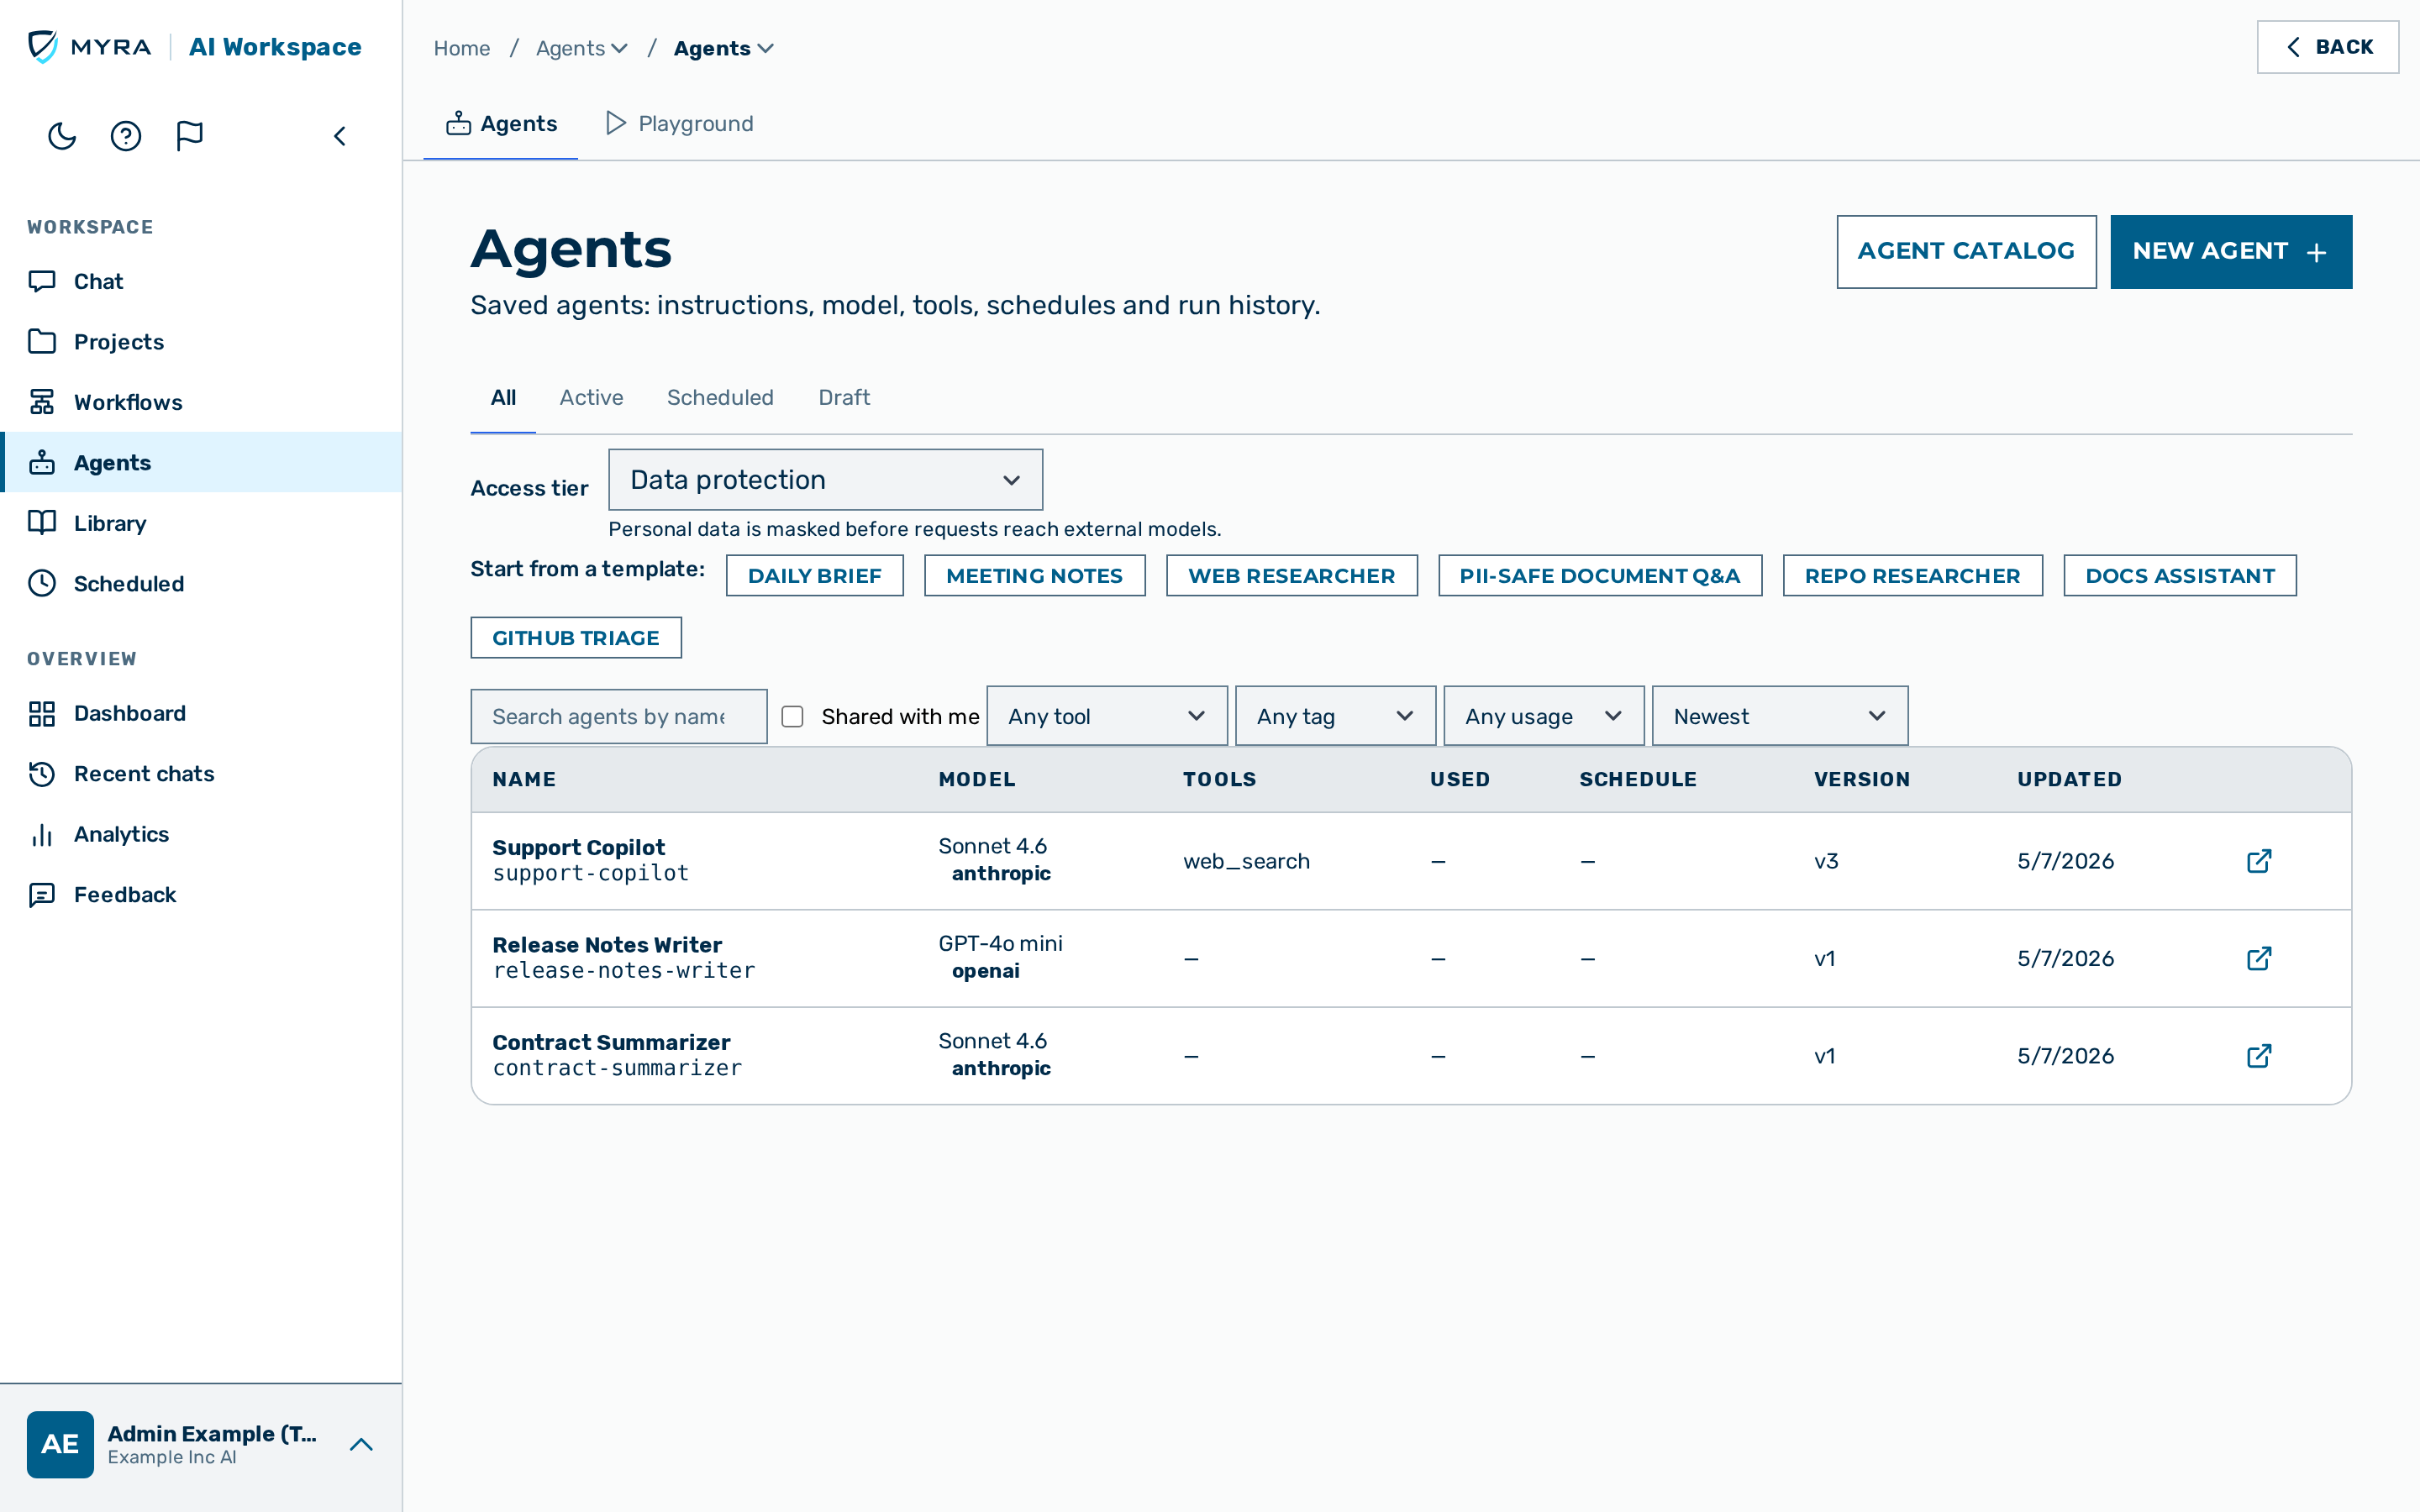 The Agents page.
An agent is a saved, reusable inference configuration. Each agent bundles a set of instructions (its system prompt), a model, a set of tools (web search, URL fetch, and MCP connectors), and one or more bound knowledge areas. Once saved, an agent can be run from the interface, called from your own code, run on a schedule, or triggered by an incoming webhook.
Agents are user-owned: every agent belongs to the account that created it, and it runs as its owner. The Agents page is a top-level item in the Workspace cluster of the left rail; it is always shown and is available to all signed-in users — there is no role gate on the entry. When the Agents feature is not part of the workspace's plan (platform-provisioned; on by default) the entry carries a Premium badge and clicking it opens a shared upgrade pop-up whose call to action leads to the contact form; a direct deep-link to an Agents page still redirects to the upgrade page. This is independent of the separate Playground item, which is governed by its own tenant flag and behaves the same way. The viewer and demouser roles can browse agents but cannot clone, create, edit, or delete them (clone requires the authoring permission those roles lack). Administrators and tenant administrators can manage every agent in their scope; all other users manage only their own.
Each agent is scoped to a single gateway. The gateway determines which models and providers the agent can run on, so the model picker only offers models that the selected gateway can serve.
Agent detail view
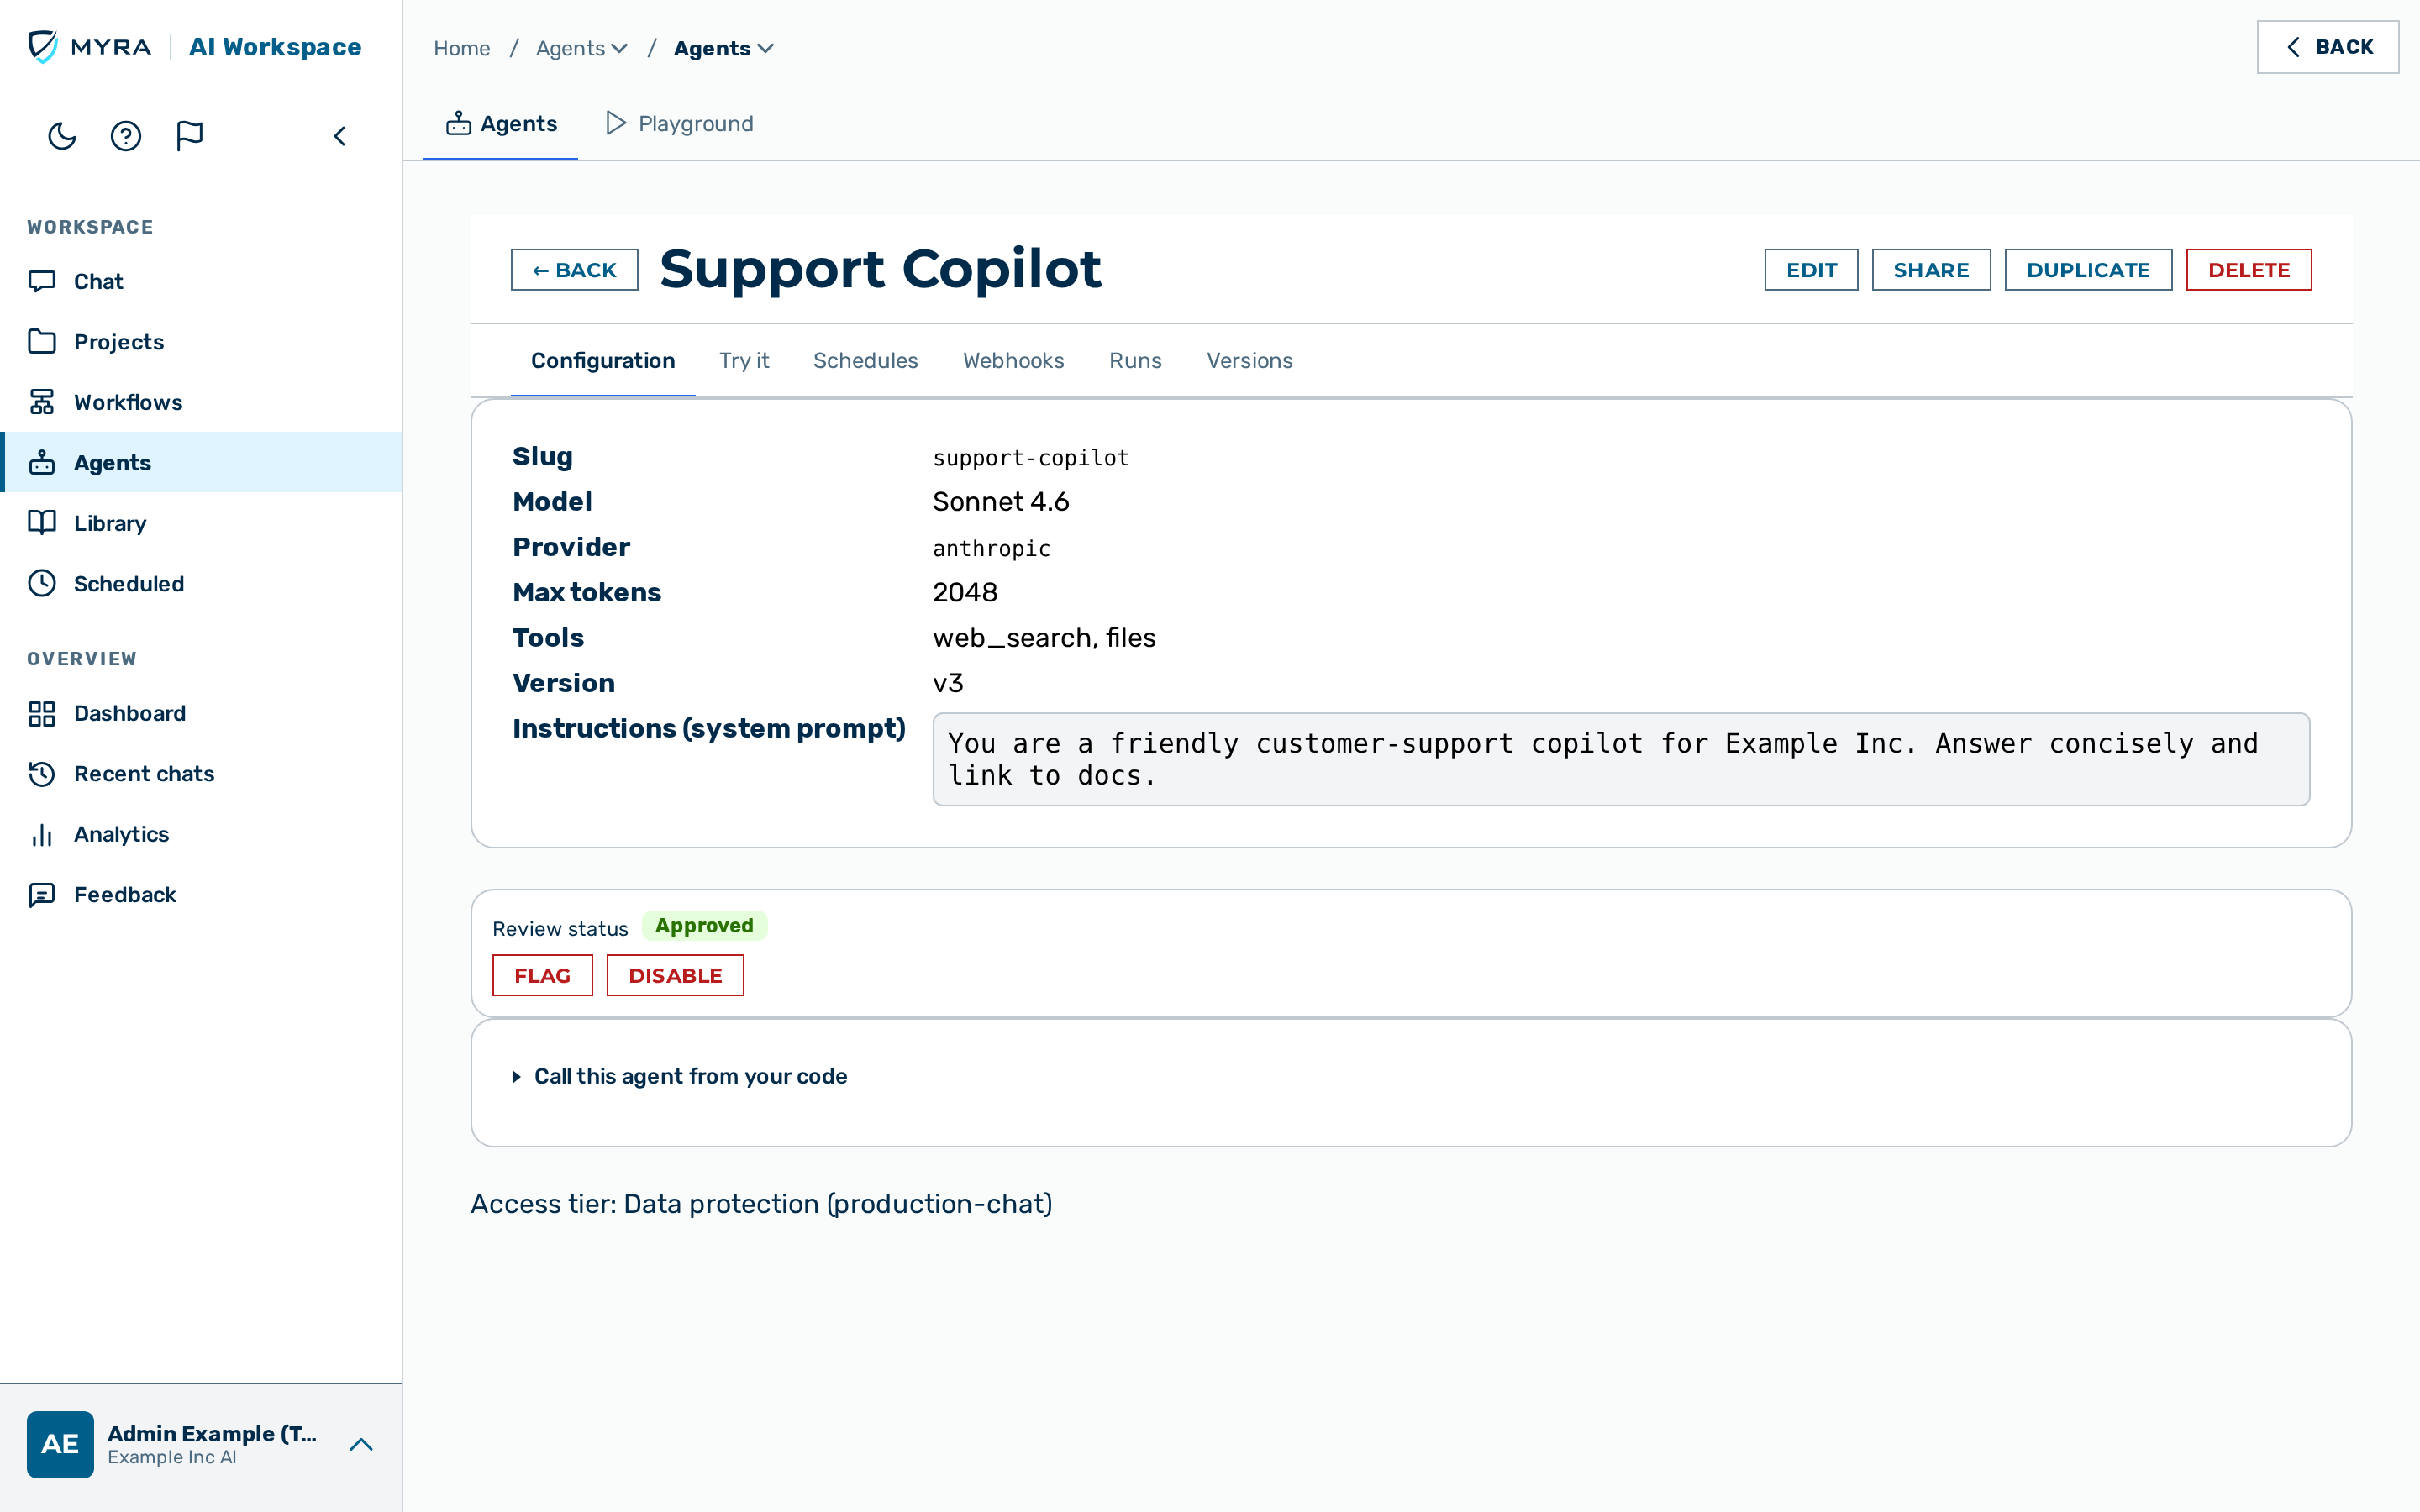 The agent detail view, open on the Configuration tab.
Open an agent's detail view via the open action icon on its row (the whole row is not clickable). The detail view is organised into tabs:
| Tab | Content |
|---|---|
| Configuration | The saved configuration: slug, model, provider, maximum tokens, tools, instructions, review status, and a copy-ready code snippet. |
| Try it | Run the agent from the interface with a sample prompt. Available to the owner only. |
| Schedules | Recurring runs of the agent. |
| Webhooks | Inbound webhook triggers that let an external system run the agent. |
| Runs | The run history, including per-run cost, tokens, and the configuration snapshot for each run. |
| Versions | The configuration version history, with restore and version comparison. |
The Provider field on the Configuration tab shows Chosen at run time when no provider is pinned. When an agent has no model, the model field shows a no model badge, and the agent cannot run until a model is chosen.
Agent list toolbar
The agents table lists the agents on the selected gateway. Non-owned agents that were shared with you carry a shared badge.
Above the toolbar, a segment filter narrows the list by lifecycle state — All,
Active, Scheduled, or Draft. The segments are derived from each agent's
existing signals (no new column): Draft = review status draft, Active = review status
approved, and Scheduled = has at least one schedule.
The toolbar above the table provides the following controls:
| Control | Description |
|---|---|
| Access tier drop-down list | Selects which of the workspace's access tiers (gateways) the listed agents belong to — Local (only locally hosted Myra models), Data protection (personal data is masked before external models), or Standard. Shown only when the workspace has more than one gateway; a short hint under the control explains the selected tier. When two gateways share a tier, the technical name is appended in parentheses to tell them apart. |
| Search field | Filters the list by agent name. |
| Shared with me checkbox | Shows only agents that were shared with you. |
| Filter by tool drop-down list | Filters by tool: Any tool, Web search, Knowledge files, Fetch, or MCP connectors. |
| Filter by tag drop-down list | Filters by catalog category. Shown only when at least one agent is categorised. |
| Filter by usage drop-down list | Filters by activity: Any usage, Used, or Never used. |
| Sort by drop-down list | Orders the list by Newest, Recently updated, Name (A–Z), or Most used. |
💡 Note: The Most used sort and the Used and Never used usage filters count invocations over the last 90 days on the selected gateway. The count is loaded on demand the first time you use one of these controls.
Agent templates
A template pre-fills the create form with a starting name, instructions, and a set of tools, so you do not have to write an agent from scratch. The template buttons appear above the list, introduced by the label Start from a template:. The available templates are Daily Brief, Meeting Notes, Web Researcher, PII-Safe Document Q&A, Repo Researcher, Docs Assistant, and GitHub Triage. A template does not select a model — you always choose the model yourself.
Creating an agent
Before you begin, ensure the following conditions are met:
- ☑ You are signed in with the
admin,tenant_admin,ki_manager, ormemberrole. Thevieweranddemouserroles cannot create agents. - ☑ At least one gateway is configured for the workspace (with a single gateway the Access tier control is hidden and that gateway is used automatically).
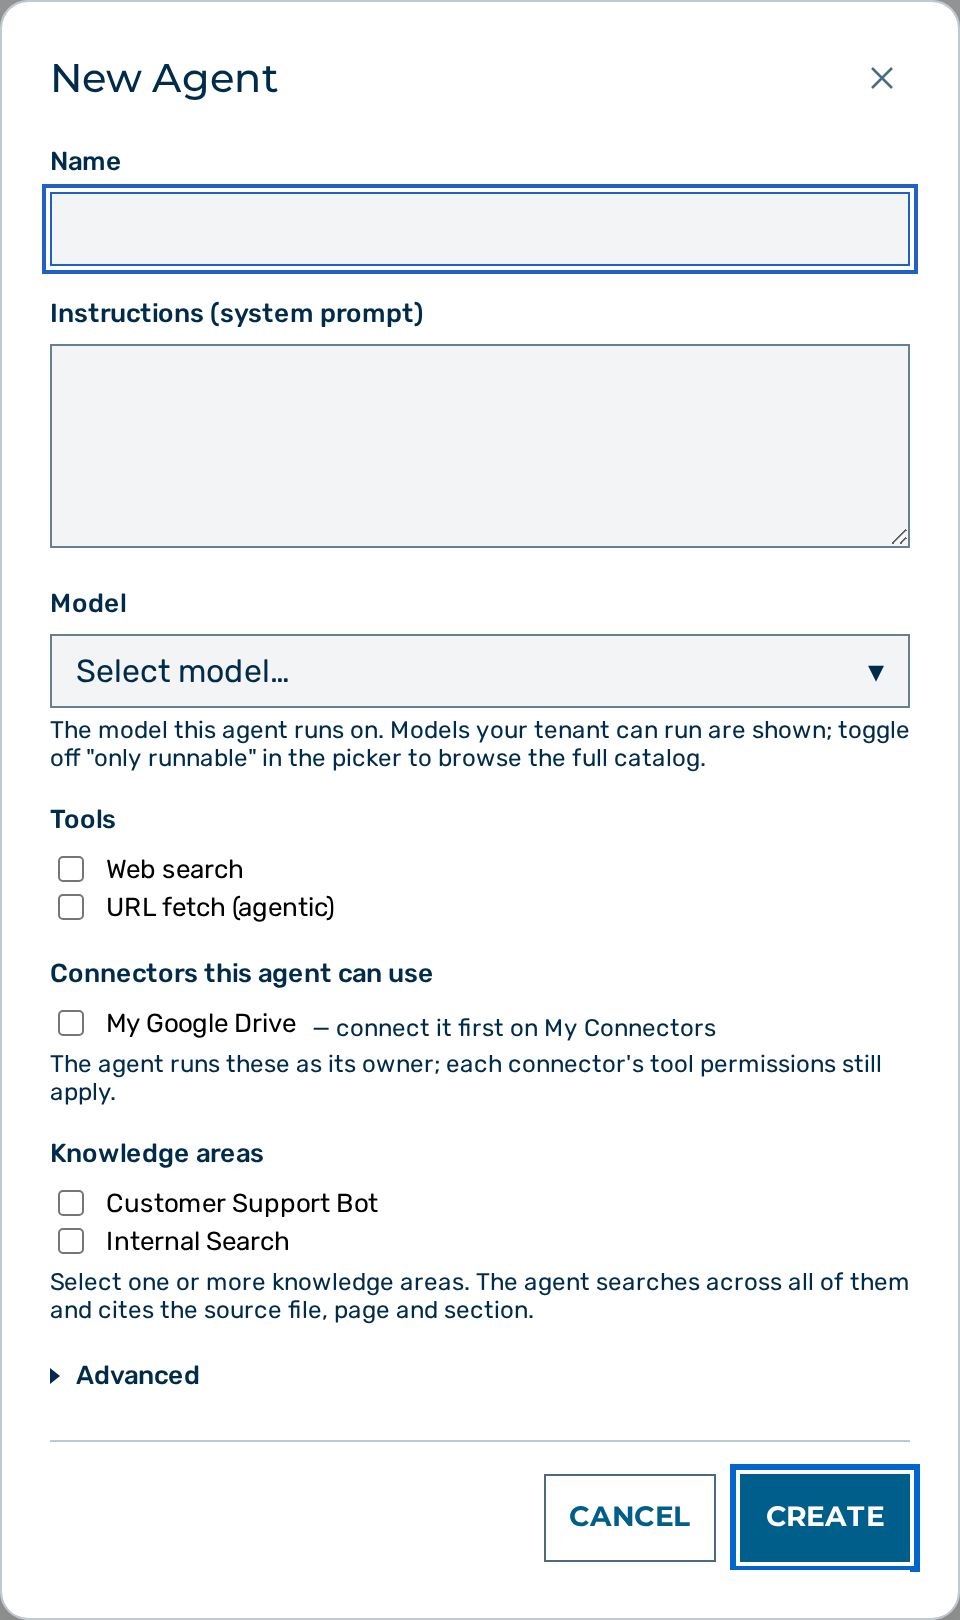 The New Agent dialog.
Proceed as follows to create an agent:
- Click on Agents in the left sidebar.
- The Agents page opens.
- Select the target gateway from the Gateway drop-down list.
- Click on the + New Agent button.
- The New Agent dialog opens.
- Enter a name for the agent in the Name text field.
- Enter the agent's instructions in the Instructions (system prompt) text field.
- Select a model in the Model picker.
- If required, select the Web search checkbox to let the agent search the web.
- If required, select the URL fetch (agentic) checkbox to let the agent fetch web pages.
- If required, select one or more connectors under Connectors this agent can use.
- The agent runs each connector as its owner. Each connector's tool permissions still apply.
- If required, select one or more knowledge areas under Knowledge areas.
- The agent searches across all selected areas and cites the source file, page, and section.
- Click on the Test run (preview) disclosure and run a sample prompt to check the draft before saving.
- Click on the Create button.
-> The new agent appears at the top of the agents list and its detail view opens.
💡 Note: The slug and the maximum-tokens limit are hidden under the Advanced disclosure. The slug is derived automatically from the name and is used in the invoke URL. The slug cannot be changed after creation.
💡 Note: Some models cannot use tools. When you pick a model that does not support tools, the message The selected model does not support tools. Pick a tool-capable model to enable web search, URL fetch, connectors and knowledge areas. appears and every tool control is cleared and disabled. The agent is saved with no tools. Choose a tool-capable model to re-enable web search, URL fetch, connectors, and knowledge areas.
Limiting a connector to specific tools
A bound connector allows all of its tools by default. Restrict an agent to a subset of a connector's tools when the agent needs only part of what the connector offers.
Proceed as follows to limit a connector to specific tools:
- Select the connector under Connectors this agent can use.
- A disclosure appears below the connector, labelled All tools allowed.
- Click on the disclosure to expand the connector's tool list.
- Clear the checkbox of each tool you want to withhold from the agent.
-> The disclosure label changes to show that the agent is limited to the remaining tools.
Editing an agent
Before you begin, ensure the following conditions are met:
- ☑ You are the agent's owner, or you have the
adminortenant_adminrole.
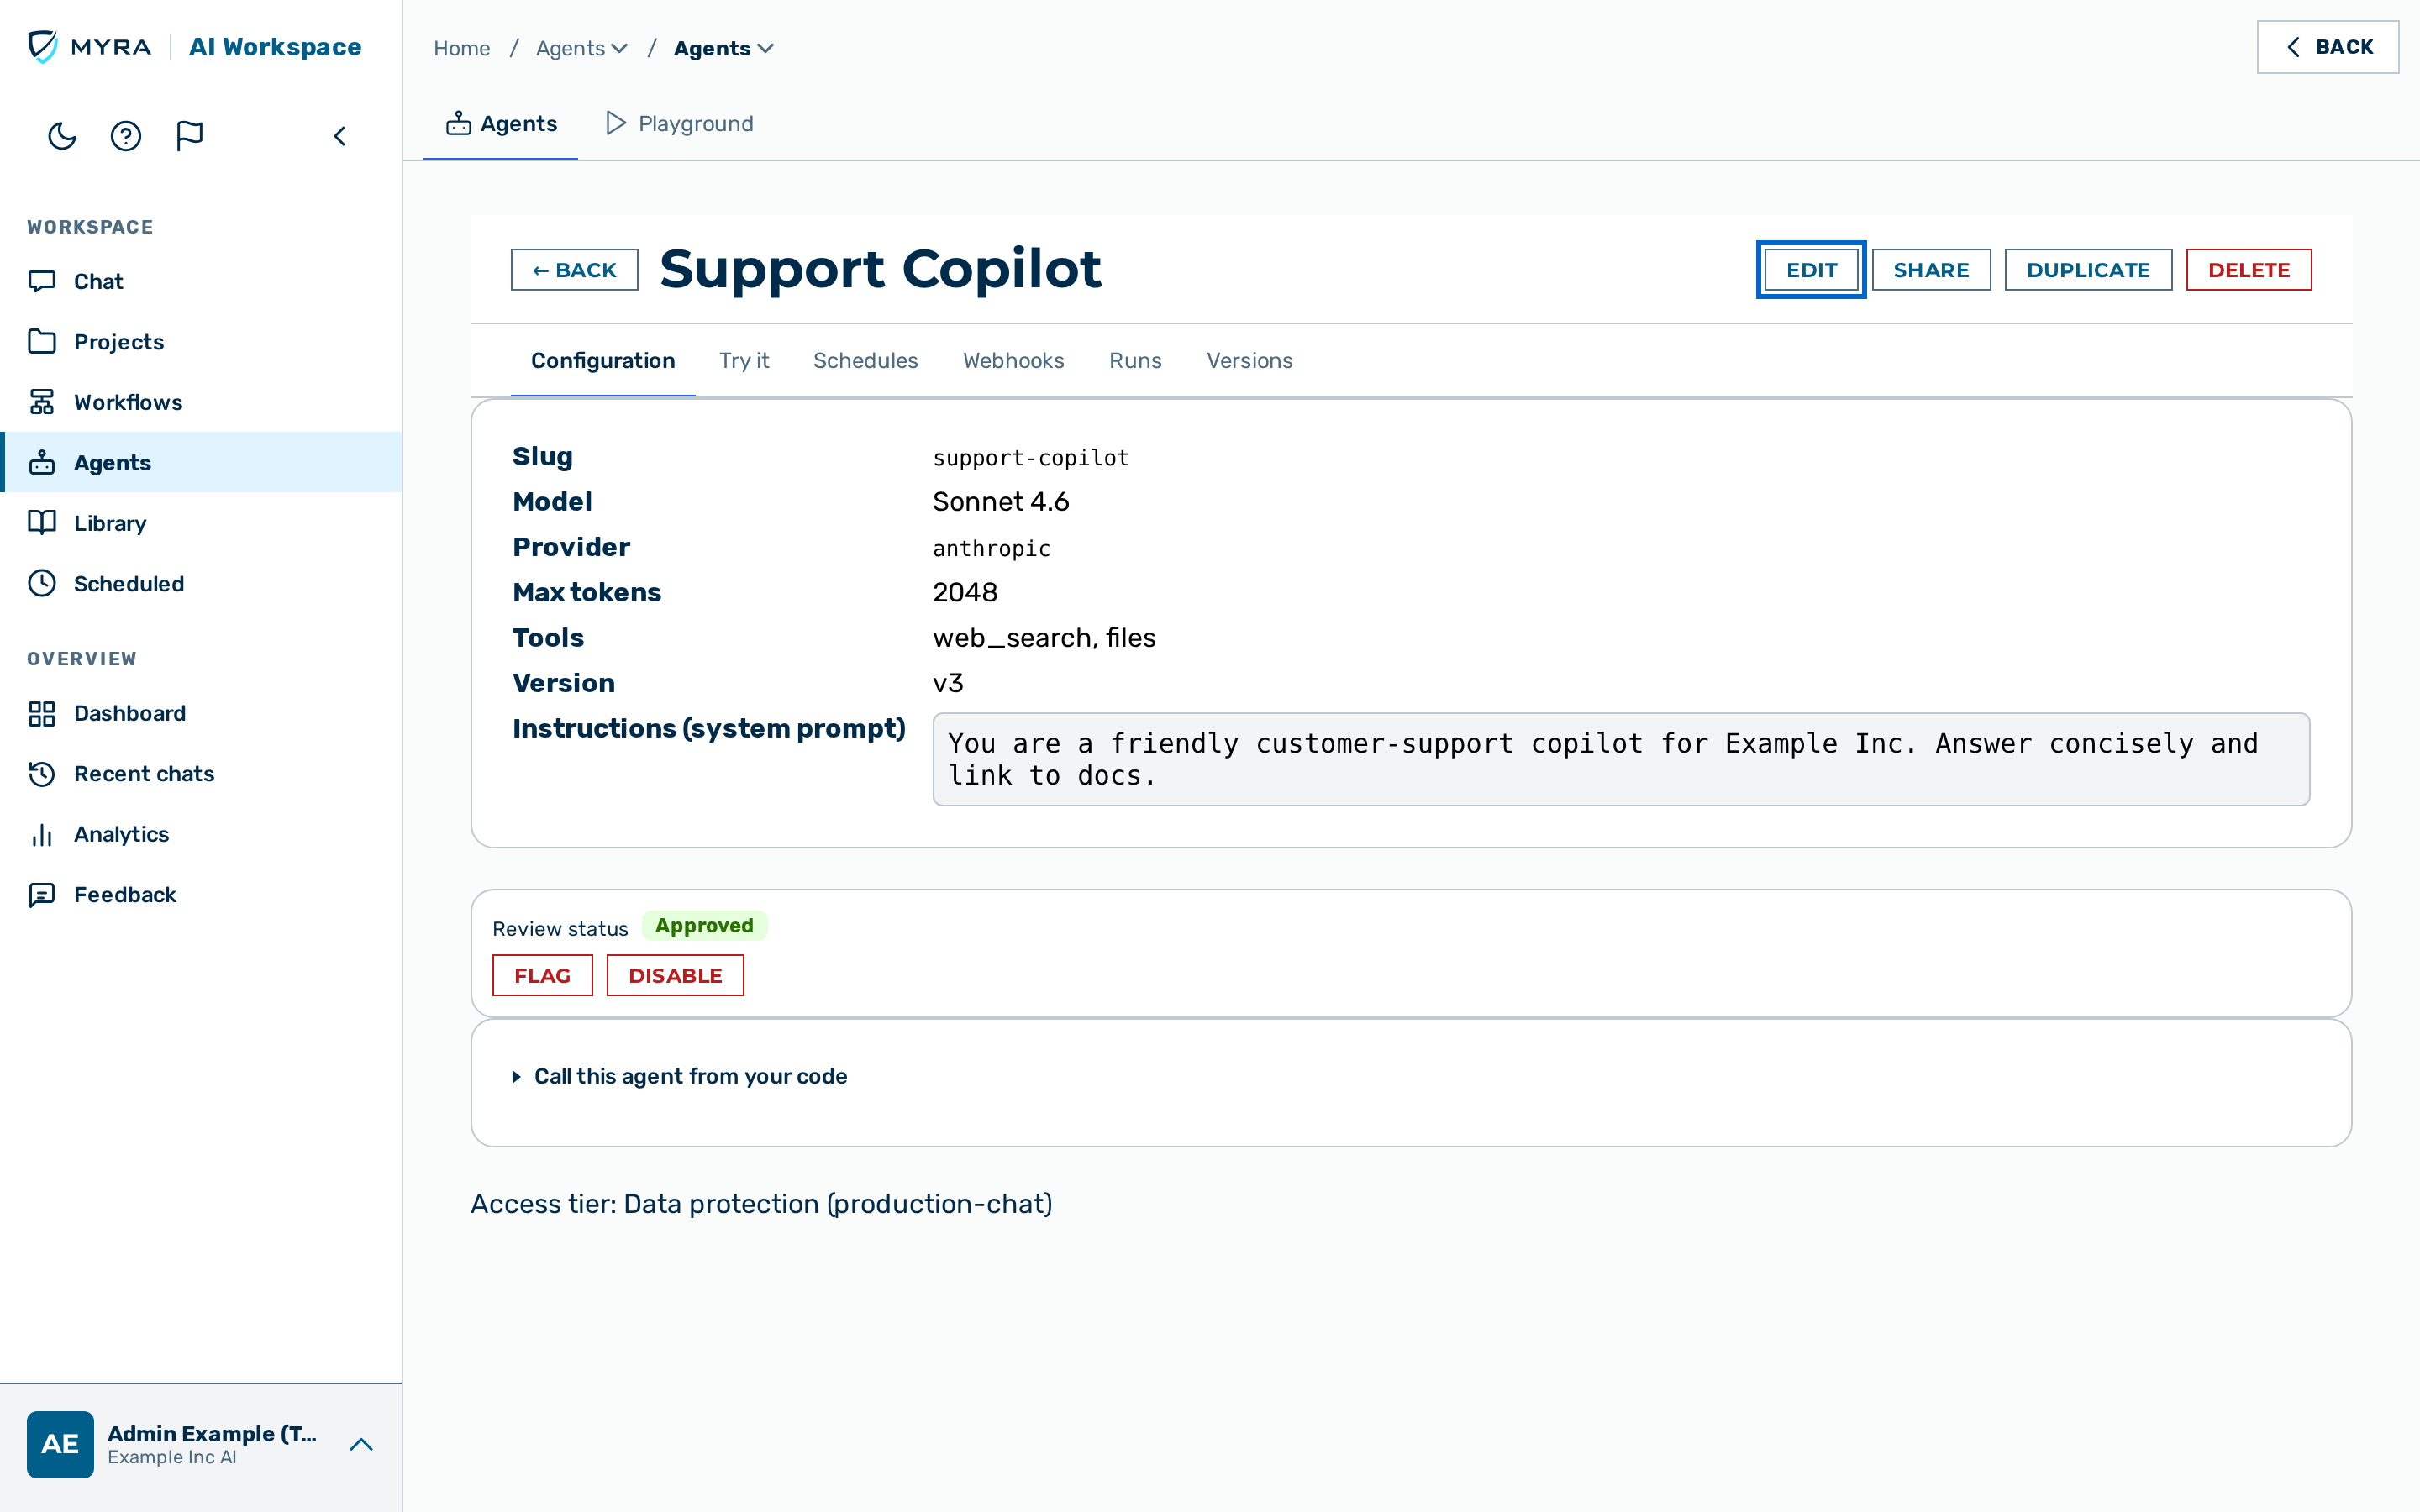 The agent detail header with the Edit button.
Proceed as follows to edit an agent:
- Open the agent detail view.
- Click on the Edit button in the detail header.
- The Edit Agent dialog opens.
- Update the name, instructions, model, tools, connectors, or knowledge areas as required.
- Click on the Save button.
-> The updated configuration is saved and a new version is recorded in the Versions tab.
💡 Note: The slug cannot be changed after creation. The slug field is read-only in the Edit Agent dialog.
Deleting an agent
Before you begin, ensure the following conditions are met:
- ☑ You are the agent's owner, or you have the
adminortenant_adminrole.
⚠️ Caution: Deleting an agent is permanent. Its schedules, webhook triggers, run history, and catalog ratings are removed with it.
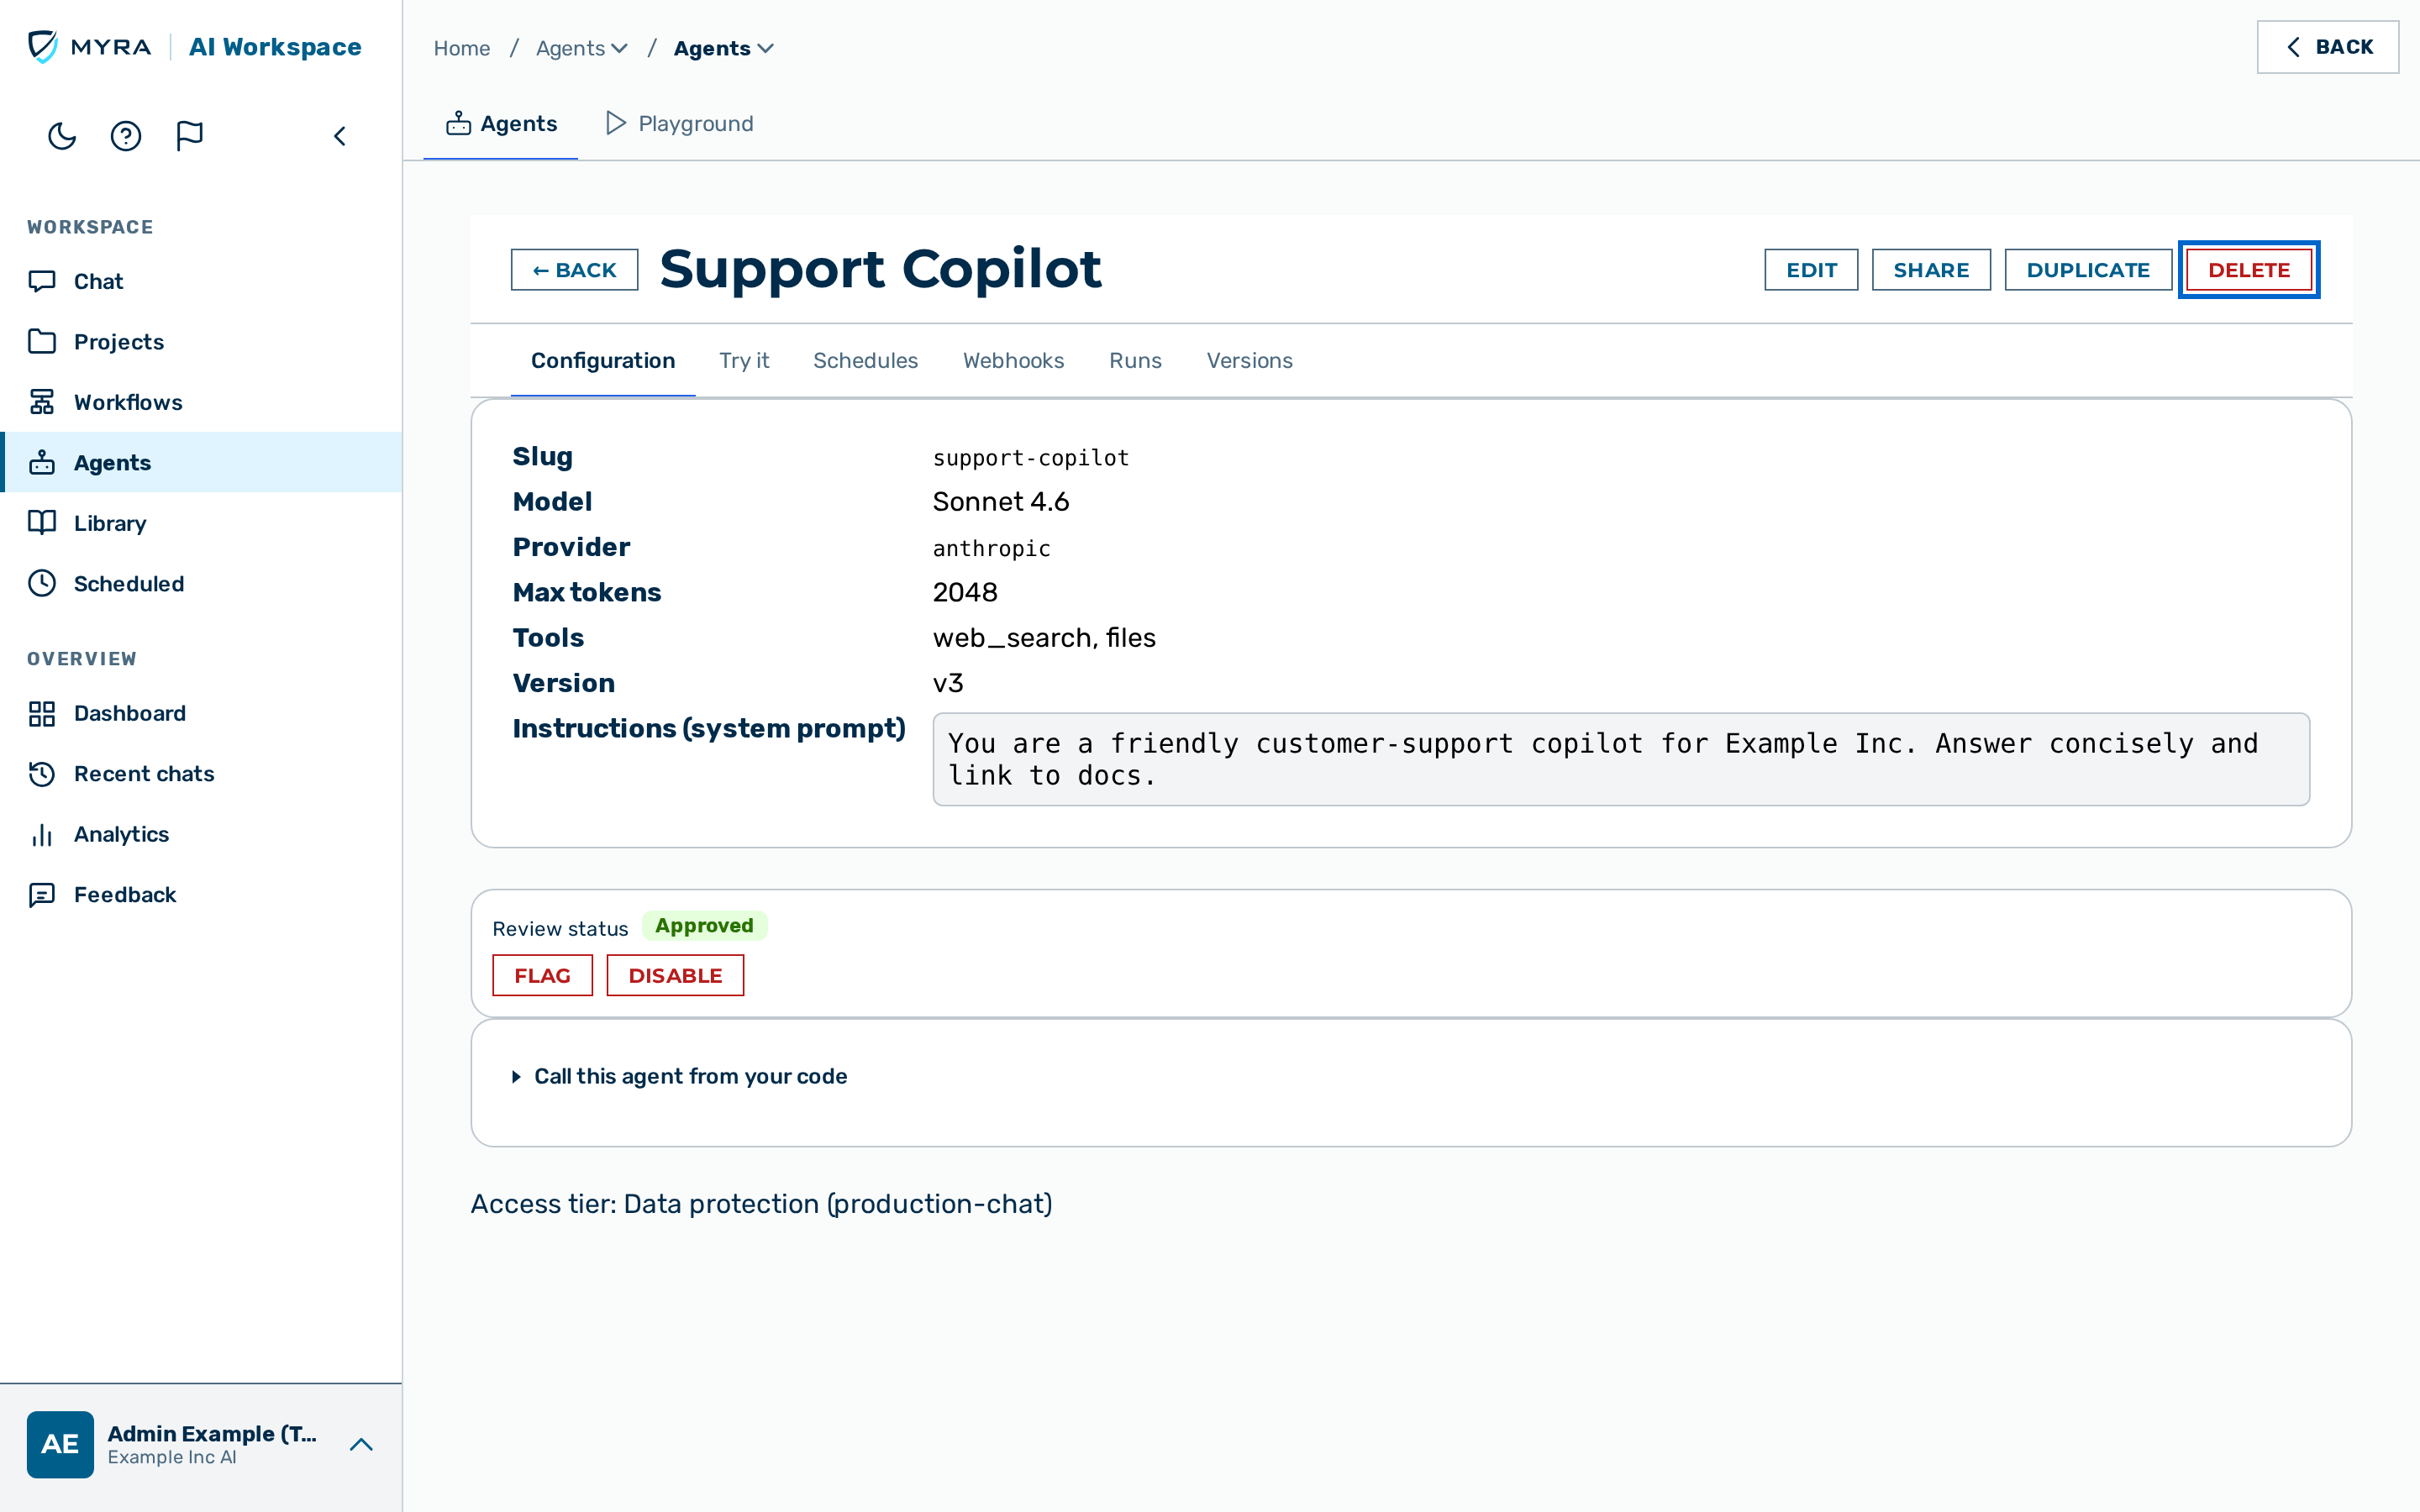 The delete-confirmation dialog.
Proceed as follows to delete an agent:
- Open the agent detail view.
- Click on the Delete button in the detail header.
- A confirmation dialog opens.
- Confirm the deletion.
-> The agent is removed from the list and can no longer be invoked.
Duplicating an agent
Duplicate an agent to start a new one from an existing configuration, or to make an editable copy of an agent from the organisation catalog.
Proceed as follows to duplicate an agent:
- Open the agent detail view.
- Click on the Duplicate button in the detail header.
- The Duplicate Agent dialog opens, pre-filled from the source agent.
- Adjust the name and any other fields as required.
- Click on the Create button.
-> The duplicate is created as your own agent.
💡 Note: A duplicate copies the instructions, model, tools, and structured-output schema. It does not copy the owner's private connectors or knowledge areas — bind your own after duplicating.
Running an agent
Run an agent from the interface to check its behaviour without leaving the page. The Try it tab runs the saved agent with all of its tools, connectors, and knowledge areas in effect.
Before you begin, ensure the following conditions are met:
- ☑ You are the agent's owner. An agent runs as its owner, so only the owner can run it from the interface.
- ☑ The agent has a model configured.
- ☑ The Playground is enabled for your tenant.
Proceed as follows to run an agent:
- Open the agent detail view.
- Click on the Try it tab.
- Enter a prompt in the Input text field.
- Click on the Run button.
-> The agent's answer appears below the input, together with a trace identifier for the run.
A long run (for example a multi-step agent that uses tools) streams its result, so the connection stays alive and the run completes even when it takes several minutes. If you navigate away from the Try it tab while a run is still in progress, the run is cancelled and a notification tells you so — it does not disappear without a trace. Start the run again to see the result.
Managing agent versions
Every time an agent is created or edited, its full configuration is recorded as a new version. The Versions tab lists the version history, newest first, and marks the live configuration with a Current badge. The history is read-only.
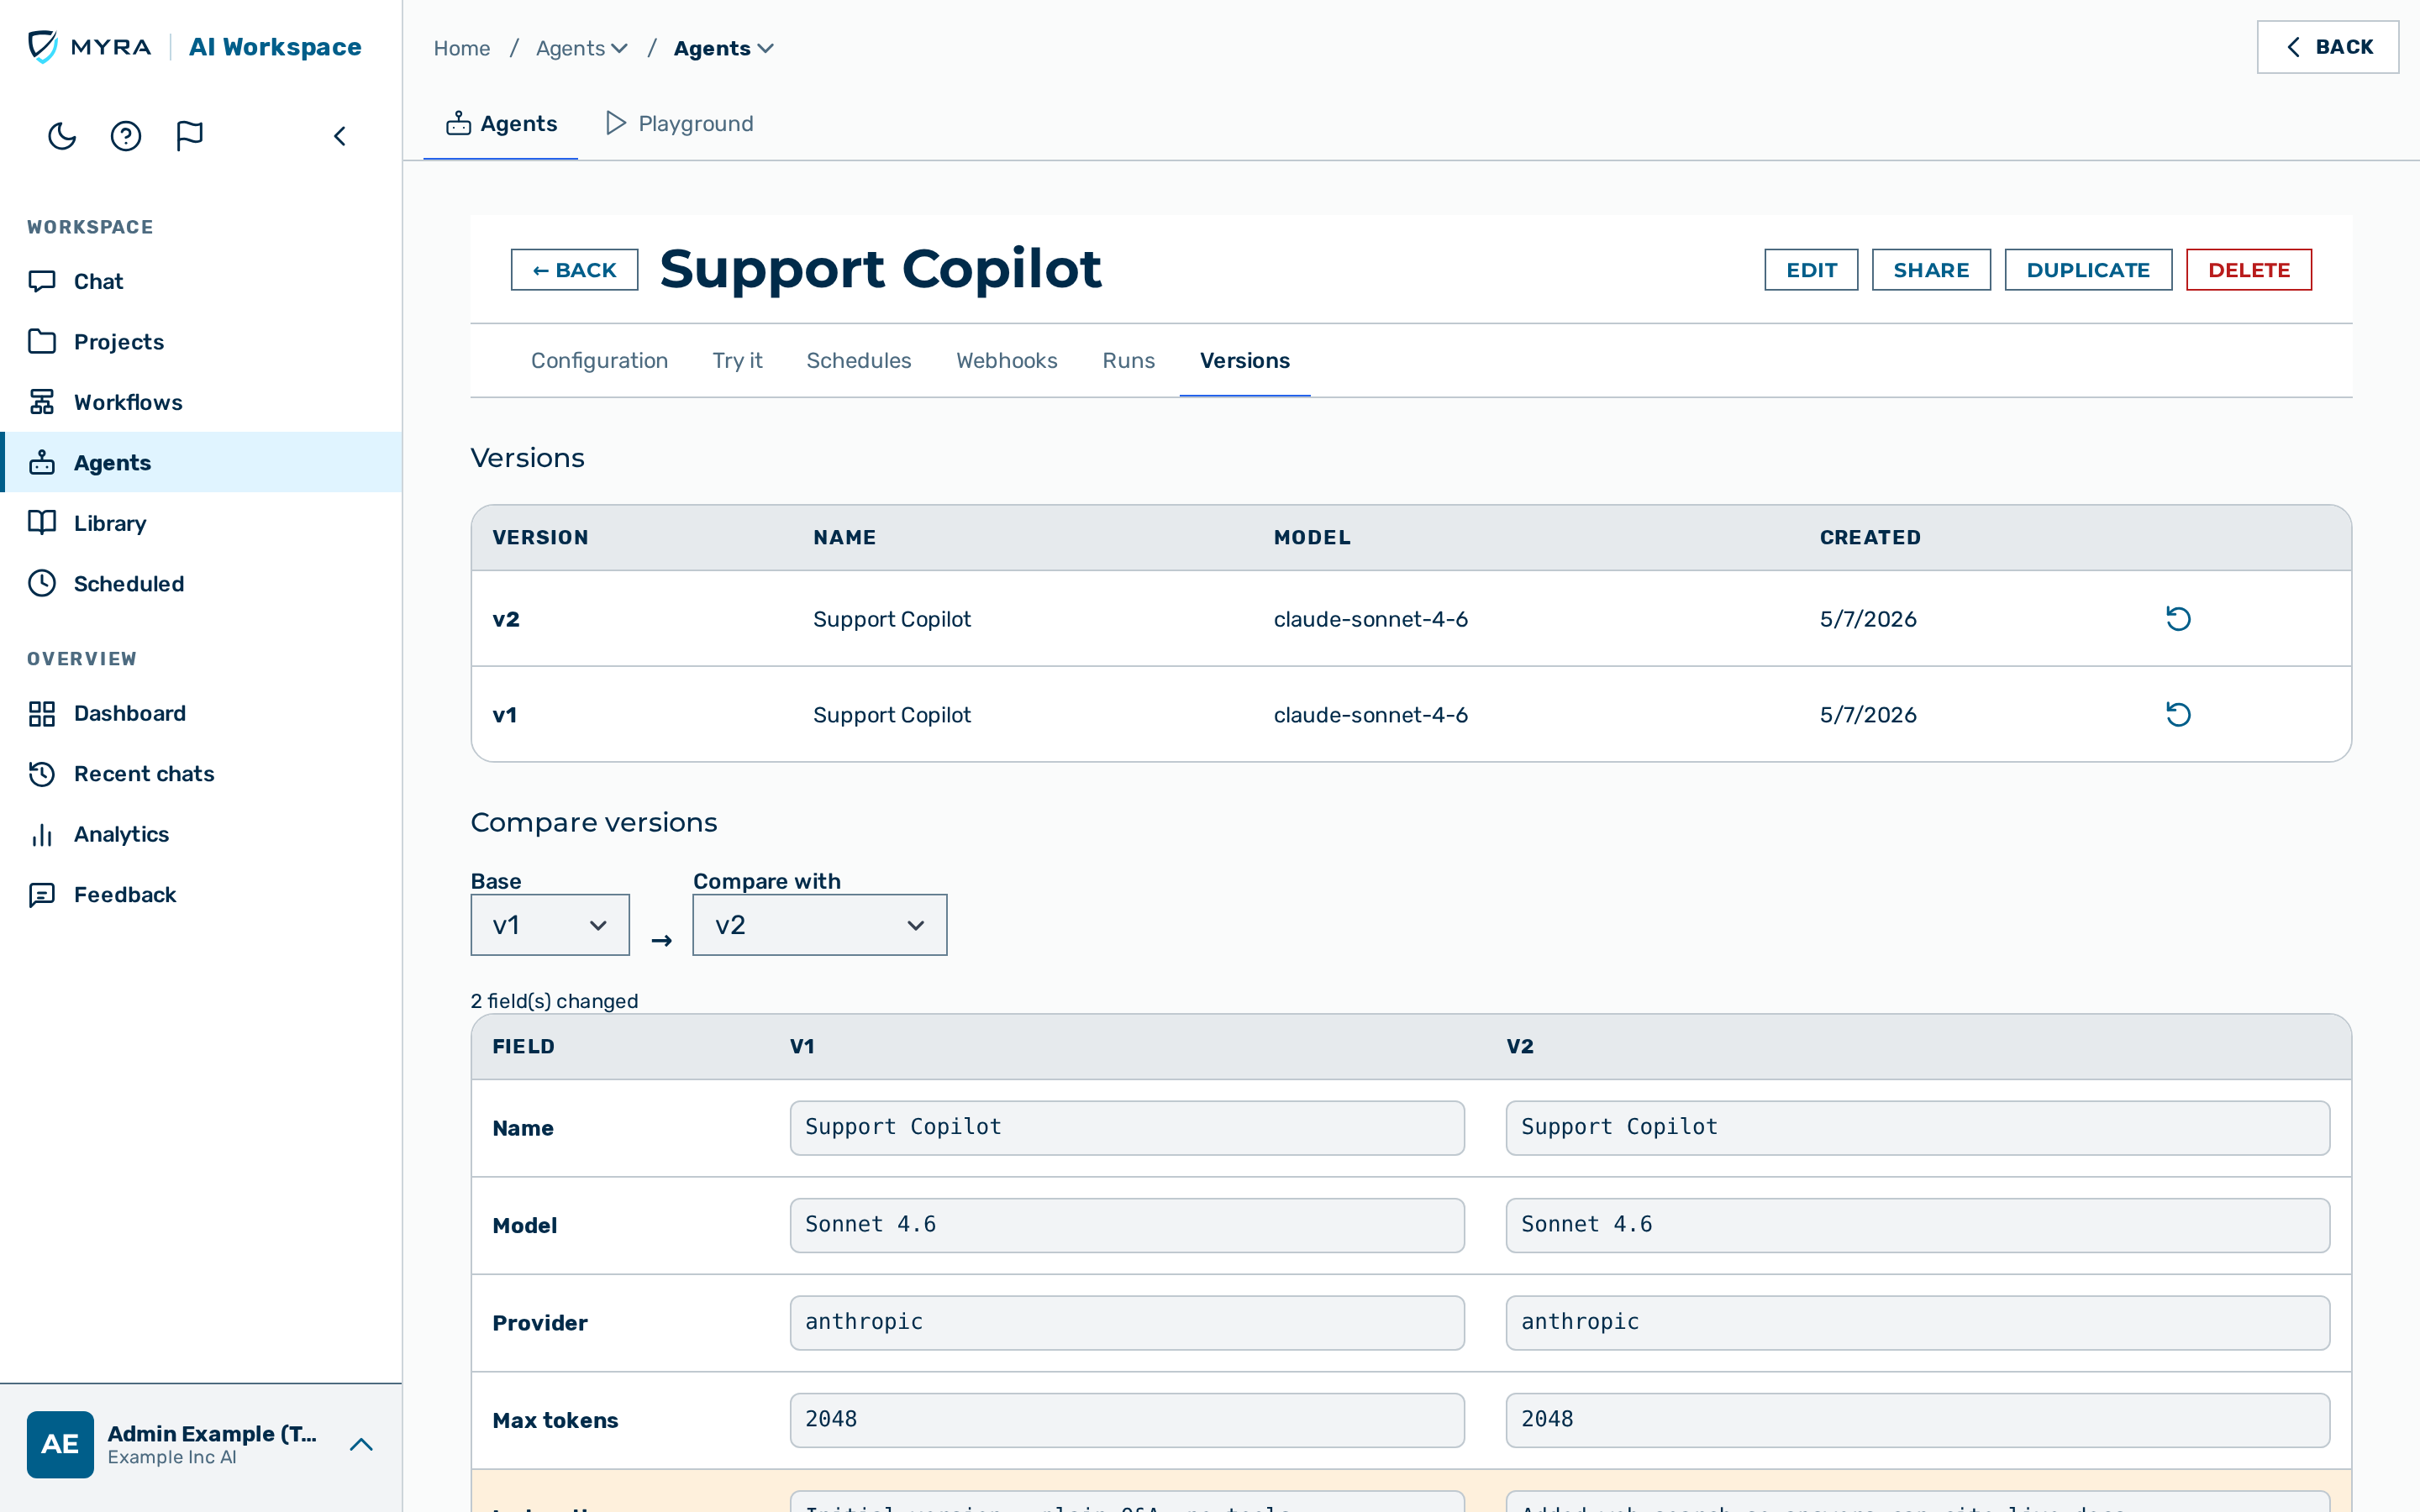 The Versions tab.
Restoring a version
Restoring a version re-applies an earlier configuration. Restoring does not overwrite history: it creates a new version whose configuration equals the chosen earlier one.
Before you begin, ensure the following conditions are met:
- ☑ You are the agent's owner, or you have the
adminortenant_adminrole.
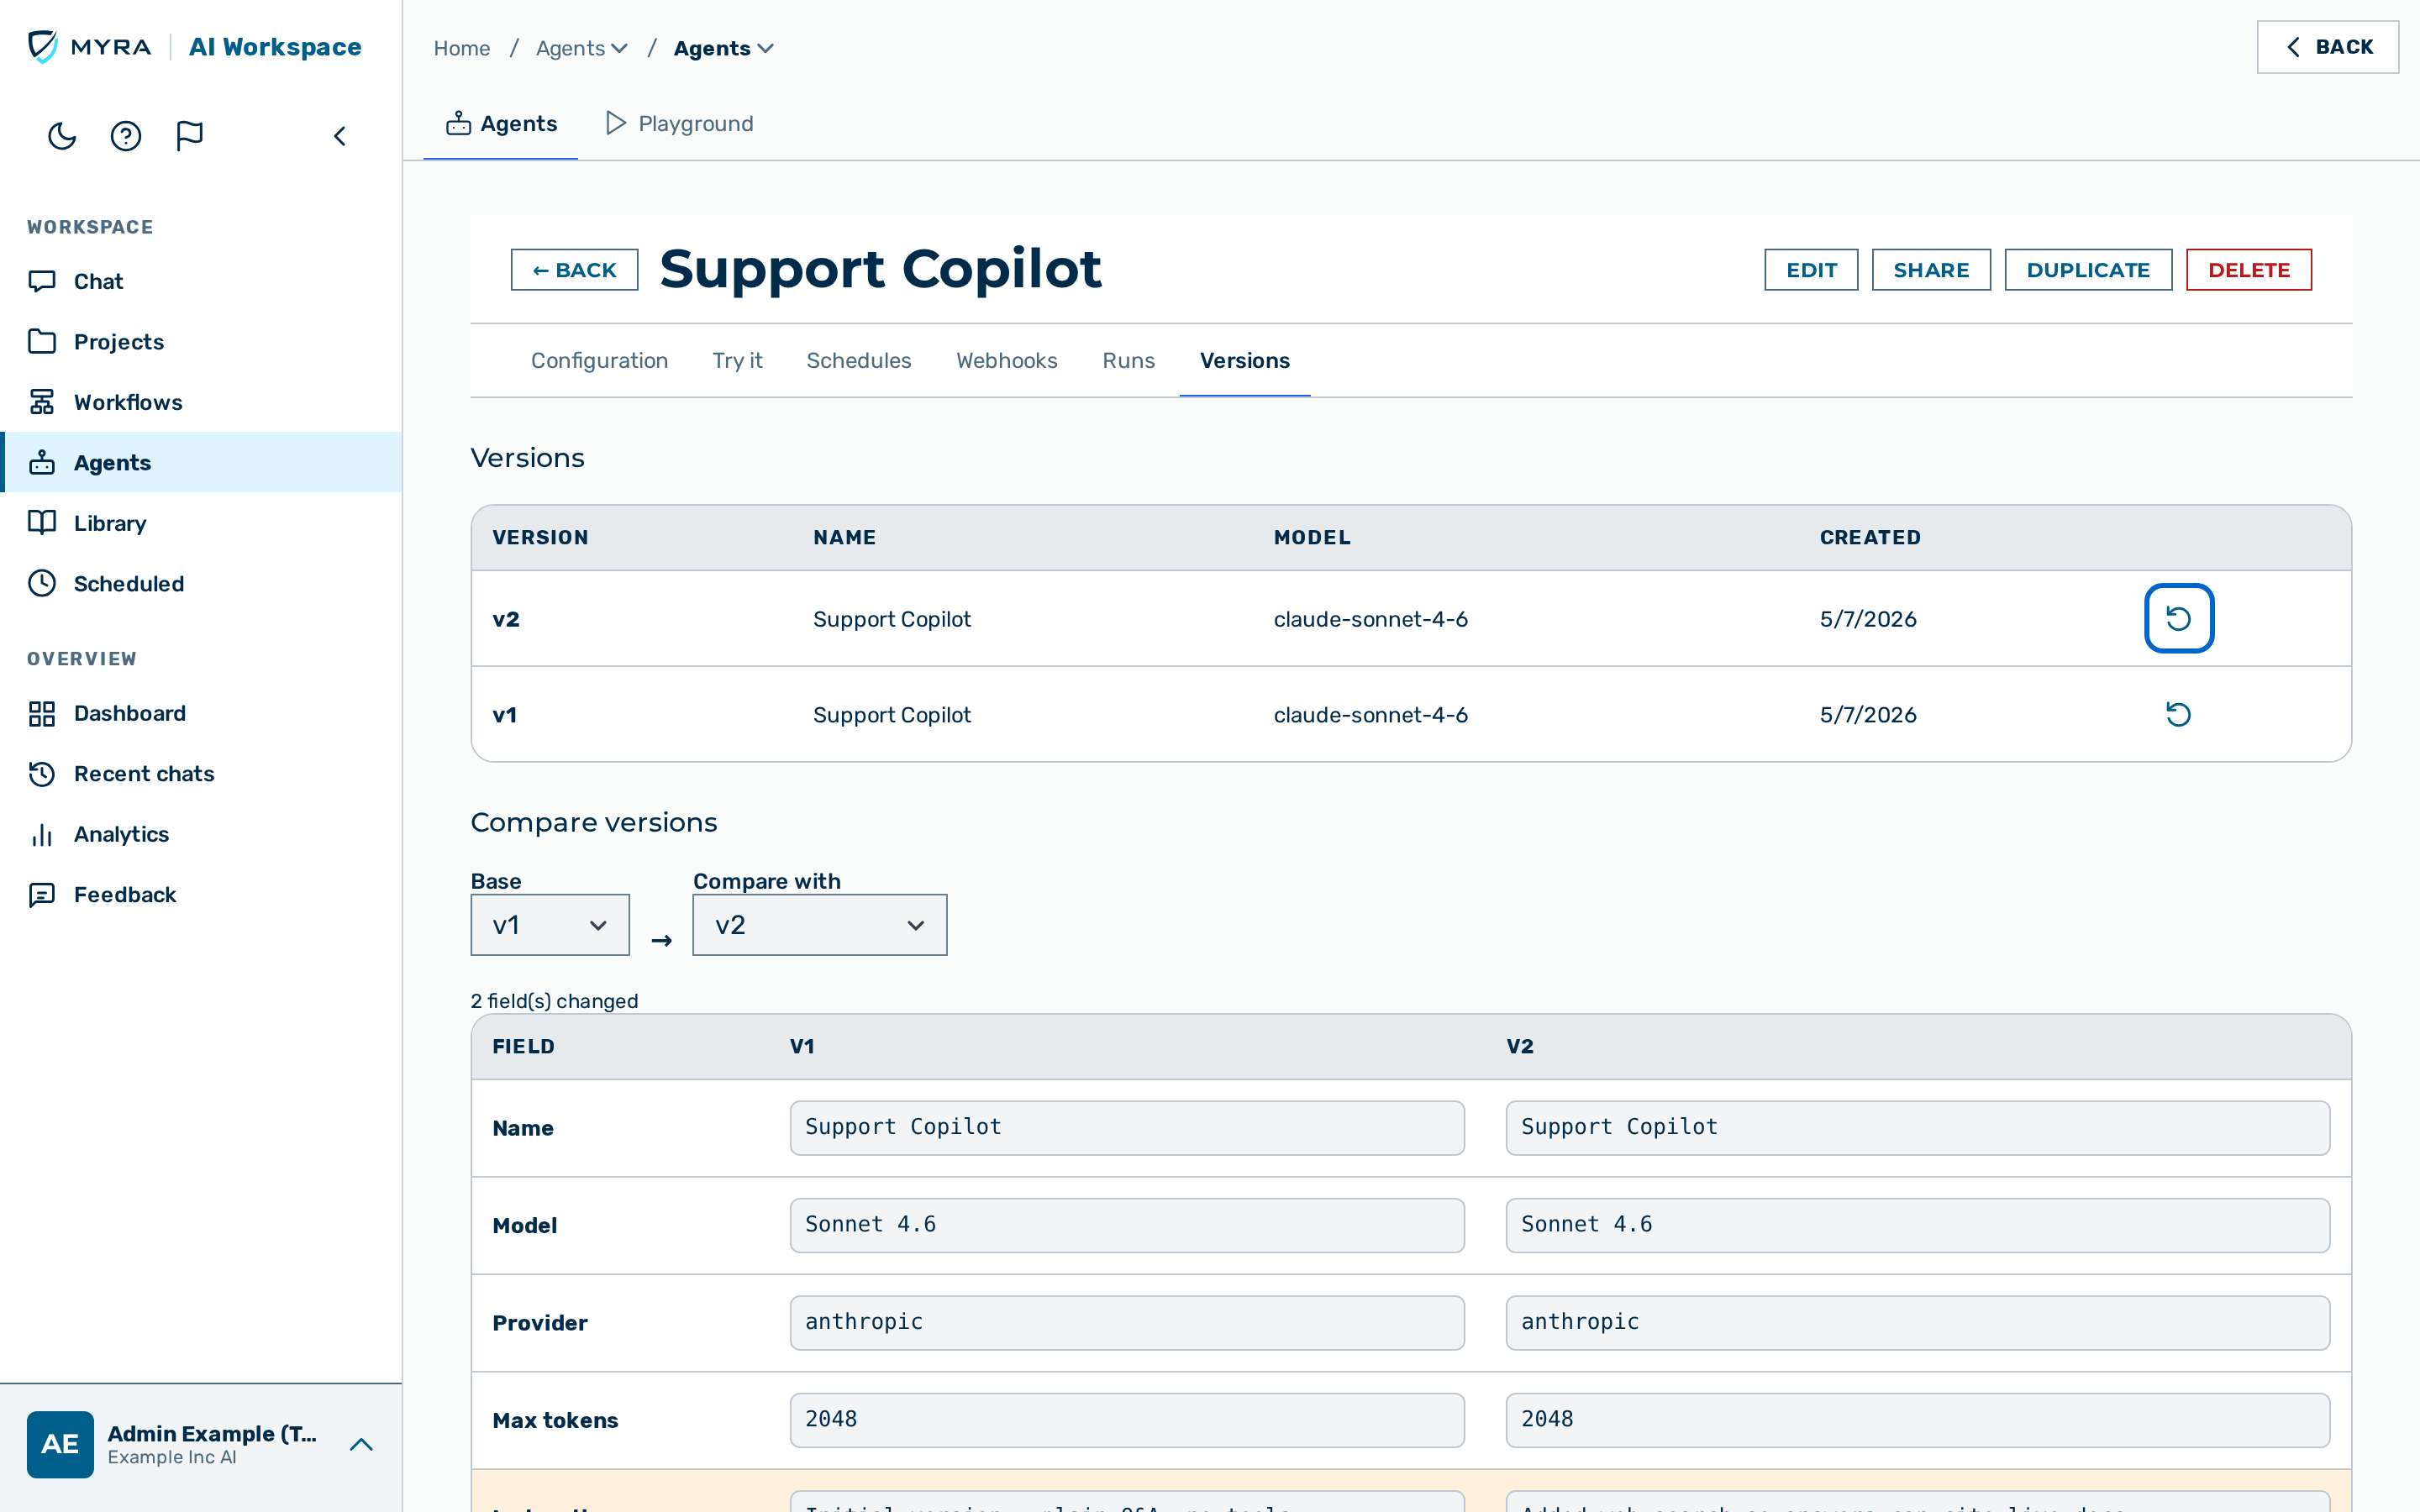 The Versions tab with the Restore this version action.
Proceed as follows to restore a version:
- Open the agent detail view.
- Click on the Versions tab.
- Click on the Restore this version button in the row of the version you want to restore.
- A confirmation dialog opens.
- Confirm the restore.
-> The agent's configuration is set to the chosen version and a new version is recorded for the change.
Comparing versions
The version comparison panel appears below the history when the agent has at least two versions. It shows a field-by-field difference between two versions, with changed rows highlighted.
Proceed as follows to compare two versions:
- Open the Versions tab.
- Select the earlier version in the Base drop-down list.
- Select the later version in the Compare with drop-down list.
-> The comparison table lists each configuration field with its value in both versions. A summary line above the table states how many fields changed.
Sharing an agent
Sharing controls who can discover, read, and clone an agent. Sharing does not let another person run your agent directly — an agent always runs as its owner, so a person you share with reuses the agent by cloning it into their own account.
⚠️ Caution: Your agent's instructions become visible to everyone you share the agent with.
The visibility levels are:
| Visibility | Effect | Who can set it |
|---|---|---|
| Private (only me) | Only you can see the agent. | Owner. |
| Specific people | The people you name by email can see and clone the agent. | Owner. |
| A group | The members of a group can see and clone the agent. | ki_manager, tenant administrators, and administrators. |
| Everyone in the organization | Everyone in your organisation can see and clone the agent from the catalog. | ki_manager, tenant administrators, and administrators, and only when organisation sharing is enabled for the tenant. |
Proceed as follows to share an agent:
- Open the agent detail view.
- Click on the Share button in the detail header.
- The share dialog opens.
- Select a visibility level from the Who can see this agent drop-down list.
- If you selected Specific people, add each person by email.
- If you selected A group, select the group.
- Click on the Save sharing button.
-> The agent's visibility is updated.
Publishing an agent to the organisation catalog
The organisation catalog collects every agent that is shared organisation-wide. Any member of the organisation can browse the catalog and clone an agent into their own account. Cloning re-binds the cloner's own connectors and knowledge areas; the owner's private bindings are never copied.
The catalog is opened from the Agent catalog button in the Agents page header. The button is hidden when organisation sharing is off for the tenant.
To publish an agent to the catalog, share it with Everyone in the organization (see Sharing an agent).
Curating a catalog agent
Curation controls how an agent is presented in the catalog. Only tenant administrators and administrators can curate an agent; an ordinary owner cannot feature their own agent. The curation fields appear in the share dialog when the visibility is Everyone in the organization and you have the required role.
| Field | Effect |
|---|---|
| Catalog category text field | A free-text section tag, up to 64 characters, that groups the agent in the catalog. |
| Feature in the catalog checkbox | Pins the agent to the top of the catalog. |
Rating a catalog agent
Each catalog agent shows its community rating and rating count. You can rate any agent you can see in the catalog, except your own, on a scale of one to five stars. Clicking your current rating again retracts it. There is one rating per person per agent; rating again updates your rating in place.
Governing agent publication
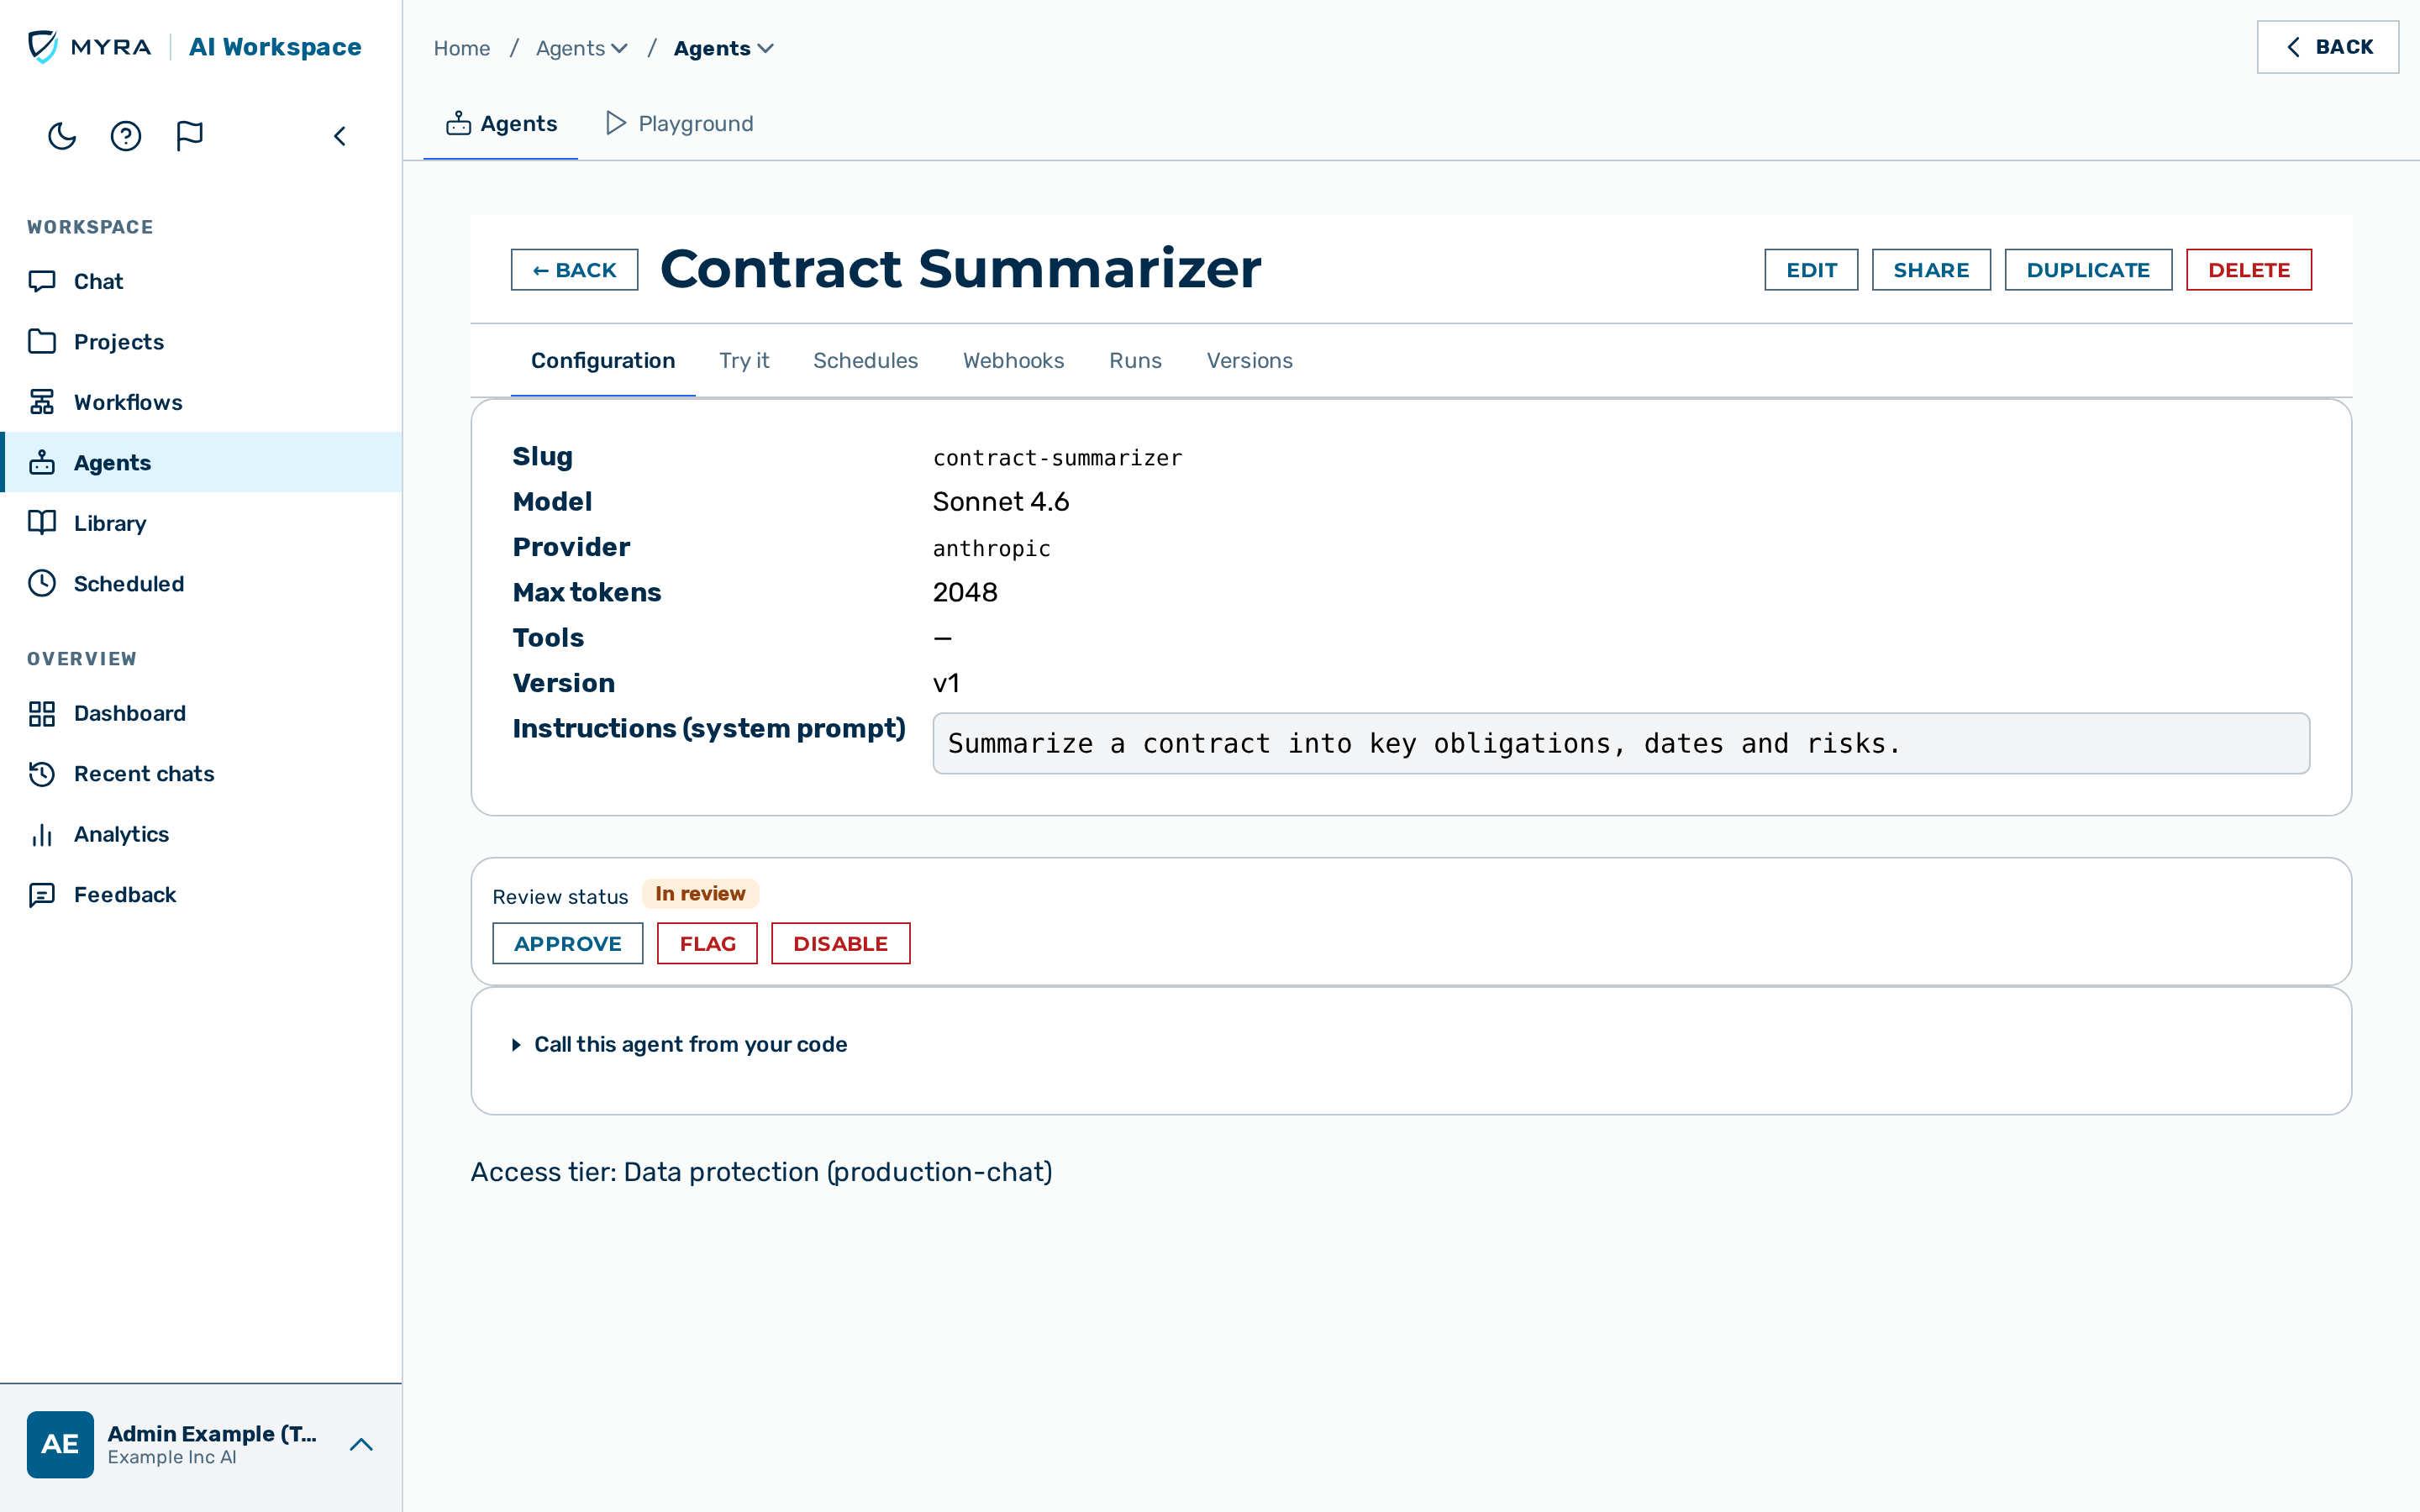 The review panel on the Configuration tab.
Every agent carries a review status, shown as a badge on the Configuration tab. The review status governs whether an agent may be published to the organisation catalog. The states are Draft, In review, Approved, Flagged, and Disabled.
Whether new agents start in Draft or Approved depends on the tenant setting: when publish review is required for the tenant, a new agent starts as Draft and must be approved before it can be published to the catalog. When publish review is not required, a new agent starts as Approved.
The available actions depend on the current state and your role:
| Action | From state | Who can act |
|---|---|---|
| Submit for review | Draft, Flagged | The agent's owner. |
| Approve | In review | ki_manager, tenant administrators, and administrators. |
| Flag | In review, Approved | ki_manager, tenant administrators, and administrators. |
| Disable | Draft, In review, Approved, Flagged | ki_manager, tenant administrators, and administrators. |
| Reactivate | Disabled | ki_manager, tenant administrators, and administrators. |
⚠️ Caution: A Flagged or Disabled agent cannot be invoked by anyone, including its owner and the scheduler. Flagging or disabling an agent also removes it from the organisation catalog immediately.
💡 Note: In a tenant that requires publish review, editing an already-approved agent returns it to In review, so the new configuration must be approved again before it is available in the catalog.
Scheduling an agent
The Schedules tab runs an agent automatically on a recurring cadence. A schedule can deliver each successful run's output to a webhook, a Mattermost channel, or an email address, or record the run without delivering it.
Proceed as follows to add a schedule:
- Open the agent detail view.
- Click on the Schedules tab.
- Click on the Schedule button.
- The New Schedule dialog opens.
- Enter the schedule details and choose where to deliver the result.
- Click on the Create button.
-> The schedule appears in the list and runs the agent on its next due tick.
Each schedule row shows its cadence, whether it is enabled, and its Delivery target — the kind of destination (Email, Webhook, or Mattermost), or a dash when the run is only recorded. The recipient address, URL, or channel itself is not shown in the list.
A schedule that has recently failed shows a red failing badge with the count of consecutive failures, so a schedule that silently retries with a backoff is still visible as needing attention.
Use the Run now, Edit, Enable, Disable, and Delete actions in each schedule row to manage a schedule. A run started with Run now executes on the scheduler's next tick, within about a minute.
Proceed as follows to change a schedule's delivery target — for example, to correct a mistyped recipient email address:
- Click on the Edit action in the schedule row.
- The Edit Schedule dialog opens, prefilled with the schedule's current details, including its delivery destination.
- Change the cadence, prompt, or delivery target as required. To stop delivering the result, set the destination to Nowhere (record only).
- Click on the Save button.
💡 Note: The Edit action is available to the agent's owner and to users with the
adminortenant_adminrole.💡 Note: A schedule can require human approval before it delivers its result to an external destination. A held delivery waits in the Agent Approvals inbox until a tenant administrator approves or denies it. See Agent Approvals for the delivery-approval contract.
Triggering an agent from a webhook
The Webhooks tab lets an external system run the agent by sending an HTTP POST to a unique URL. Each trigger has its own secret, and the run executes as the agent's owner.
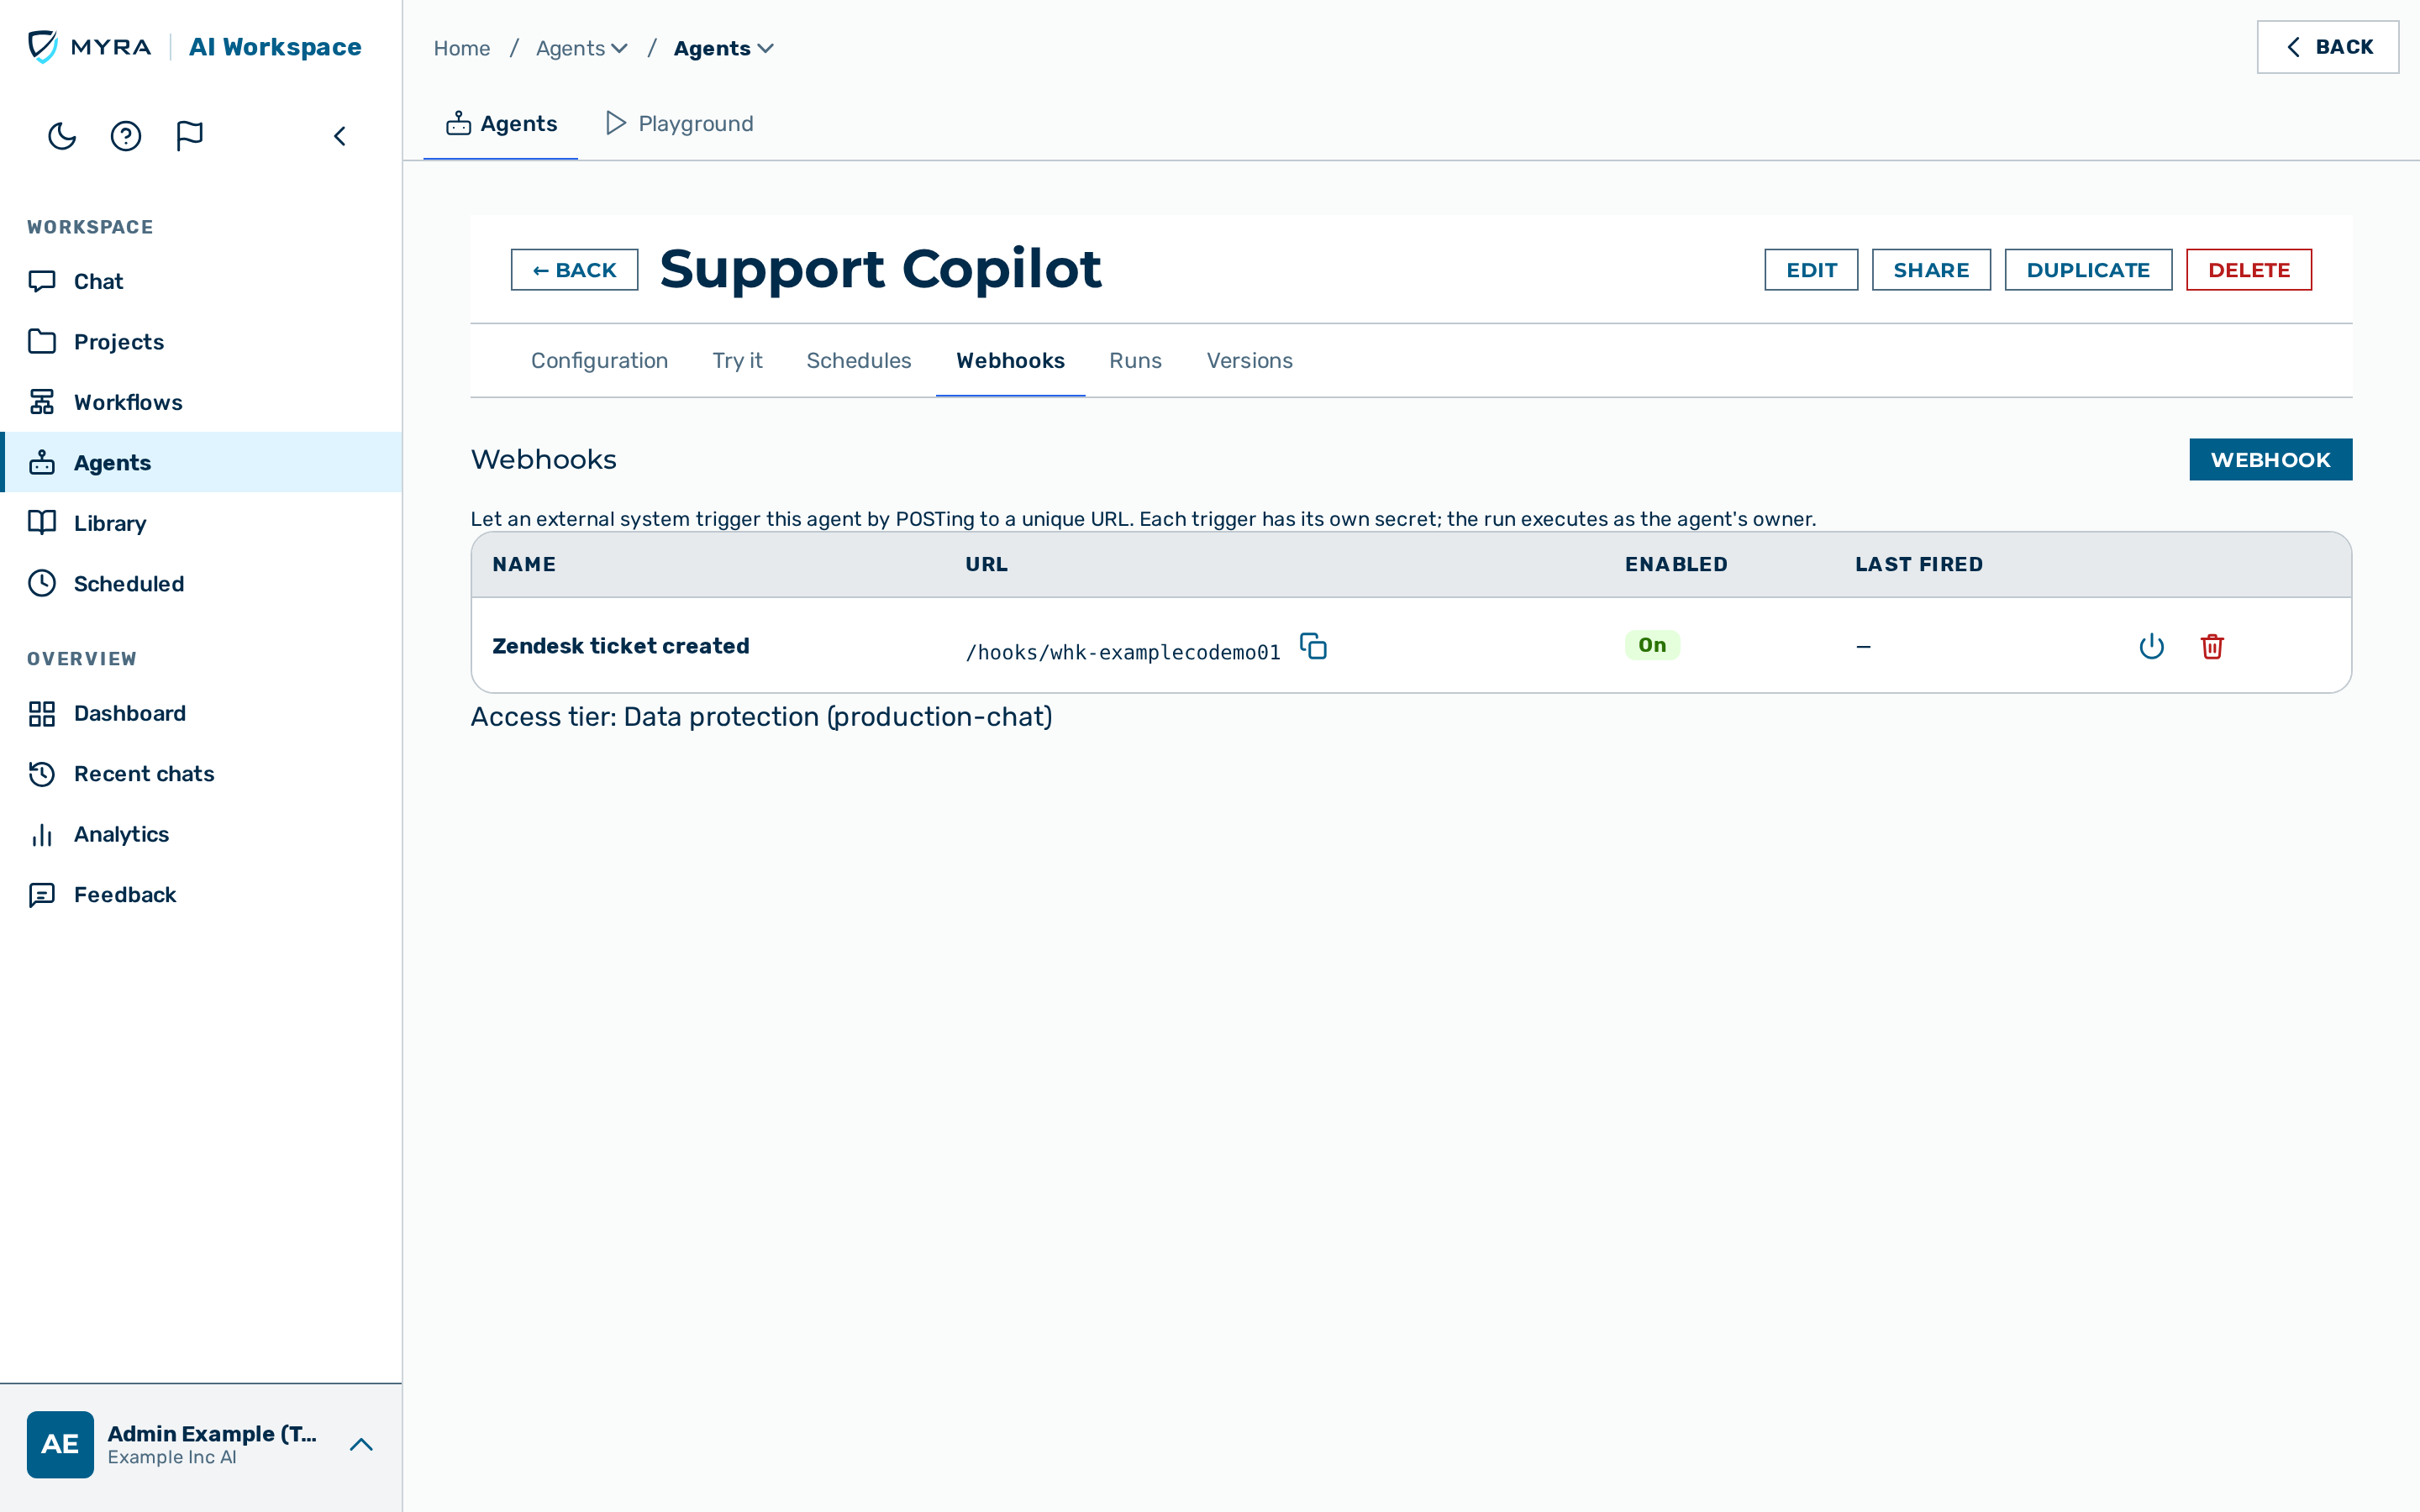 The Webhooks tab and the New Webhook Trigger dialog.
Before you begin, ensure the following conditions are met:
- ☑ You are the agent's owner, or you have the
adminortenant_adminrole.
Proceed as follows to add a webhook trigger:
- Open the agent detail view.
- Click on the Webhooks tab.
- Click on the Webhook button.
- The New Webhook Trigger dialog opens.
- Enter a name for the trigger.
- If required, enter a prompt that is prepended to each incoming payload.
- Click on the Create button.
- The Webhook Trigger Created dialog shows the trigger URL and its secret.
- Copy the secret.
-> The webhook trigger appears in the list.
⚠️ Caution: The secret is shown only once, at creation. Copy it before you close the dialog; it cannot be retrieved later.
Use the Enable, Disable, and Delete actions in each trigger row to manage a trigger. For the request format the receiver expects, see the Webhook triggers API.
Reviewing agent runs
The Runs tab lists the agent's runs, newest first. Each row shows the run status, the time, the HTTP status, the delivery status, and the version of the agent used for the run. Clicking a run opens its detail panel.
When one or more recent runs failed to deliver their output, a banner at the top of the Runs tab reports how many runs are affected — shown as an error when a delivery hard-failed, and as a warning otherwise — with the delivery error of the newest failing run as the first clue.
The delivery status is distinct from the run status: a run can succeed while its delivery is withheld. A blocked delivery is shown explicitly so it can be diagnosed rather than mistaken for a broken agent. In particular, when your organisation's PII policy masked personal data during the run, external delivery is refused and the run is marked Blocked (PII). The run detail panel then explains that the run completed but the result was not delivered because the PII policy blocks external delivery of masked content; for email deliveries the recipient receives a notification without the result.
For a Blocked (PII) run, the detail panel also lists what you can do, so the block is not a dead end:
- If the result may leave the platform, run the agent on a gateway that does not mask personal data — its output can then be delivered externally.
- If the result must stay internal, adjust the agent's instructions so its output does not contain personal data; a run with nothing to mask is delivered normally.
The run itself succeeded and is recorded either way; only the external delivery was withheld.
If you are the agent's owner, the run detail panel also shows the run's Result — the real output the agent produced, even when external delivery was blocked by the PII policy. This is the actual, unmasked text, so a successful run is no longer empty to the person who owns it. The result is shown to you as the owner only: a tenant administrator reviewing the run for governance sees its status, steps, and cost, but not the result, and no other member can open the run at all. When a run has no stored output — for example an aborted run, or a gateway that does not log message content — the Result section is simply not shown.
The run detail panel shows the trace steps and the configuration snapshot captured for that run. When the run made a billable model call, the panel also shows a Cost & tokens section with the run's cost, input tokens, output tokens, and — where applicable — cache tokens.
Requiring approval before a tool runs
An agent can be configured to hold a run at a gated tool — a gateway built-in, an
MCP-connector tool (for example send_email), or a sub-agent tool (agent__<slug>) — until a
human approves it. This is useful for unattended (scheduled or webhook-triggered) runs that would
otherwise call a side-effecting tool with no one watching. When a run reaches a gated tool, the whole tool batch
for that turn is suspended and a review item appears on the Tool reviews tab of
Settings › Approvals. A reviewer with the egress-approval
permission approves the hold (the run resumes) or denies it (the tool is never called). An
un-reviewed hold expires fail-closed — the tool is not called and the run ends.
💡 Note: Approval authorises the tool name and action, not a bypass of live controls. A held MCP, sub-agent, or egress tool that resumes after approval still passes the fail-closed egress and data-residency floor at execution time: an approval granted before the agent's project became local-only does not egress afterwards — the held tool is blocked on resume — and MCP tool arguments carrying protected personal data are still refused.
The gate is configured through the agent API (the approval block in the agent's tool
configuration), not the create form. See the Agents API for the
field format and the resume contract.
Calling an agent from your code
The Configuration tab includes a Call this agent from your code disclosure with a ready-to-copy curl command. The command posts a prompt to the agent's invoke URL. Replace the token placeholder in the command with a personal API token scoped to the gateway.
For the full invoke and admin API, including the request and response bodies, see the Agents API.
Agent as a tool
A supervisor agent can call other saved agents as tools, so one agent delegates part of a task to another. This delegation is configured through the agent API, not the create form. Each sub-agent runs its own full configuration and returns its answer to the supervisor. Delegation is bounded by fixed depth, fan-out, token, and time limits, and cross-owner delegation is refused. For the field format and the delegation guards, see the Agents API.
See also
- Agents API — the invoke and admin API for agents, sharing, versions, review, and delegation
- Webhook triggers API — the request format for a webhook trigger
- Projects — knowledge areas that an agent can search
- MCP connectors — the connectors an agent can use as tools