Workflows
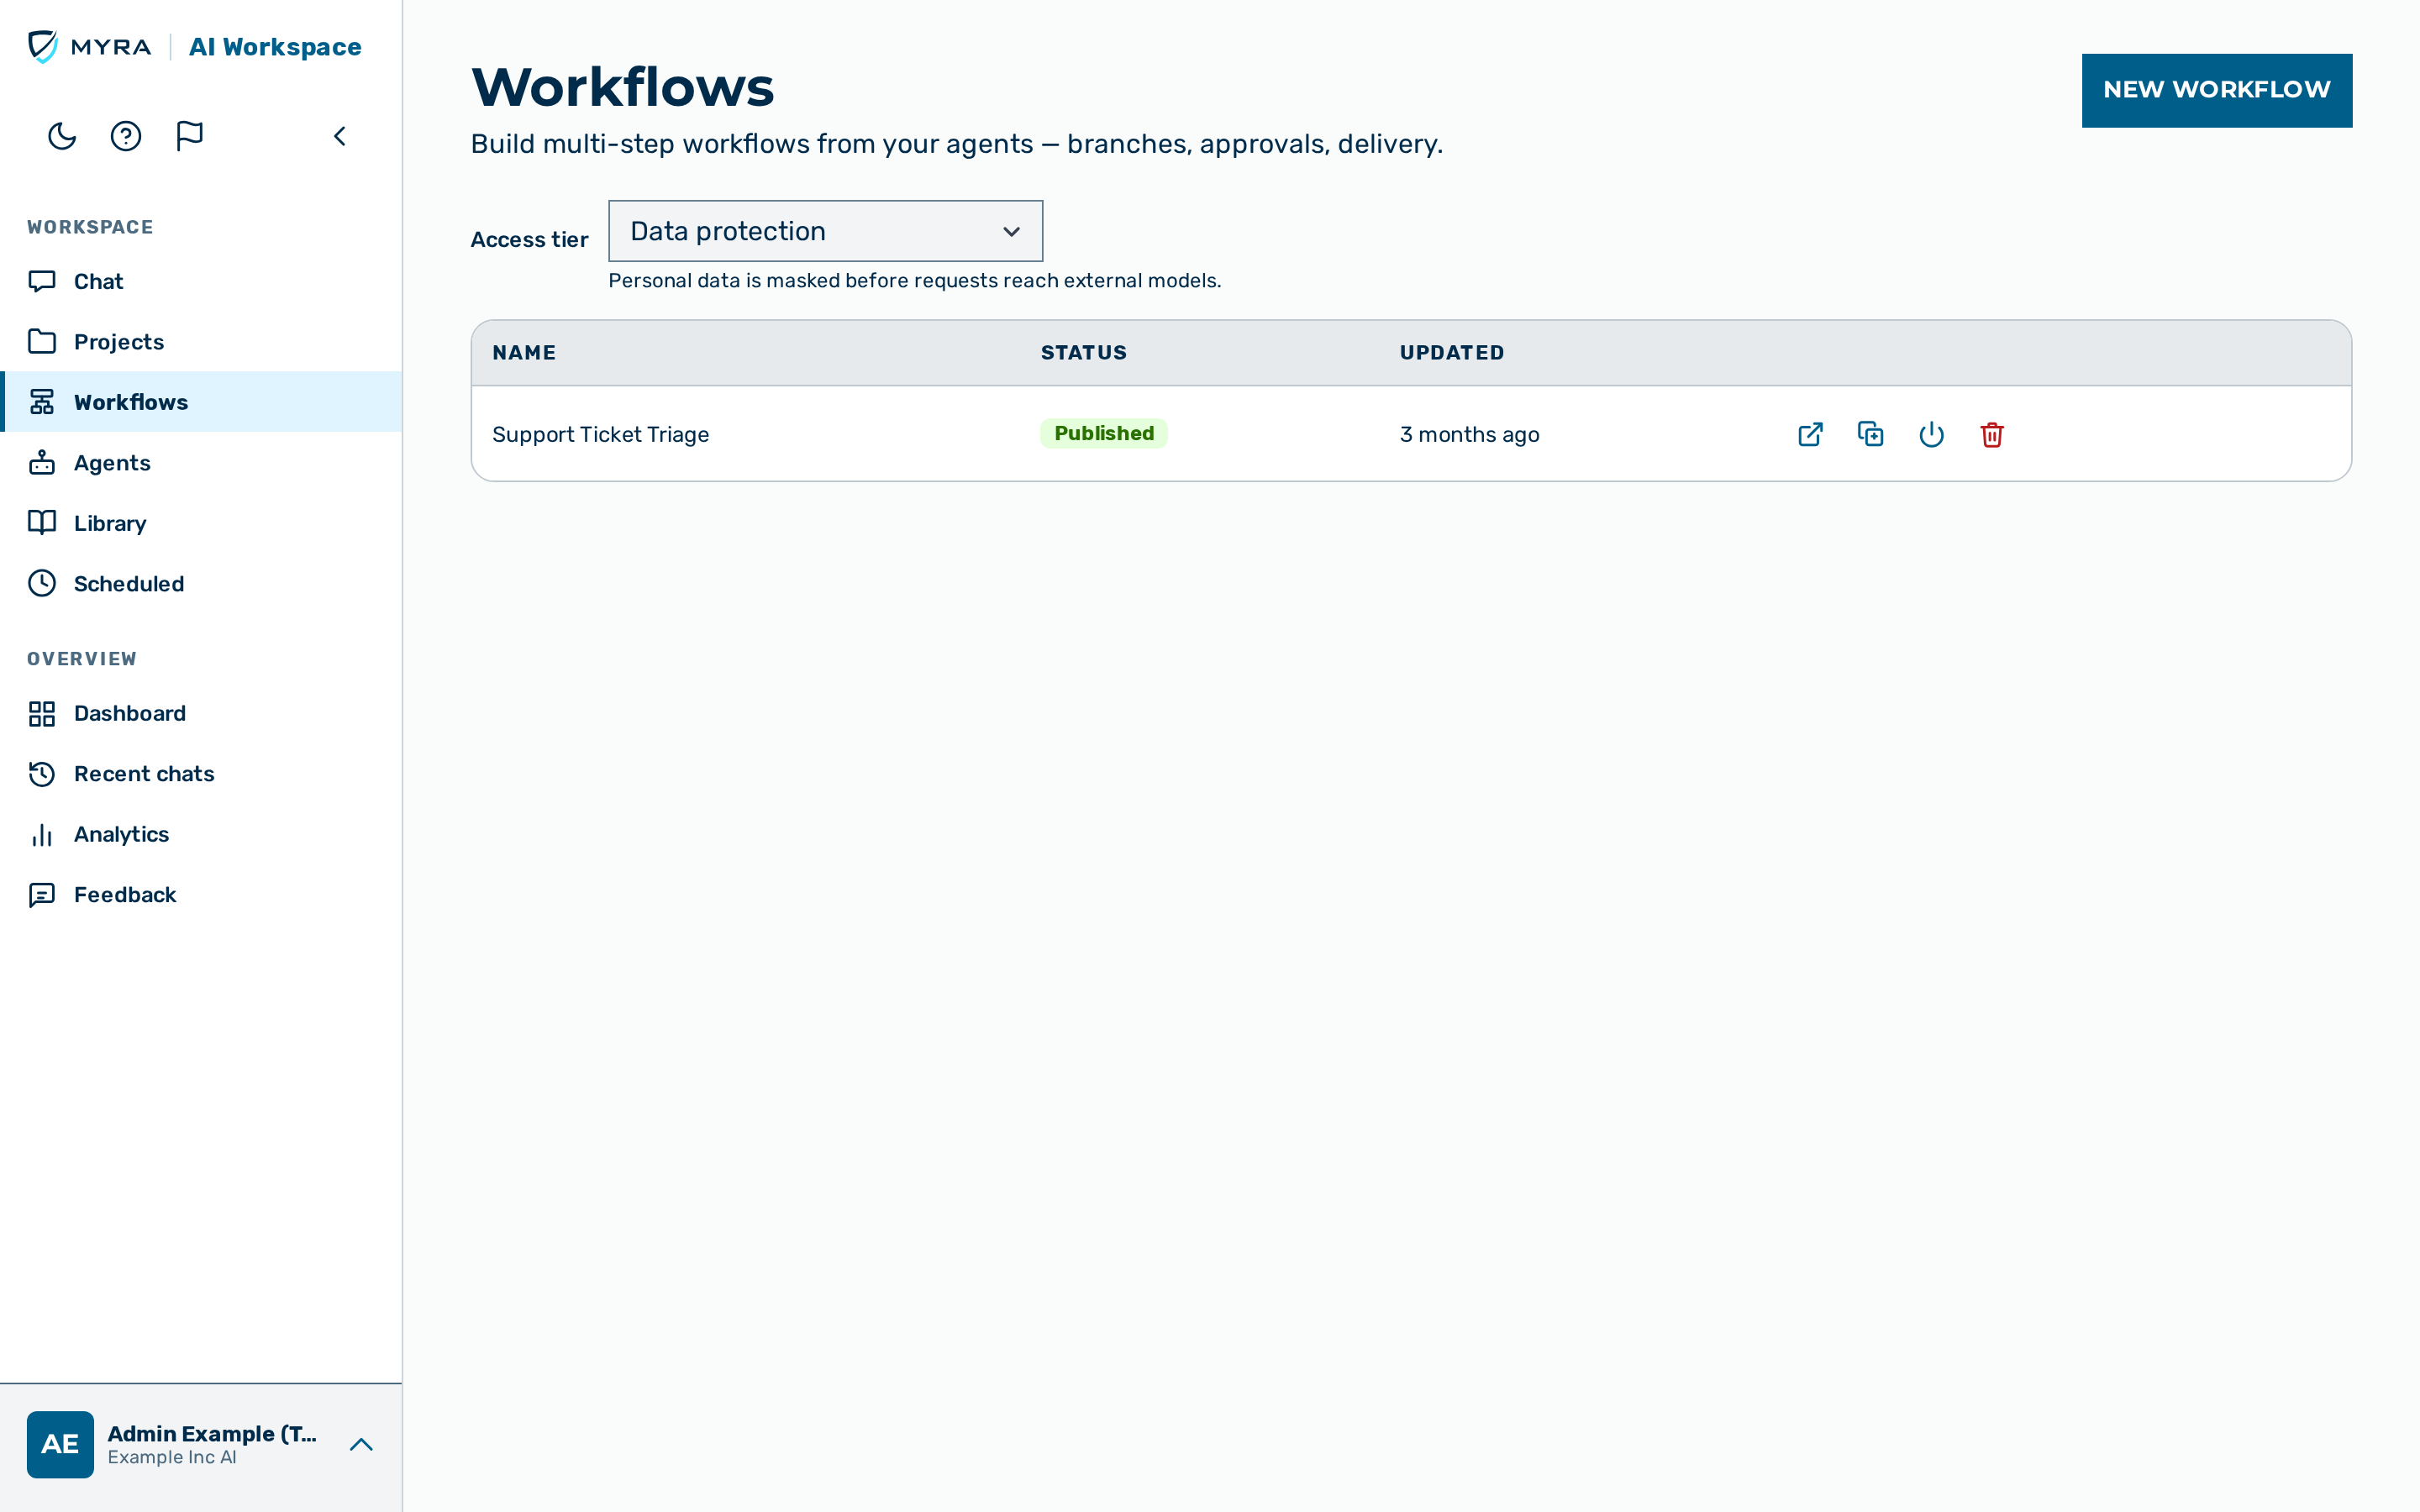 The Workflows page.
A workflow chains saved agents into a repeatable, multi-step process — with branches, loops, human approval, and delivery to an external channel. Steps run as a vertical chain: there is no free-form canvas and no drag-and-drop. A workflow is edited as a draft, then published to an immutable, versioned snapshot; a run is bound to the exact version it started on, so a later change never disturbs a run that is already in flight.
The builder is the authoring surface only. Every rule described below is re-enforced on the server — the client is never the authorization or validation boundary.
💡 Note: Workflows are gated per workspace. The Workflows entry is always shown in the WORKSPACE cluster of the left rail. It is live for users who may author workflows —
admin,tenant_admin,ki_manager,member, or a custom role holding the workflow-author capability (notviewer,demouserorfinance) — in a workspace whose plan includes the feature (tenant_workflows_enabled; off unless provisioned by the platform operator). Otherwise the entry carries a Premium badge and clicking it opens a shared upgrade pop-up whose call to action leads to the contact form; a bookmarked or typed workflow link — the list, the builder, and run views — still redirects to the upgrade page, so it never opens for a user the server would refuse. Building, publishing, and running a workflow is open to every authoring user; run history is scoped to your own runs, while anadmin,tenant_admin, orki_managersees every run of the workflow.
For the underlying API shapes — admin CRUD, publish, trigger and resume, the schedule and webhook routes, the approval inbox, and the internal runner seam — see the Workflows API reference. Human-Approval requests are reviewed on the Personal tab of Settings › Approvals.
Workflows list
The Workflows page lists the workflows on the selected access tier. When the workspace has more than one gateway, an Access tier control above the list selects which one the workflows belong to — Local, Data protection, or Standard, with a hint explaining the selected tier (the same control as on the Agents page); with a single gateway the control is hidden. Workflows are gateway-scoped — changing the access tier reloads the list for that tier's gateway.
Each row shows the workflow name, its Status (Draft, Published, or
Disabled), and when it was last Updated. (The earlier Steps, Agents, and
Runs (30d) enrichment columns were removed.) The list row does not carry the workflow graph —
graph_json is returned only by the detail endpoint. The row actions are:
| Action | Effect |
|---|---|
| Duplicate | Creates an editable copy of the workflow and opens it in the builder. |
| Enable / Disable | Toggles a published workflow between Published and Disabled. A disabled workflow does not run. |
| Delete | Deletes the workflow and all its runs, after a confirmation. |
Open a workflow in the builder via the open action icon on its row (the whole row is not clickable).
Creating a workflow
Proceed as follows to create a workflow:
- Click on the New workflow button.
- The New workflow dialog opens.
- Enter a name in the Name text field.
- Click on the Create button.
-> The new workflow opens in the builder as an empty draft with a single trigger step.
Creating an example workflow
When a gateway has no workflows yet, the page shows an empty state with a Create example workflow button. This seeds a ready-to-run example — a press review with an approval step — owned by you, and opens it in the builder so a new workspace can learn by example and publish it as-is.
Proceed as follows to create the example workflow:
- Click on the Create example workflow button.
-> The example workflow is created and opens in the builder. Repeating the action returns the existing example rather than creating a duplicate.
Builder
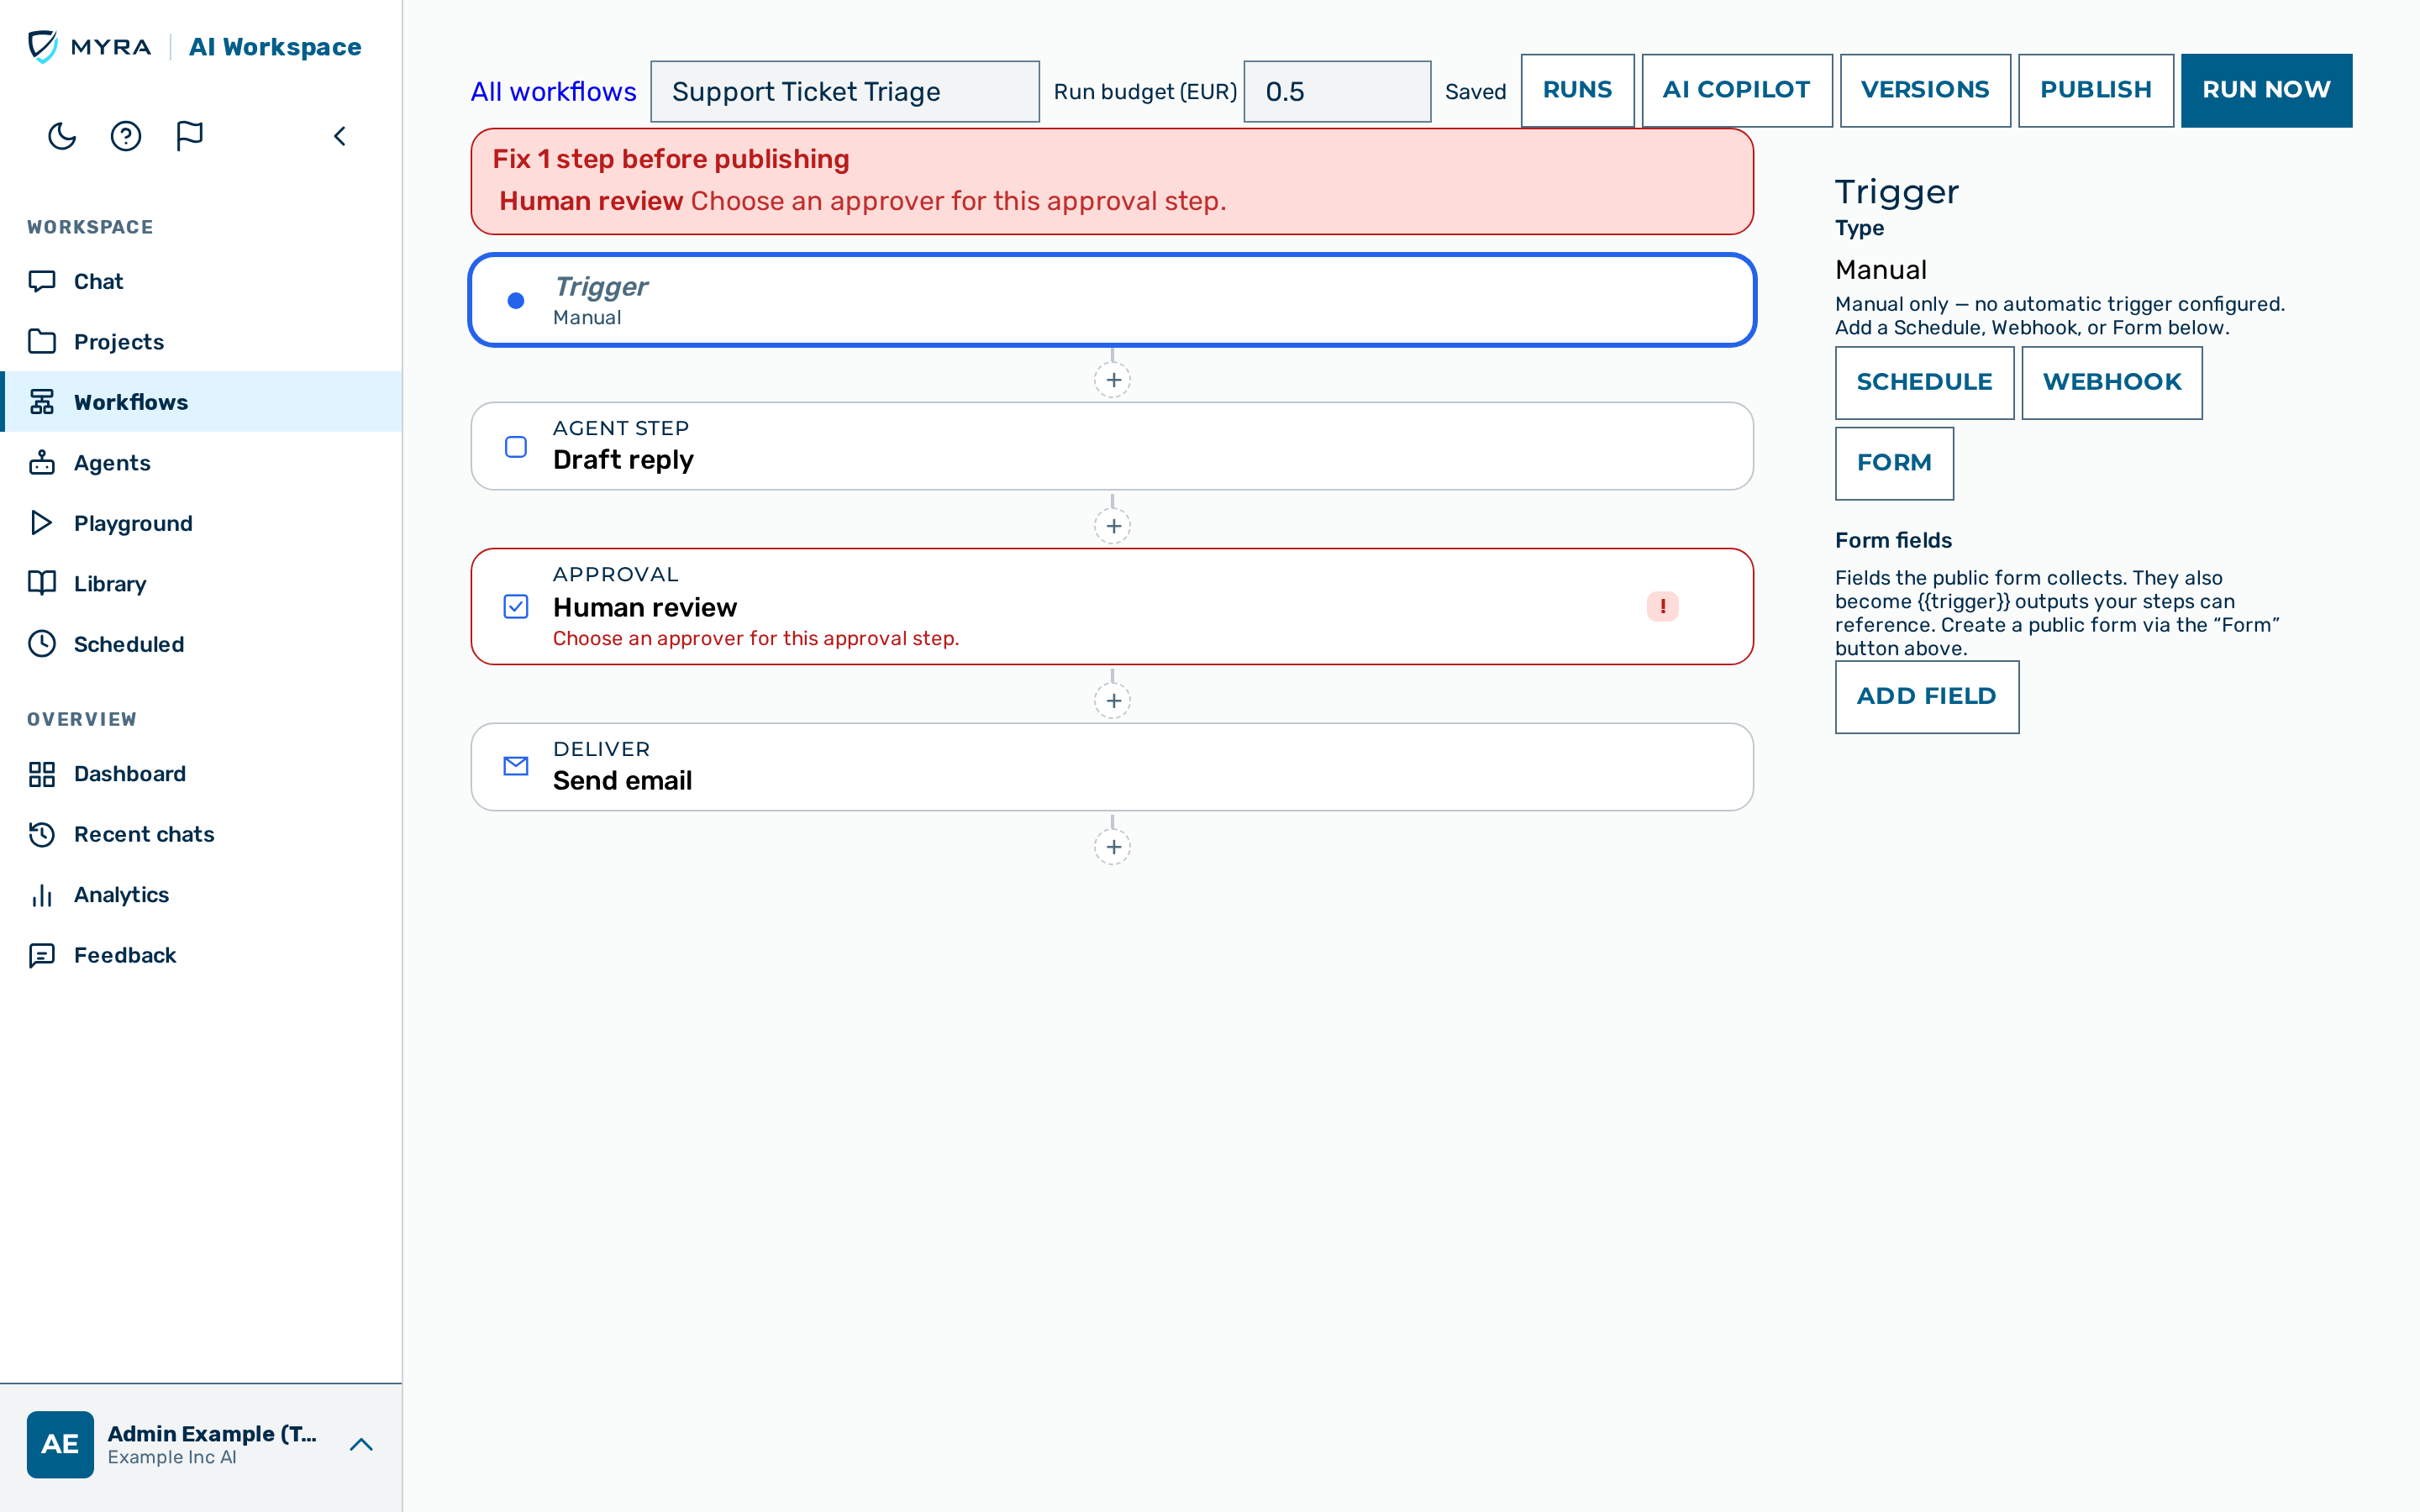 The workflow builder: the step chain on the left, the configuration panel on the right.
The builder shows the workflow as a vertical chain of step cards. A "+" control sits between cards; clicking it opens a Choose a step type menu and inserts the chosen step at that position. Selecting a card opens its configuration in the panel on the right. When the builder opens, the trigger step is selected, so its configuration — including the Schedule, Webhook, and Form trigger buttons — is immediately visible in the panel.
The builder header holds the workflow name, a Run budget (EUR) field, the save-state indicator, and the action buttons Runs, AI copilot, Versions, Publish, and Run now. The trigger buttons (Schedule, Webhook, Form) live in the trigger step's configuration panel, next to the trigger status they change.
The Run budget (EUR) field sets an optional cost ceiling for a single run. Leave it empty for no cap. When a run reaches the budget, it stops at the next step boundary.
A freshly inserted step gets a default name — for example Agent step 1 — that you can rename in its configuration panel. The name is only a display label; every reference binds to the step's immutable identifier, so renaming a step never breaks a reference.
Step types
A workflow is composed from the following step types.
| Step | Purpose |
|---|---|
| Trigger | Starts the workflow. Its declared input becomes referenceable by later steps. |
| Agent step | Invokes a saved agent. Its structured output (or its text output when it has no schema) becomes referenceable by later steps. |
| Condition | Compares one picked value, with an If true and an Otherwise branch shown as indented sub-chains beneath it. |
| Loop | Iterates a picked list value, running its body once per item, up to 10 items per run. |
| Approval | Suspends the run until a named user approves or rejects it in their approvals inbox. |
| Deliver | Sends the result to Mattermost, a webhook, or email, through the same fail-closed personal-data and egress checks as agent delivery. |
| Fetch | Downloads a file from an https URL (SSRF-pinned to public addresses) and stores it as a workflow artifact that later steps can reference. |
| Code | Runs a short script in a headless sandbox over referenced input artifacts and emits its output as a new workflow artifact. |
| Connector | Calls a saved MCP or API connector during the run, as the workflow owner, and emits the masked text result of the connector for later steps to reference. |
A Condition renders its two branches as indented sub-chains in a single column; the main chain continues below. A Loop renders its single body slot the same way. Branch and loop nesting is capped at one level, and a loop body may not contain a Deliver, a Connector, or an Approval step, because a re-run of the loop re-sends the result.
Agent step
An agent step runs one saved agent. Select the agent from the Agent drop-down list. The list offers only agents you own on this workflow's access tier — an agent step may not reference another user's agent, and agents belong to the access tier they were created on. If the list is empty although you own agents, they live on a different access tier: create the workflow on your agents' tier (the Access tier control on the Workflows page), or create an agent on this one. The builder shows this hint under the drop-down. The Input for this step field is the task or prompt sent to the agent, and may reference the output of earlier steps. The agent's own system prompt is set on the agent itself, not here.
Condition
A condition routes the chain down one of two branches. Pick the Value to compare, choose a Comparison (equals, not equal, contains, greater than, less than, or is empty), and, for every comparison except is empty, enter the value to Compare with. The taken branch runs; every step in the branch not taken is marked as skipped.
Loop
A loop iterates a list produced by an earlier step. Pick the list under Iterate over. The body runs once per item, up to 10 items per run. Inside the body, each step can reference the current item and its index; after the loop, the collected items and their count are referenceable by the following steps.
Deliver
The Deliver step sends the result outside the platform. Pick a Channel, then fill in its target:
| Channel | Target field | Notes |
|---|---|---|
| Mattermost | Mattermost channel ID | The 26-character channel ID, not the #name. |
| Webhook | Webhook URL | An https URL. Only public addresses are accepted. |
| Subject | Sent to the workflow owner's email address by default, resolved server-side. |
For an Email delivery you may also set two optional fields:
- External recipient (optional) — leave it empty to send to the workflow owner. A non-owner address is delivered only when it is on your tenant's recipient allowlist; any other address is refused.
- Attachment (optional) — a
{{…}}reference to a prior step's artifact (for example a Fetch or Code step output), attached to the email.
The Message field is the composed text, which may reference earlier steps. An empty message delivers nothing. A run that masked personal data refuses external delivery — the Deliver step is blocked rather than sending unchecked data. For an Email delivery the recipient still receives a short notification that the run completed but the result was withheld by the organization's data-protection policy — the notification never contains the result or any personal data, and the run detail records the outcome next to the delivery status. Mattermost and webhook deliveries stay silent externally; the block is visible in the run detail.
💡 Note: If your organization has enabled internal PII delivery, an Email delivery to a workspace member (the owner) instead receives the full, unmasked result — the masked-run block applies only to external recipients. Mattermost and webhook deliveries stay blocked regardless. Separately, a platform admin can disable Mattermost delivery org-wide, in which case a Mattermost Deliver step hard-fails independently of PII.
Fetch
The Fetch step downloads a file over https and stores it as a workflow artifact that later steps can reference (for example as a Code step input or an email Attachment).
| Field | Purpose |
|---|---|
| URL | The https address to download. Required. The request is SSRF-pinned: only public addresses are reachable, so it cannot be used to probe internal services. |
| Allowed content types | Optional list of acceptable Content-Type values. When set, a response of any other type is rejected. |
| Maximum size | Optional cap on the download size in bytes. A larger response is rejected. |
A network fetch is the most transient-failure-prone step, so it participates in step retries and on-error policies.
Code
The Code step runs a short script in a headless sandbox over referenced input artifacts and writes its result out as a new workflow artifact.
| Field | Purpose |
|---|---|
| Code | The script source. Required. The source itself is treated as opaque and is never scanned for step references — data reaches the script through its declared inputs, not through {{…}} refs embedded in the code. |
| Input artifacts | Optional list of up to seven references to prior steps' artifacts, made available to the script as files. |
| Output filename | Optional name for the artifact the step produces. |
Like Fetch, a Code step participates in step retries and on-error policies.
Connector
The Connector step calls one of your saved MCP or API connectors in the middle of a run and makes the result of the connector available to later steps. The connector runs as the workflow owner, and the call passes through the same EU data-residency and personal-data (PII) checks as the rest of the run; the result is masked before it reaches the next step.
| Field | Purpose |
|---|---|
| Connector | The saved connector to call. Required. |
| Tool | The connector tool to invoke. Required. |
| Input | The argument sent to the tool. Required. It may reference the output of earlier steps with a {{…}} template. |
A Connector step cannot be retried automatically, because the call may change data on the connected system and its result cannot be safely repeated, and it may not be placed inside a loop body.
Human-Approval
An Approval step pauses the run until a named person decides. Configure it as follows:
- Approver — search for a user by email. The named user need not be able to build workflows; any user in the workspace can be an approver. The chosen user decides in their My Approvals inbox.
- If not decided in time — choose End the run (nothing goes out) or Continue automatically (auto-approve).
- Timeout (hours) — a whole number of hours, between 1 and 8760 (one year).
At run time, a run that reaches the approval step is suspended and appears in the approver's inbox. On approval, the run continues past the step; on rejection, the run ends and the approver's reason is recorded on the run. If the deadline passes first, the run either continues or ends, according to the timeout choice. See My approvals for the reviewer side.
References
A step reads an earlier step's output through a reference. References are inserted only through the picker — you never type raw handlebars — and are shown as chips carrying the source step's label. A reference binds to the step's immutable identifier, not its label, so renaming a step never breaks a reference.
The picker only offers values that can actually be resolved where you are: the step's ancestors on the same path, plus, inside a loop body, the loop's per-iteration item and index. A value produced only inside one branch of a condition is never offered to the other branch or to the chain after the condition, because it cannot be guaranteed to have run; a hand-crafted reference of that kind blocks publish.
The offered values come from the referenced agent's declared output schema. An agent with no schema exposes exactly one value, its text output.
Draft autosave
The server holds the state. Edits are saved automatically, with the workflow's last-read timestamp sent as a precondition, so a save never overwrites a change made elsewhere. The save indicator shows one of three states: Unsaved changes, Saving…, or Saved.
If another tab saved the same workflow first, the next save is refused and the indicator switches to Changed in another tab with a Reload action, so local edits are never silently discarded.
Testing a step
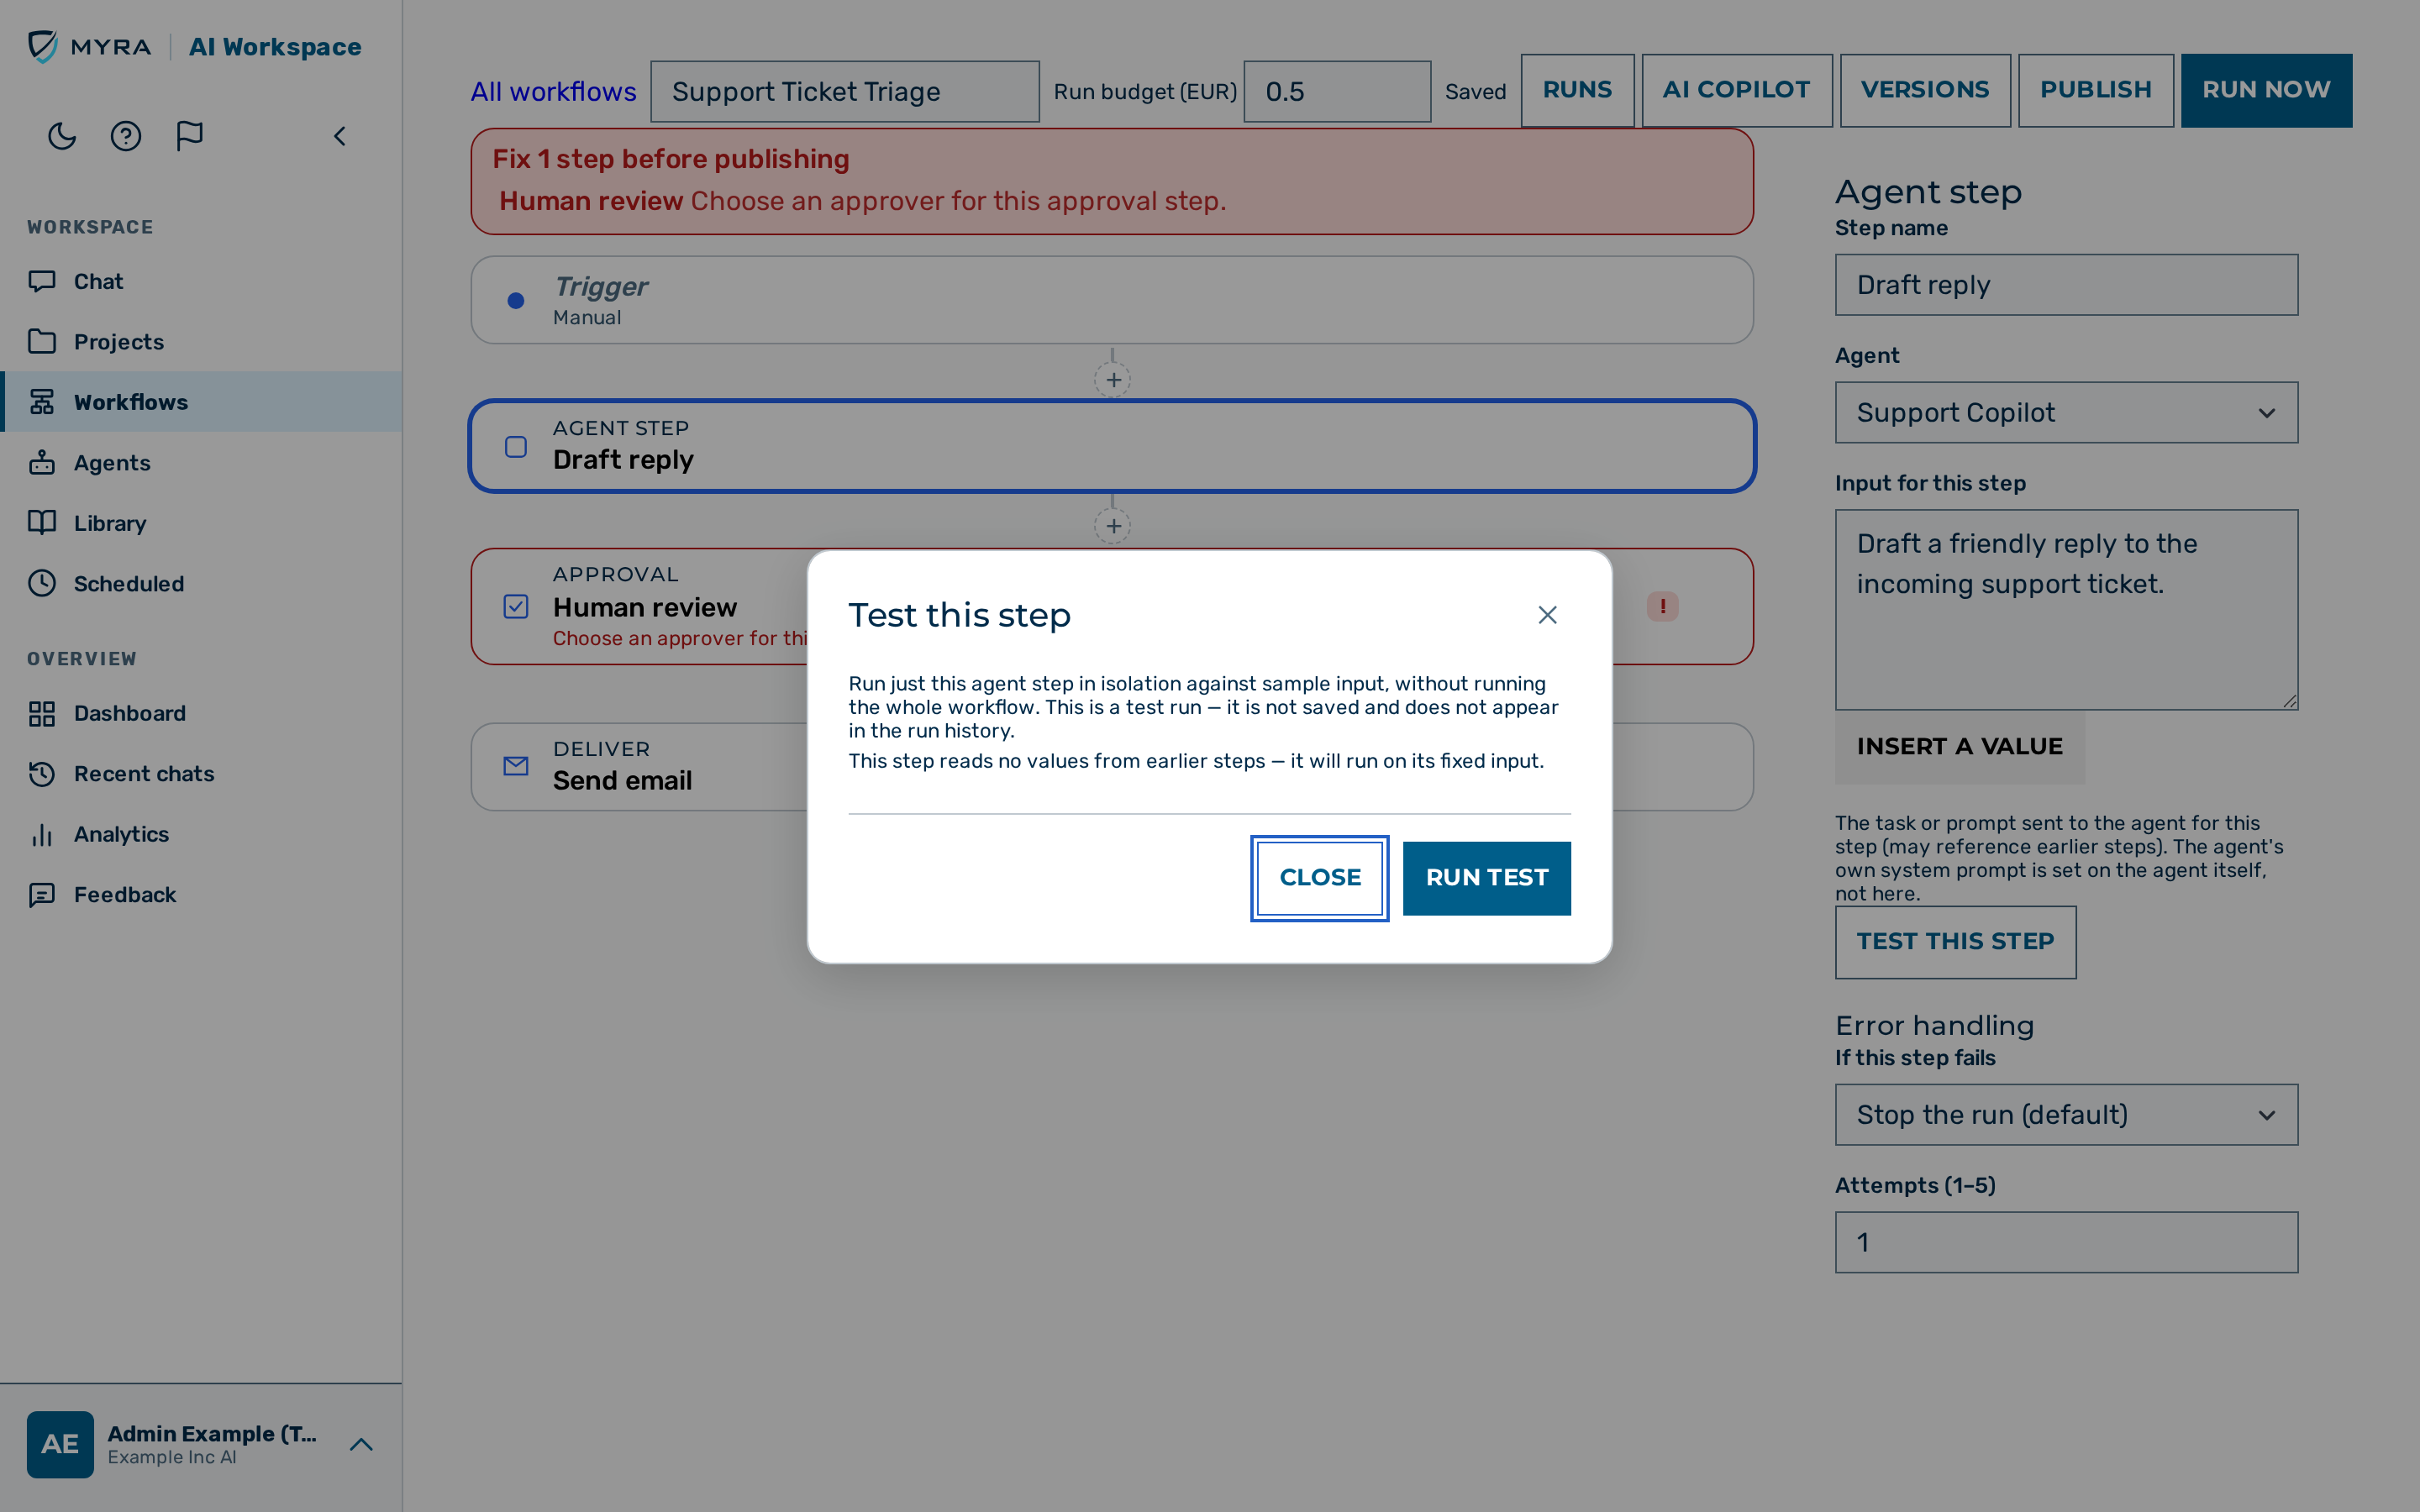 The Test this step dialog.
An agent step's configuration panel offers a Test this step button that runs only that step, in isolation, without running the whole workflow. The test run is not saved and does not appear in the run history.
Because a mid-chain step has no upstream output at design time, the dialog lists each value the step references and lets you supply a sample value for each; those are substituted into the step input before the run. The Test run cost is shown beneath the Output.
The test is blocked, with no run, when the step's agent has been deleted, when a reference cannot be resolved, or when the resolved input is empty. Only agent steps can be tested in isolation.
NL copilot — describe, fix, or explain a workflow
The builder toolbar has an AI copilot button that opens a natural-language assistant with three modes:
- Generate — describe a process in plain words ("When a ticket arrives, summarise it, then ask a manager to approve, then email the customer") and the copilot proposes a draft graph built from the existing node types. You review a diff of the proposed nodes and click Apply to load it into the builder as an editable draft.
- Fix — when the draft has validation problems, the copilot takes the current graph and its validation errors and proposes concrete repairs, again shown as a diff you apply.
- Explain — a plain-language summary of the current graph, including its error-handling and any approval gates — useful for a review or an audit.
The copilot never publishes. It only proposes a draft; you review it and publish, so the governance and audit story is unchanged. Every proposal is checked on the server through the same validator as publishing before it can be applied — a graph that fails validation is shown with its errors and is never applied as a partial draft. Copilot runs are metered like a normal request (the model call draws your workspace's usage), and the assistant is available only to workflow editors, on workspaces where workflows are enabled.
To generate a workflow:
- Click AI copilot, choose Generate, and describe the process.
- Review the proposed nodes in the diff, then click Apply to load the draft.
- Adjust anything in the builder, then Publish when you are satisfied.
Publishing
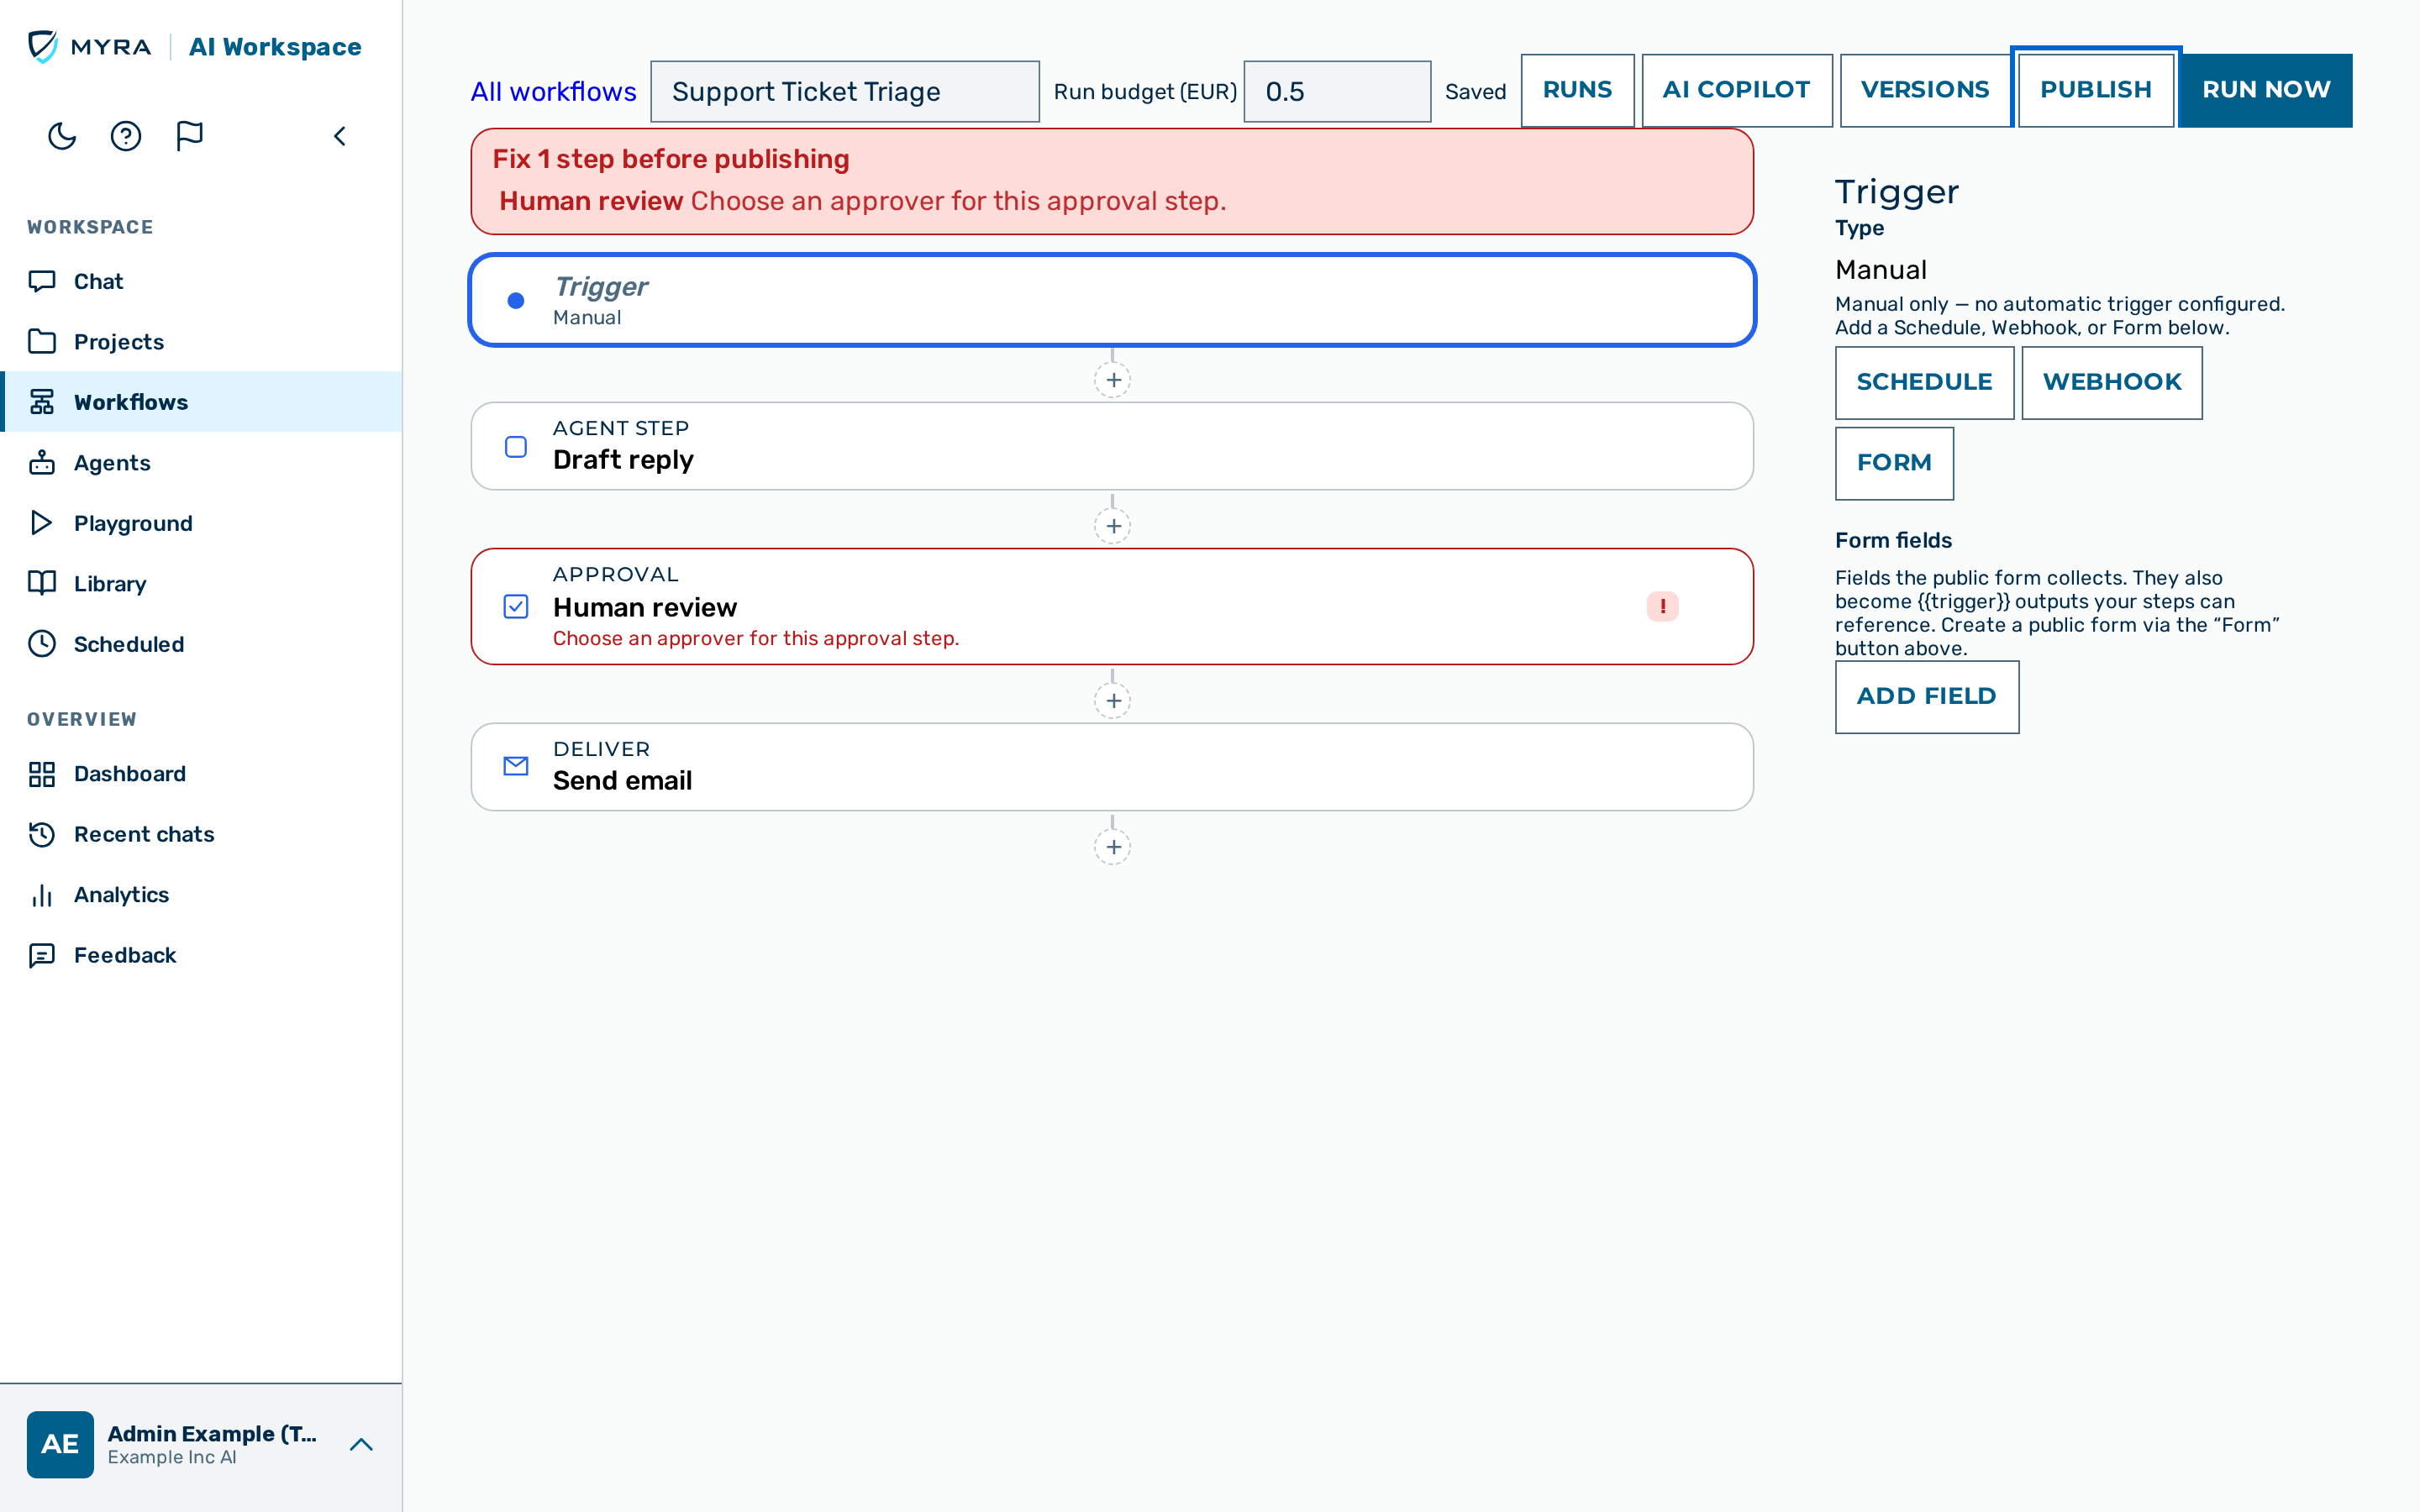 The Publish button and the validation summary.
Publishing always asks the server to validate the workflow; the server is authoritative. On success, an immutable, versioned snapshot is created, and the Run now button becomes available.
On failure, the builder shows an error-summary banner above the chain listing every failing step. Clicking a row scrolls to that step and opens its configuration, where the offending field is marked red; each failing card also carries a red badge. Blocking issues include an agent step with no agent selected or with a deleted agent, a reference to a step that no longer exists, a reference into a branch that may be skipped, a loop with no list to iterate over, an approval step with no valid approver or timeout, and structural problems in the graph. A workflow with any blocking issue cannot be published until it is fixed.
Proceed as follows to publish a workflow:
- Click on the Publish button.
- The server validates the stored draft.
- If the banner lists a failing step, click on its row, correct the red-marked field, then publish again.
-> The workflow is published and a new version is recorded.
When a published workflow has draft edits that are not yet published, the builder shows an Unpublished changes indicator next to the Run now button. A run — whether started manually, on a schedule, by a webhook, or by a form — always uses the last published version, not the unpublished draft. Publish again to make the edits take effect.
Versions
Every publish records an immutable version. The Versions button in the builder opens the version history: each row shows the version number, who published it, when, how many runs executed on it, and a Current badge on the version that is live now.
Comparing two versions. Select the checkboxes on any two versions and click Compare. The comparison lists what changed between them — steps that were added, removed, or changed (with the individual configuration fields that differ, shown as before -> after) and any changed connections. Comparing a version with itself shows No differences.
Rolling back. A non-current version has a Roll back button. Rolling back publishes that version's workflow as a new current version — the history is never rewritten, and past runs stay attached to the version that actually ran them. Rollback re-validates exactly like a normal publish, so if the older version references an agent or approver that no longer exists, it is rejected with an explanatory message instead of going live. Your current draft is not changed; rollback only changes what is published (so future runs use the rolled-back version). A disabled workflow stays disabled after a rollback — you re-enable it explicitly when you are ready.
Triggers
A published workflow can be started in four ways: manually with the Run now button, on a schedule, by an incoming webhook, or by a submission to a public form. The automatic triggers are configured from the trigger step: select the trigger card, then use the Schedule, Webhook, or Form button in its configuration panel.
What the trigger element shows
The trigger element at the top of the canvas — and the Trigger panel you get by clicking on it — always report the workflow's real trigger state, read from the schedule, webhook and form you configured with the buttons above the canvas. It reports one of:
- the active trigger or triggers, for example Schedule or Schedule, Webhook;
- Schedule — switched off, when a schedule exists but is not enabled. The workflow does not run automatically in this state;
- Schedule — paused after repeated failures, when the schedule paused itself (see below). Fix the cause and save the schedule again to re-arm it;
- Manual, when no automatic trigger is configured at all.
A switched-off or paused trigger is always listed, even next to an active one, so a workflow that has silently stopped running cannot hide behind a second, working trigger.
The trigger element has no editable name: it always shows its step type, with the real trigger
state on the line below, never a free-text label. Older AI-generated drafts sometimes seeded the trigger with
a cadence-claiming name such as "Every morning at 10am"; that leftover text is not displayed and
has no effect on when the workflow runs. Separately, if the step's configuration carries a cron
or schedule value — which those same drafts sometimes did — the builder shows a warning on the
element: those values do nothing. Only the Schedule dialog below actually schedules a run.
Scheduling a workflow
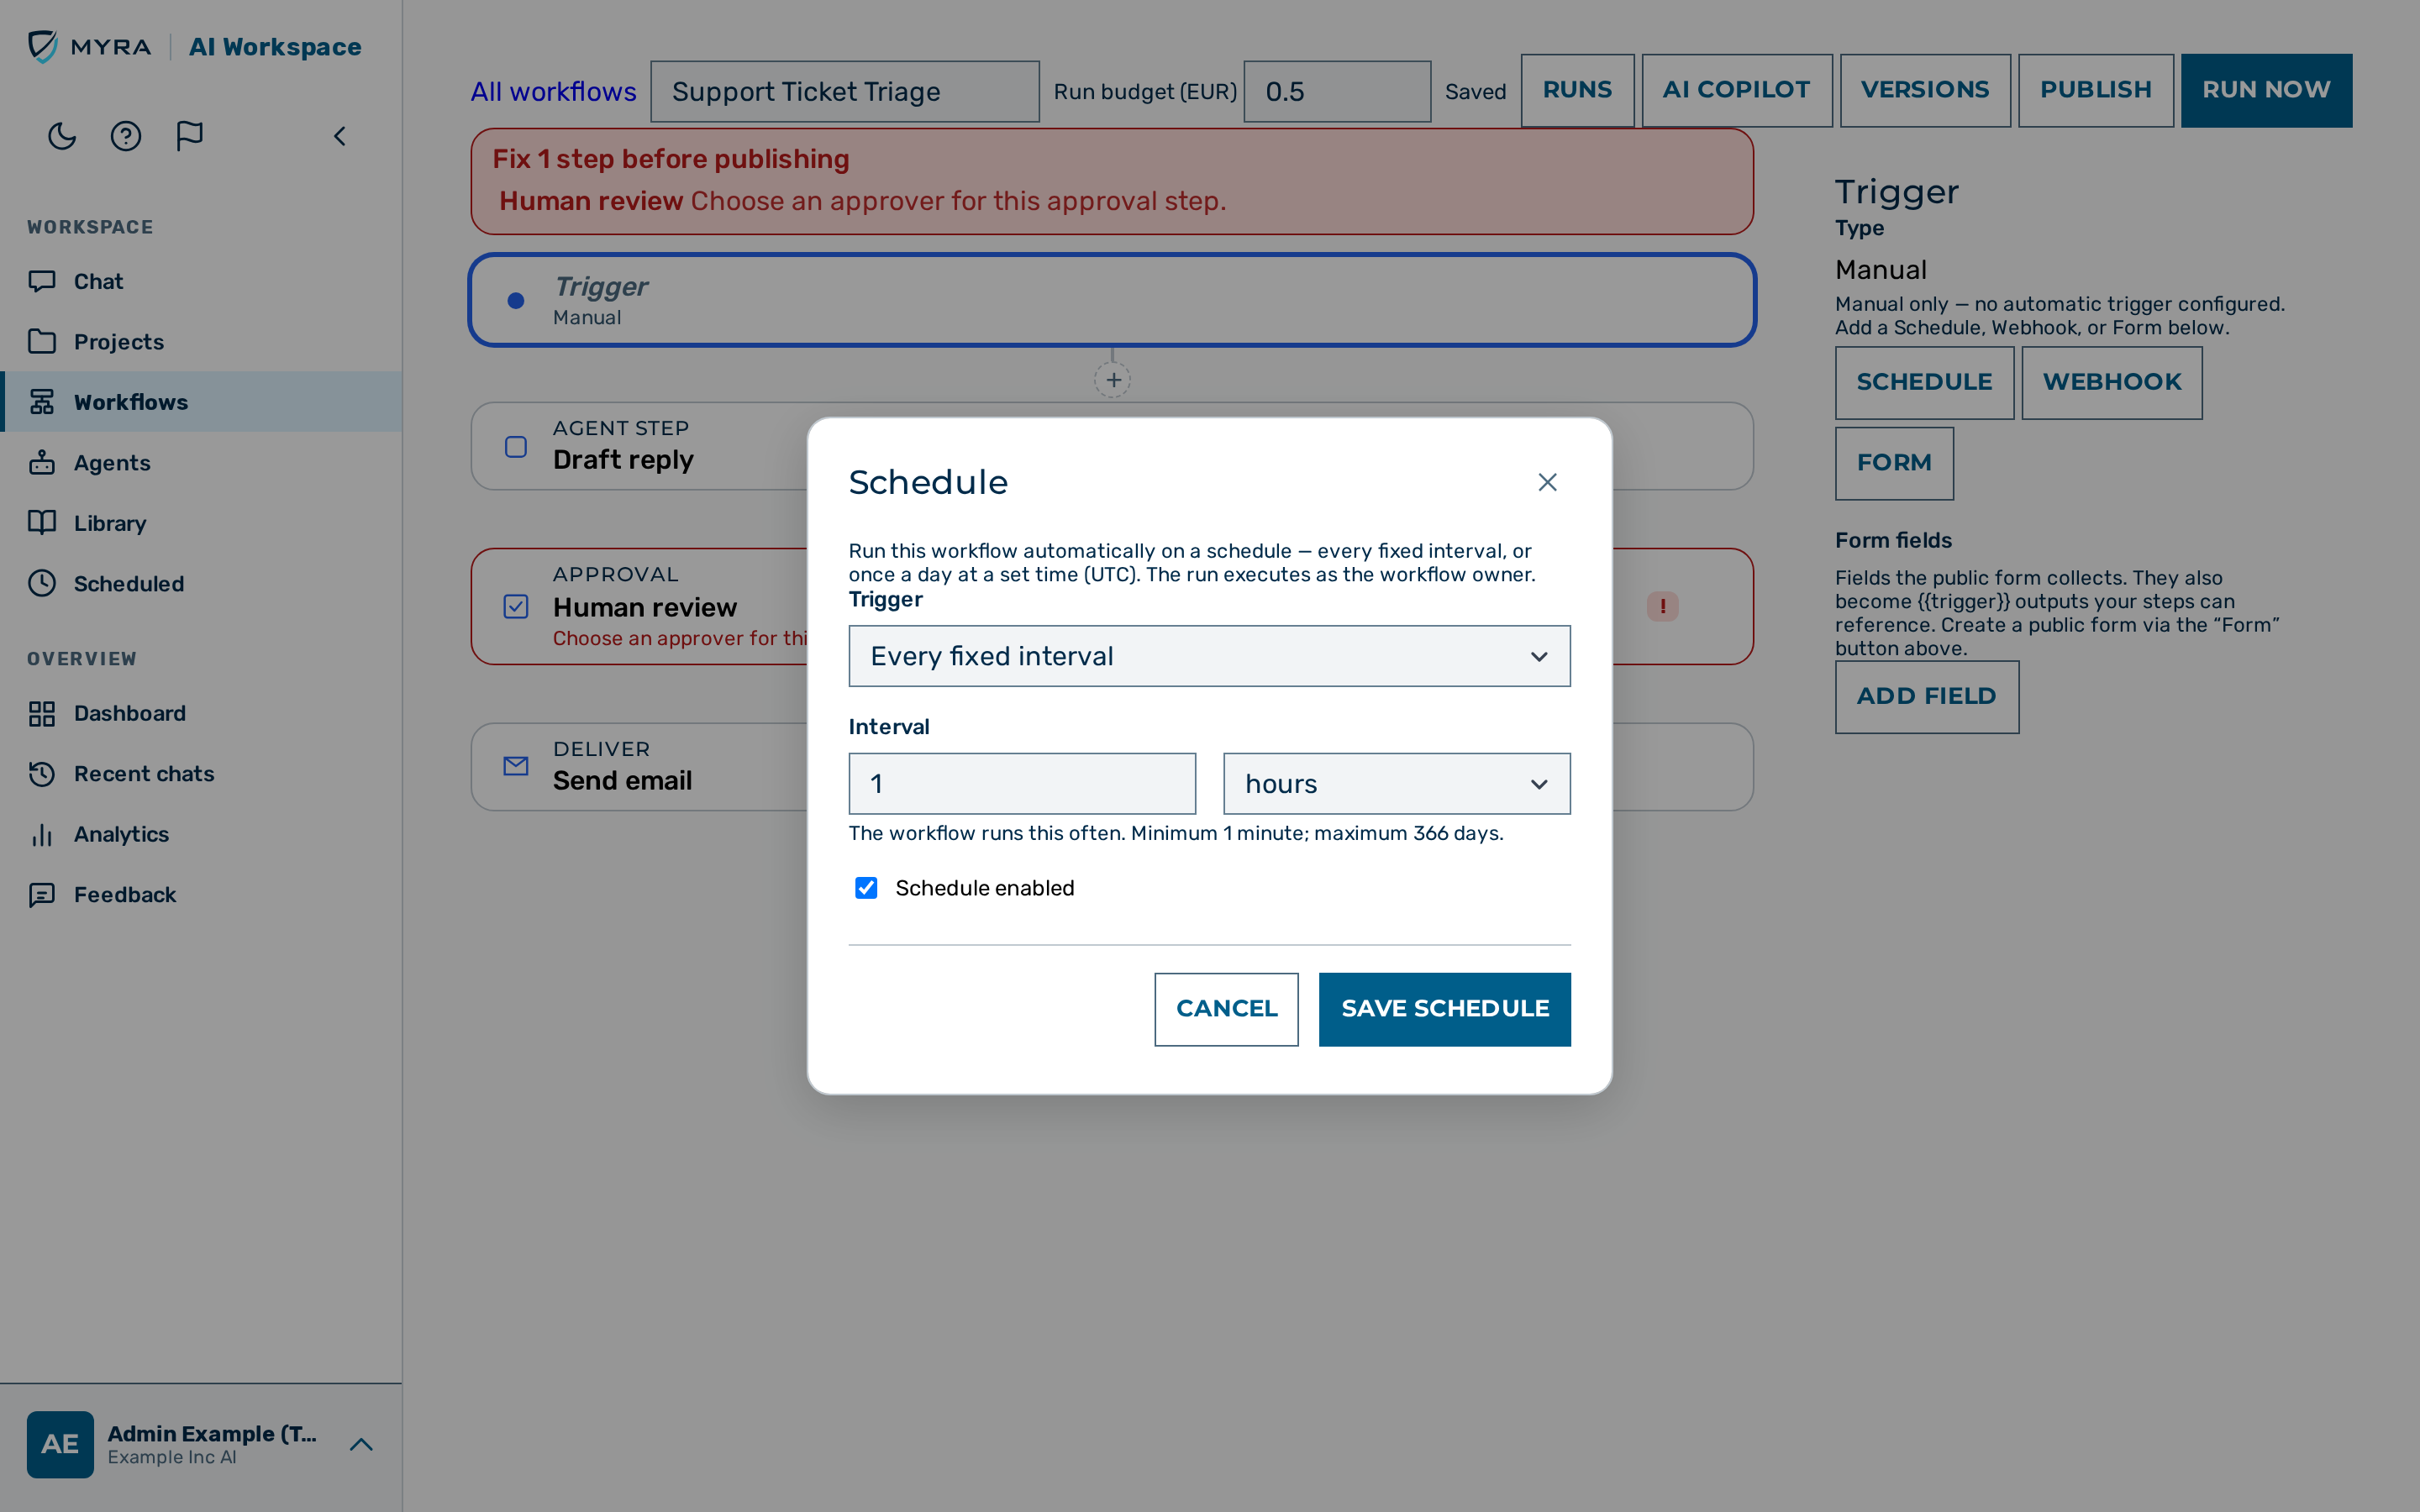 The Schedule dialog.
The Schedule button in the trigger step's panel opens a dialog that runs the workflow automatically. A workflow has at most one schedule. The run executes as the workflow owner.
Under Trigger, choose Every fixed interval, Once a day (UTC), or Once a week (UTC):
- For Every fixed interval, enter an Interval count and a unit of minutes, hours, or days. The interval must be between 1 minute and 366 days.
- For Once a day (UTC), enter the Time of day (UTC) as a 24-hour
HH:MMvalue — for example06:00. - For Once a week (UTC), choose a weekday and enter the Time of day (UTC).
Click on the Save schedule button to store the cadence, or Remove schedule to clear it. A scheduled run is skipped when a run of the same workflow is already in flight, so a schedule never starts a second, overlapping run.
The Schedule dialog also shows the schedule health. A schedule pauses itself after five consecutive failed runs — for example after its agent's model was retired — so an unattended schedule never runs on forever. A paused schedule shows its state and the consecutive-failure count in the dialog. Fix the cause, then click on the Save schedule button to re-arm the schedule, or leave it paused.
Triggering from a webhook
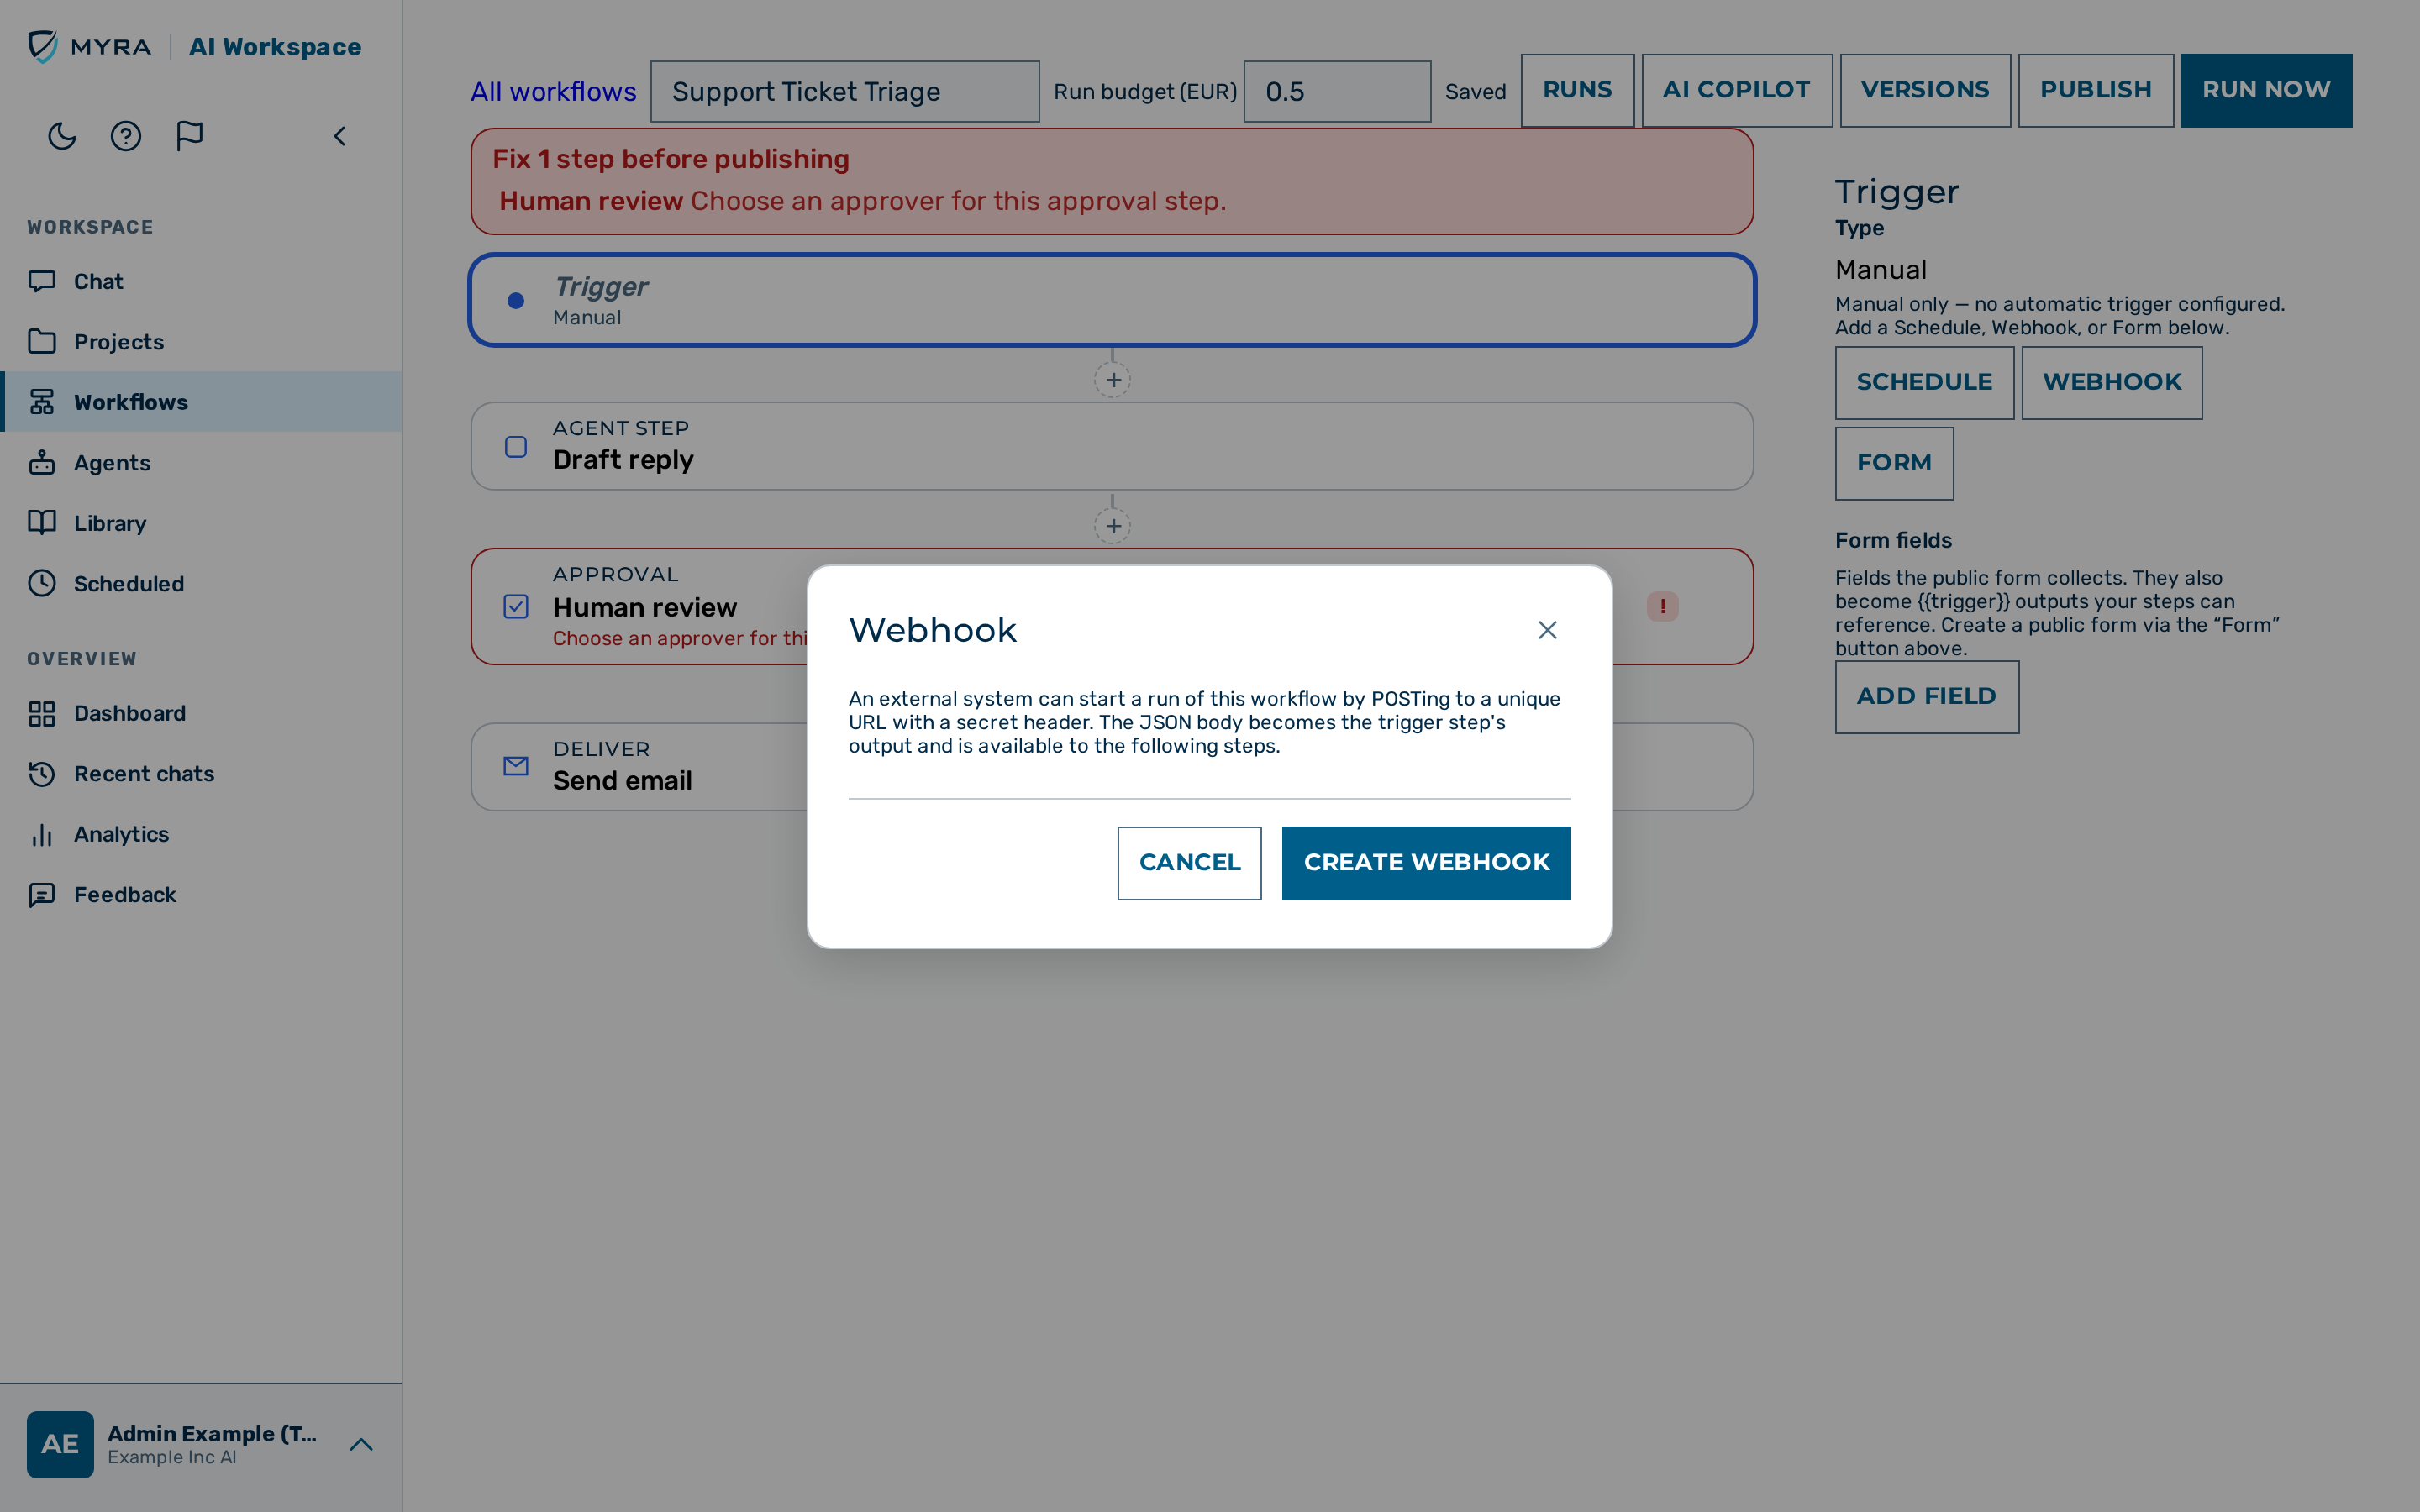 The Webhook dialog after a webhook is created.
The Webhook button in the trigger step's panel opens a dialog that lets an external system start a run by sending an HTTP POST to a unique URL with a secret header. The JSON body of the request becomes the trigger step's output and is available to the following steps.
Proceed as follows to create a webhook trigger:
- Select the trigger step, then click on the Webhook button in its panel.
- The Webhook dialog opens.
- Click on the Create webhook button.
- The Webhook created panel shows the Webhook URL and the Secret.
- Copy the Secret and store it securely.
- Click on the Done button.
⚠️ Caution: The secret is shown only once and cannot be retrieved later. Copy it before closing the dialog. To replace a lost secret, delete the webhook and create a new one.
To remove a webhook, open the Webhook dialog and click on the Delete webhook button.
Triggering from a public form
The Form button in the trigger step's panel publishes a public, login-free web page where anyone with the link can fill in a form and start a run. It is the business-user counterpart to the webhook: instead of a server-to-server call with a secret, a person submits an HTML form. A workflow has at most one form, and the run executes as the workflow owner.
The form fields come from the trigger step. Open the trigger step's config panel and, under Form fields, add one field per input you want to collect:
- Field label — the text shown above the input on the public page.
- key — the identifier the value is stored under; it must start with a letter or
_and contain only letters, digits and_. Downstream steps reference the value as{{step_0.output.<key>}}(wherestep_0is the trigger step's id). - Type — Text, Number (validated as a decimal), Select (one option per line in the options box), or File upload.
- Required — whether the field must be filled in.
A File upload field lets the submitter attach a file that downstream steps can read. It adds two more controls:
- Allowed file types — a set of checkboxes (PDF, PNG, JPEG, WebP, Text, Word (DOCX), Excel (XLSX)). Leave every box unchecked to allow every supported type. The server always enforces the supported list by inspecting the file content, not the file name.
- Max size per file (MB, 0 = default 10 MB) — the per-file size limit.
Use the ↑ / ↓ buttons to order the fields as they should appear on the page.
Proceed as follows to publish a form:
- Add the fields you need in the trigger step's Form fields editor, then publish the workflow (a form only works while the workflow is published).
- In the trigger step's panel, click on the Form button and then Create form.
- The dialog shows the public form URL. Copy and share it.
- Optionally enable Require anti-spam check (CAPTCHA), or toggle the form off with the Form enabled checkbox. Regenerate link issues a new URL and invalidates the old one; Delete form removes it.
⚠️ Caution: A form is public and anonymous — anyone with the link can start a run that drives the workflow's agents with their full tool access, without signing in. Only enable a form on a workflow you trust with anonymous input.
Submissions are validated server-side against the field schema (unknown fields, wrong types, missing required fields and out-of-range selects are rejected), rate-limited per IP and per form, and protected by the same personal-data safeguards as every other trigger. A submitter sees only a short confirmation with a reference id — never any run internals. The runs list shows the Form source and the submission time; the run detail lists the submitted field names (values stay redacted). For the full endpoint contract see the Form triggers API.
Error handling — retries and on-error policies
Agent and Deliver steps can recover from transient failures without failing the whole run. In the step's config panel, the Error handling section offers:
- Retry attempts (1-5) with a fixed delay (0-30 seconds) between attempts. Only transient failures retry — a provider outage or timeout, or a failed webhook delivery. Content blocks (for example a PII block) and configuration errors are never retried.
- If this step fails — what happens when the last attempt still fails:
- Stop the run (default): the run halts.
- Continue: the step is marked as absorbed ("continued") and the workflow proceeds with the next step. Later steps cannot reference this step's output (the builder blocks such references at publish).
- Error branch: the step gains a second outgoing path — a catch chain that runs only when the step ultimately fails (for example: deliver the report, and on failure notify an admin instead). On success the catch chain is skipped. Catch chains are linear (no conditions or loops inside).
The run detail shows every attempt as its own row with its own cost, an attempt badge (for example "attempt 2/3"), and the final disposition — so retried and absorbed steps stay fully auditable.
Monitoring runs
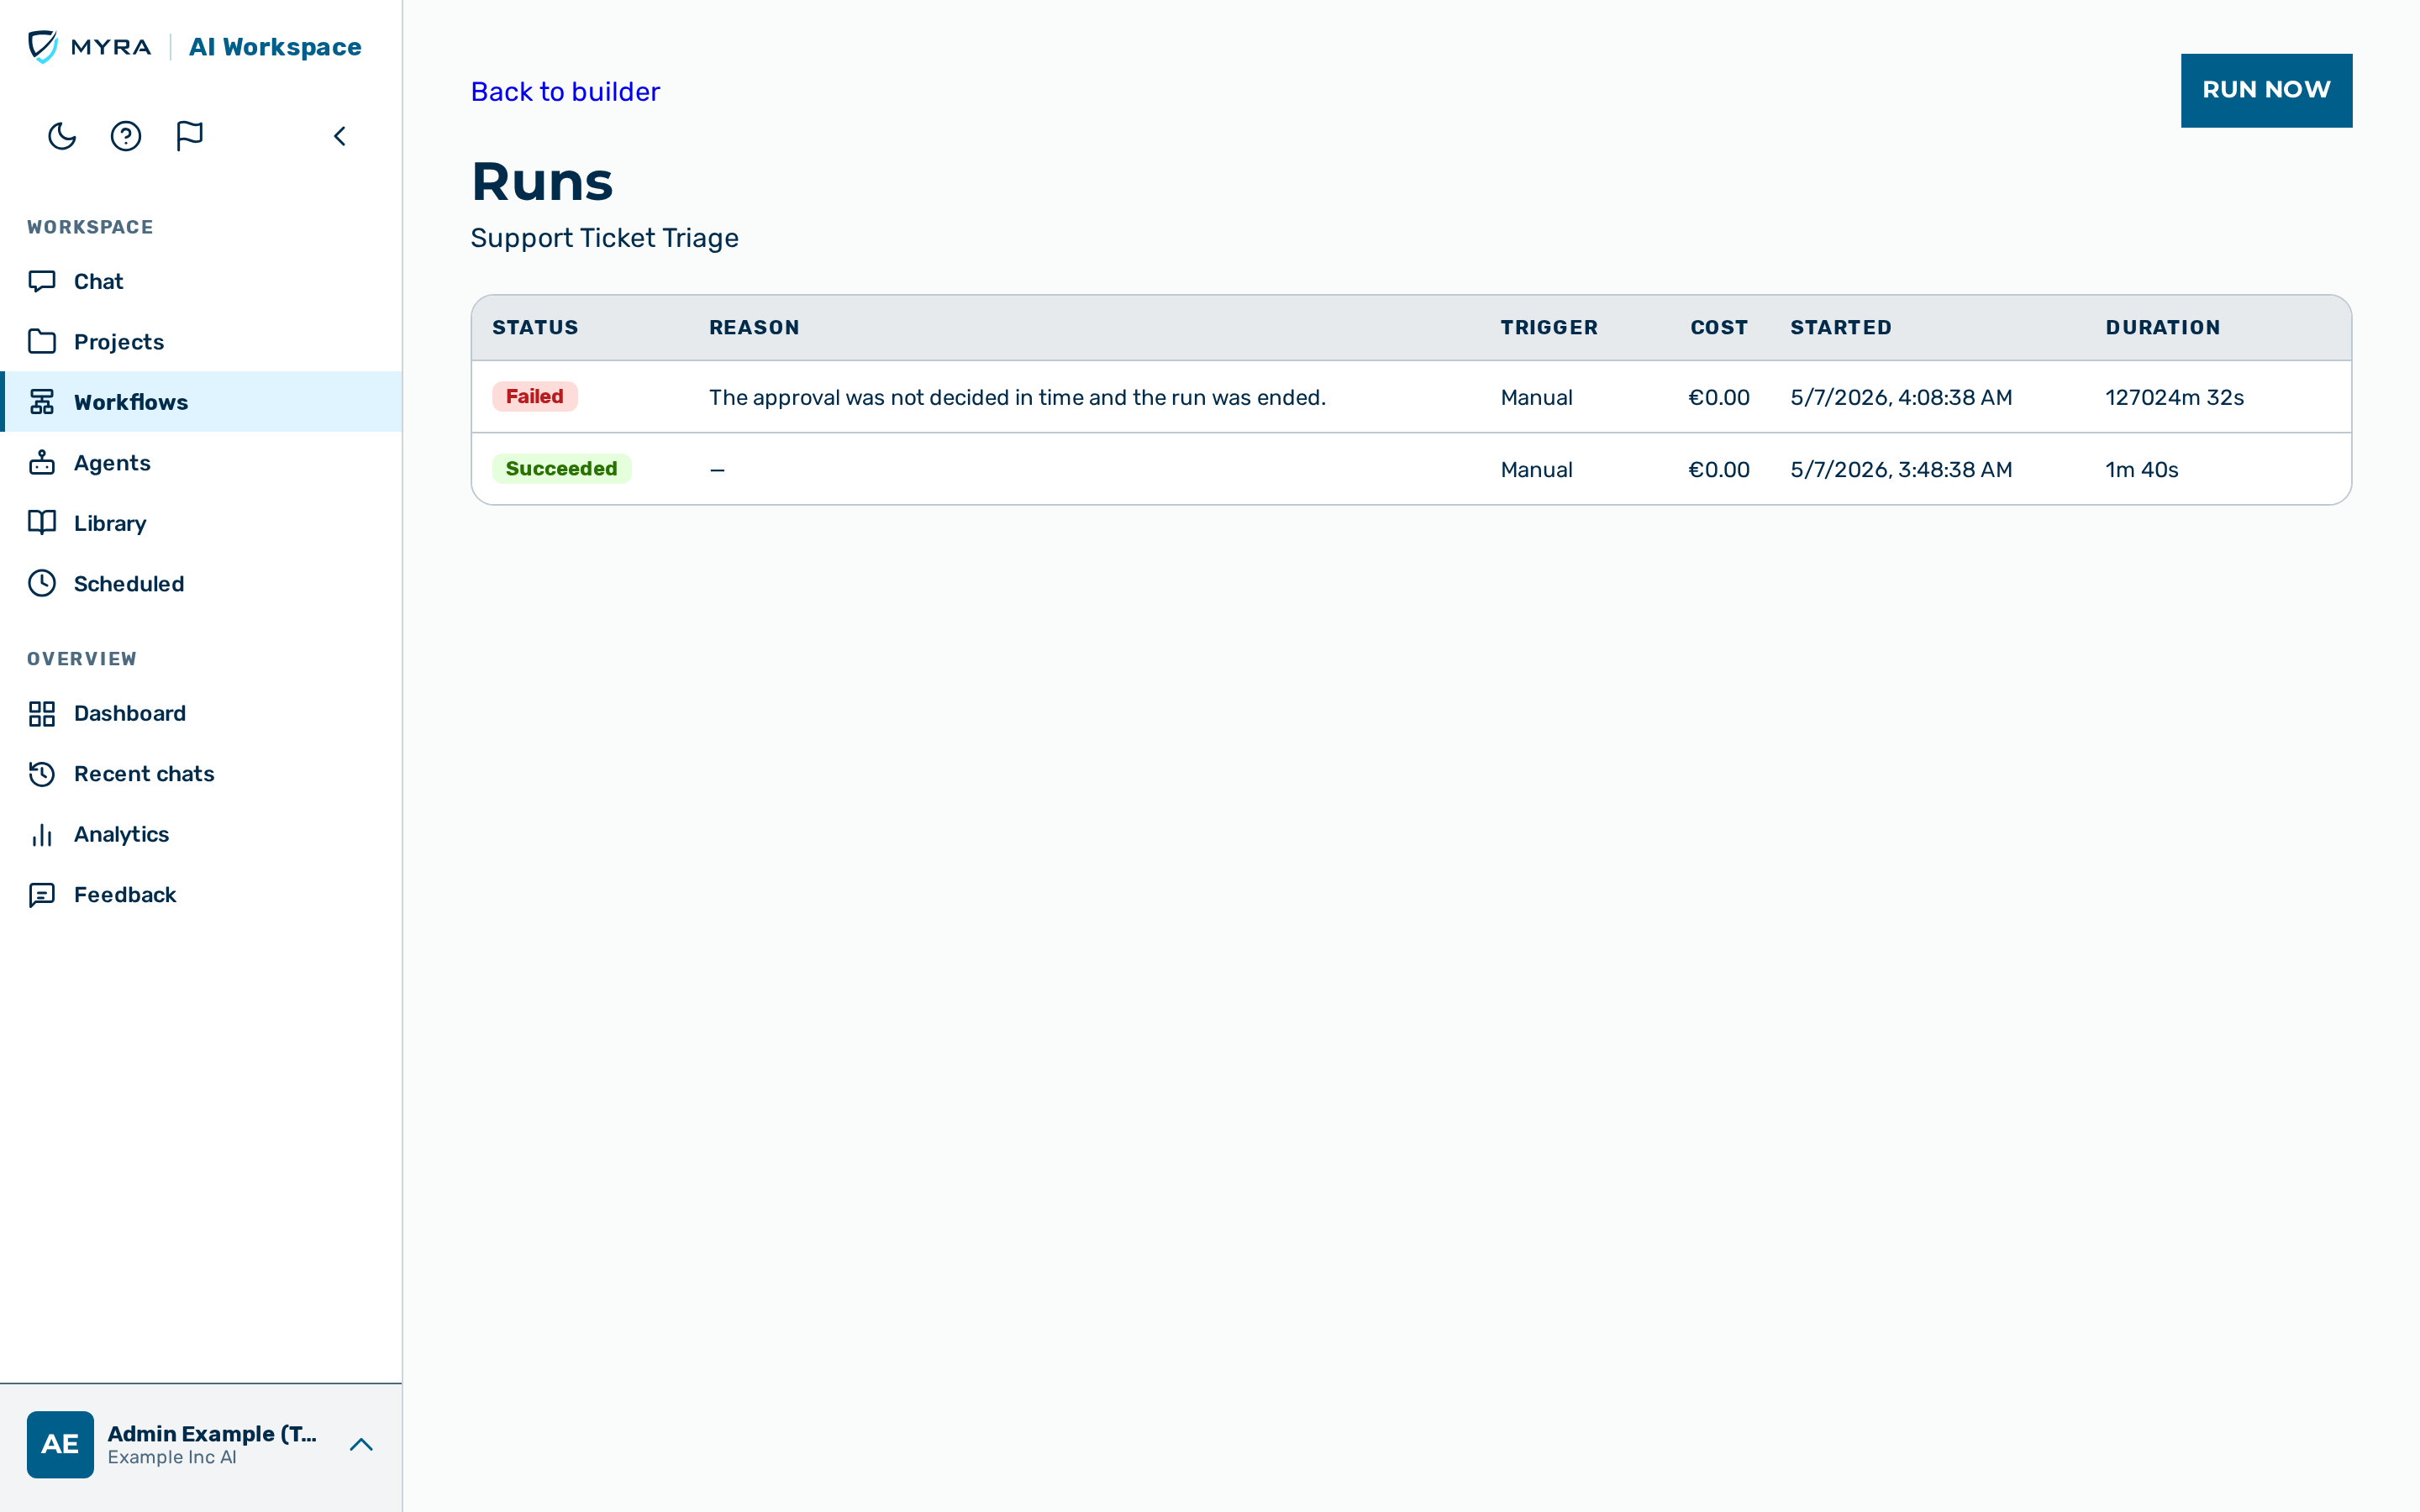 The Runs list for one workflow.
The Runs button opens the run history for the workflow. Every authoring user can view
runs, but because a run's detail can expose the model output of every step (possibly
personal data), the history is scoped to your own runs: you see the runs you triggered
(and, for a workflow you own, its scheduled, webhook, and form runs). An admin,
tenant_admin, or ki_manager sees every run of the workflow as the audit view.
The runs list shows, per run, the Status, the Trigger kind, the Cost, when it Started, and its Duration. The Run now button starts a fresh run and opens its live detail view.
Run detail
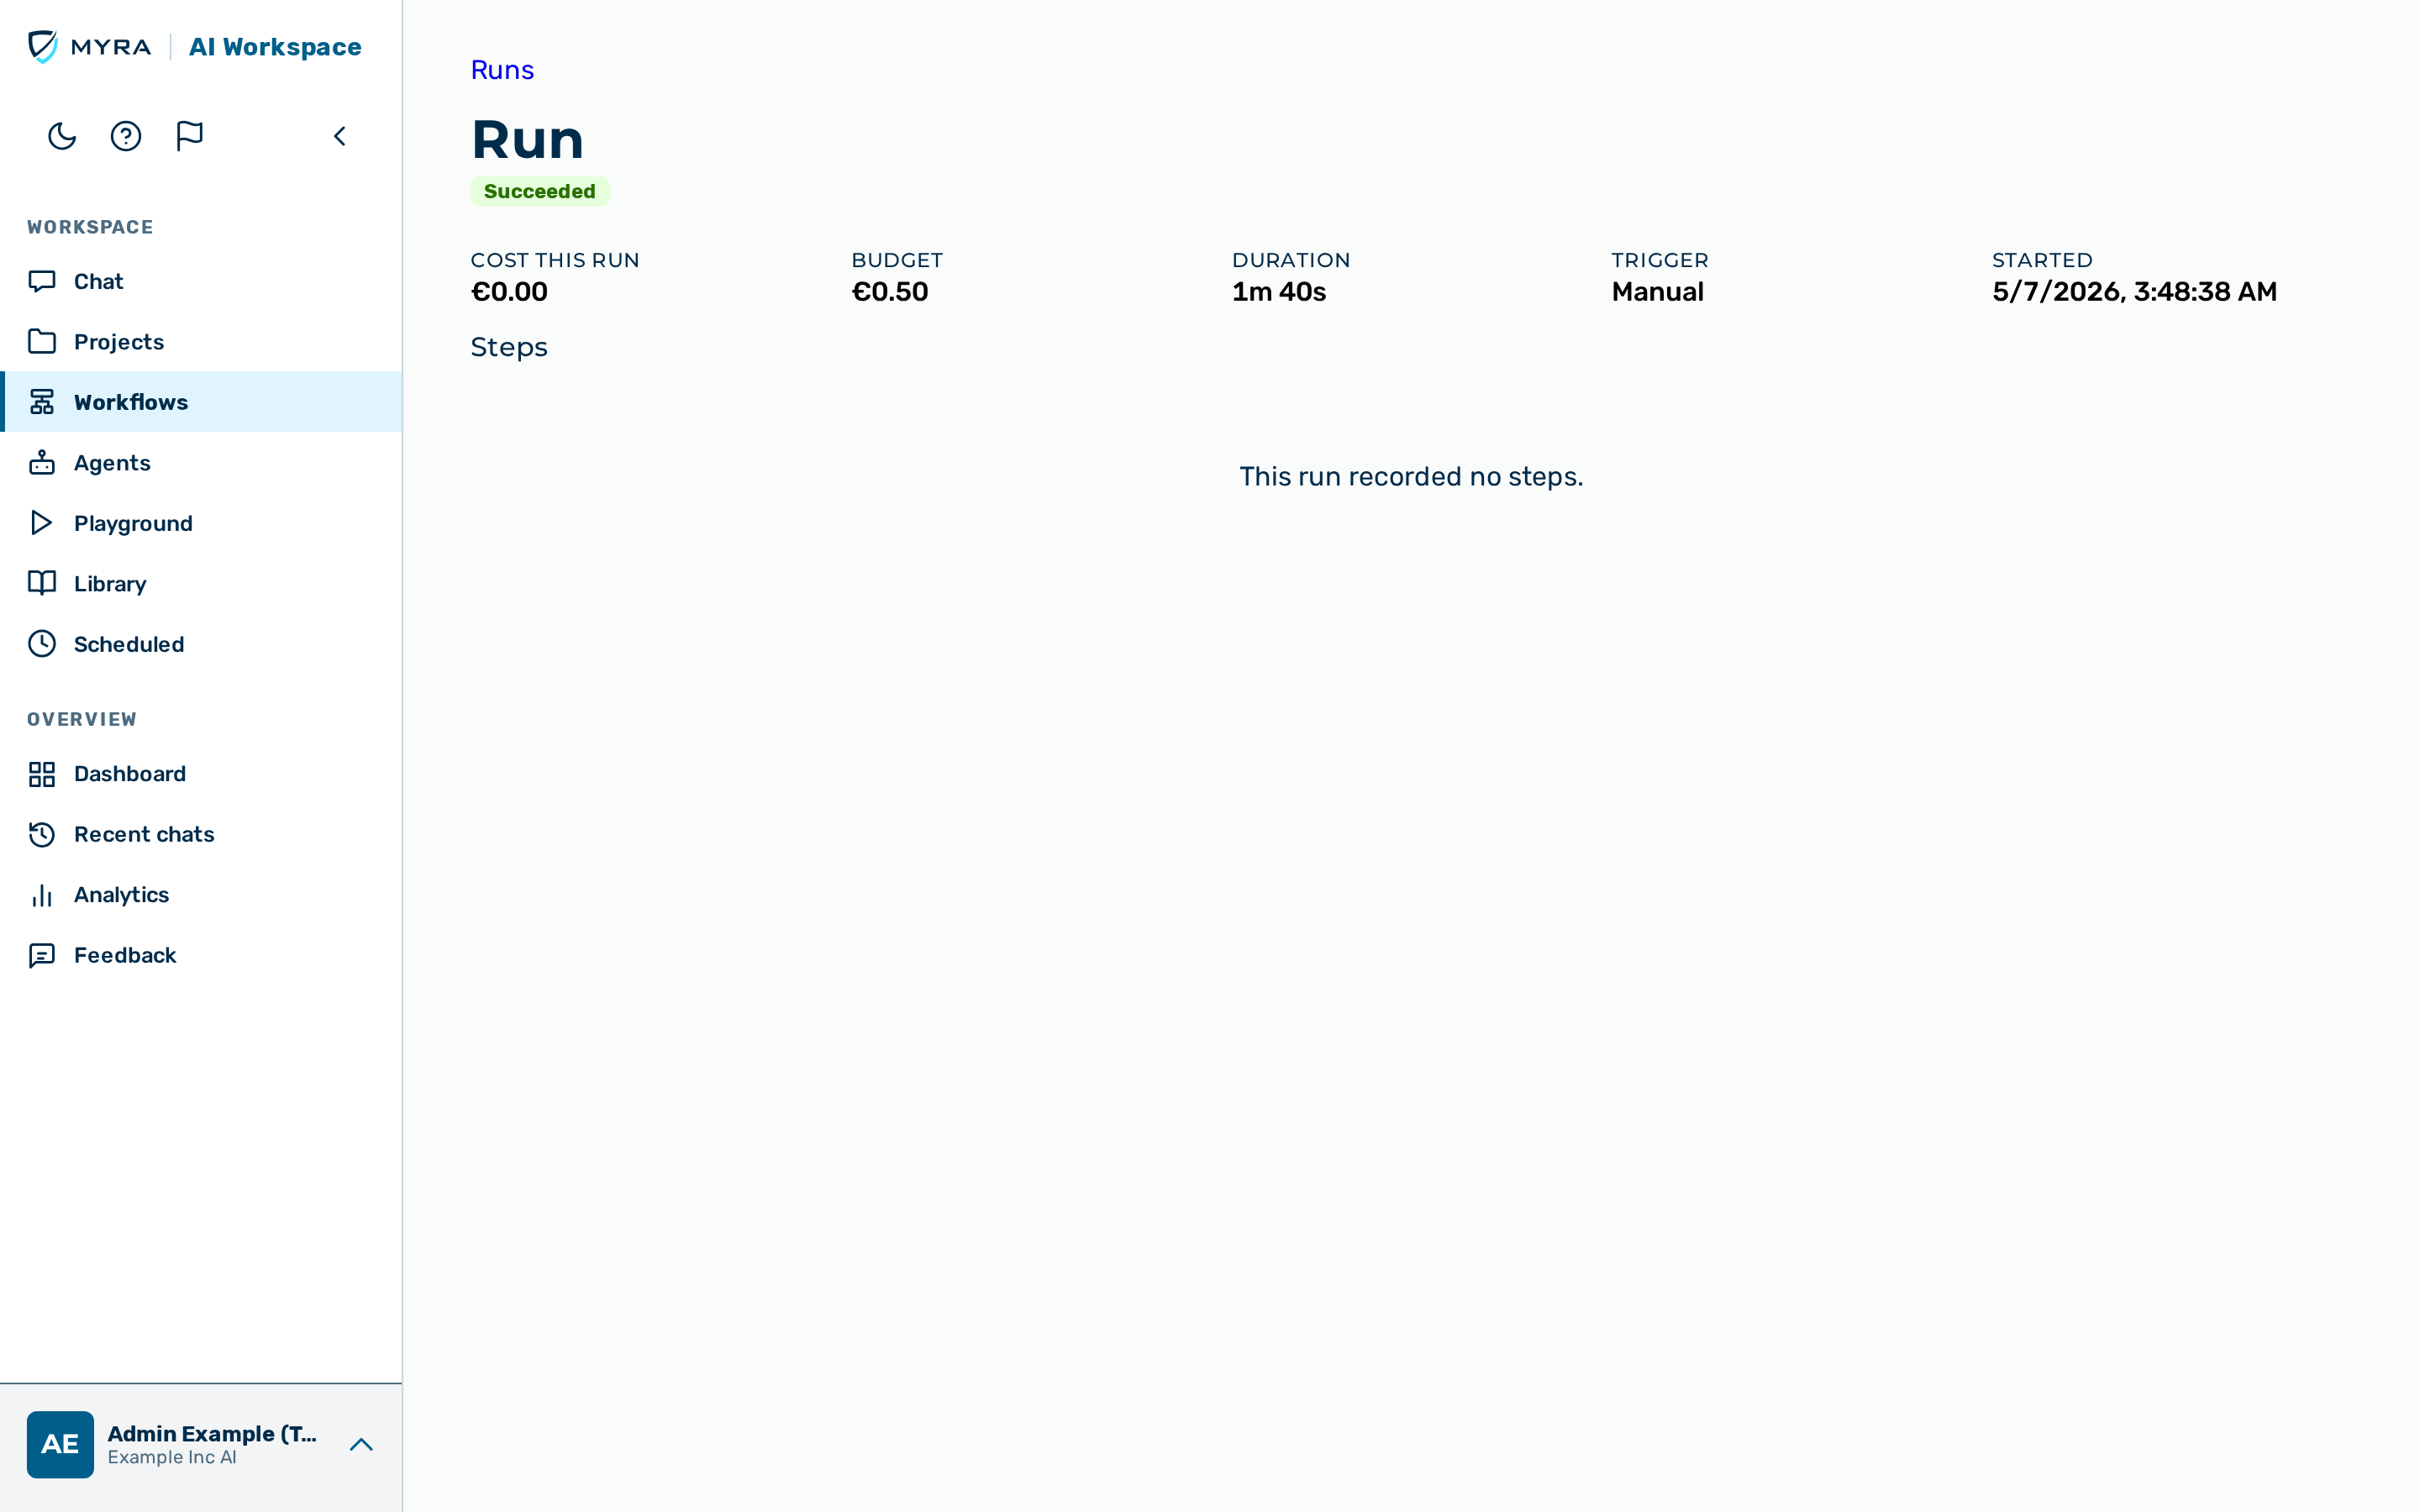 The run-detail view.
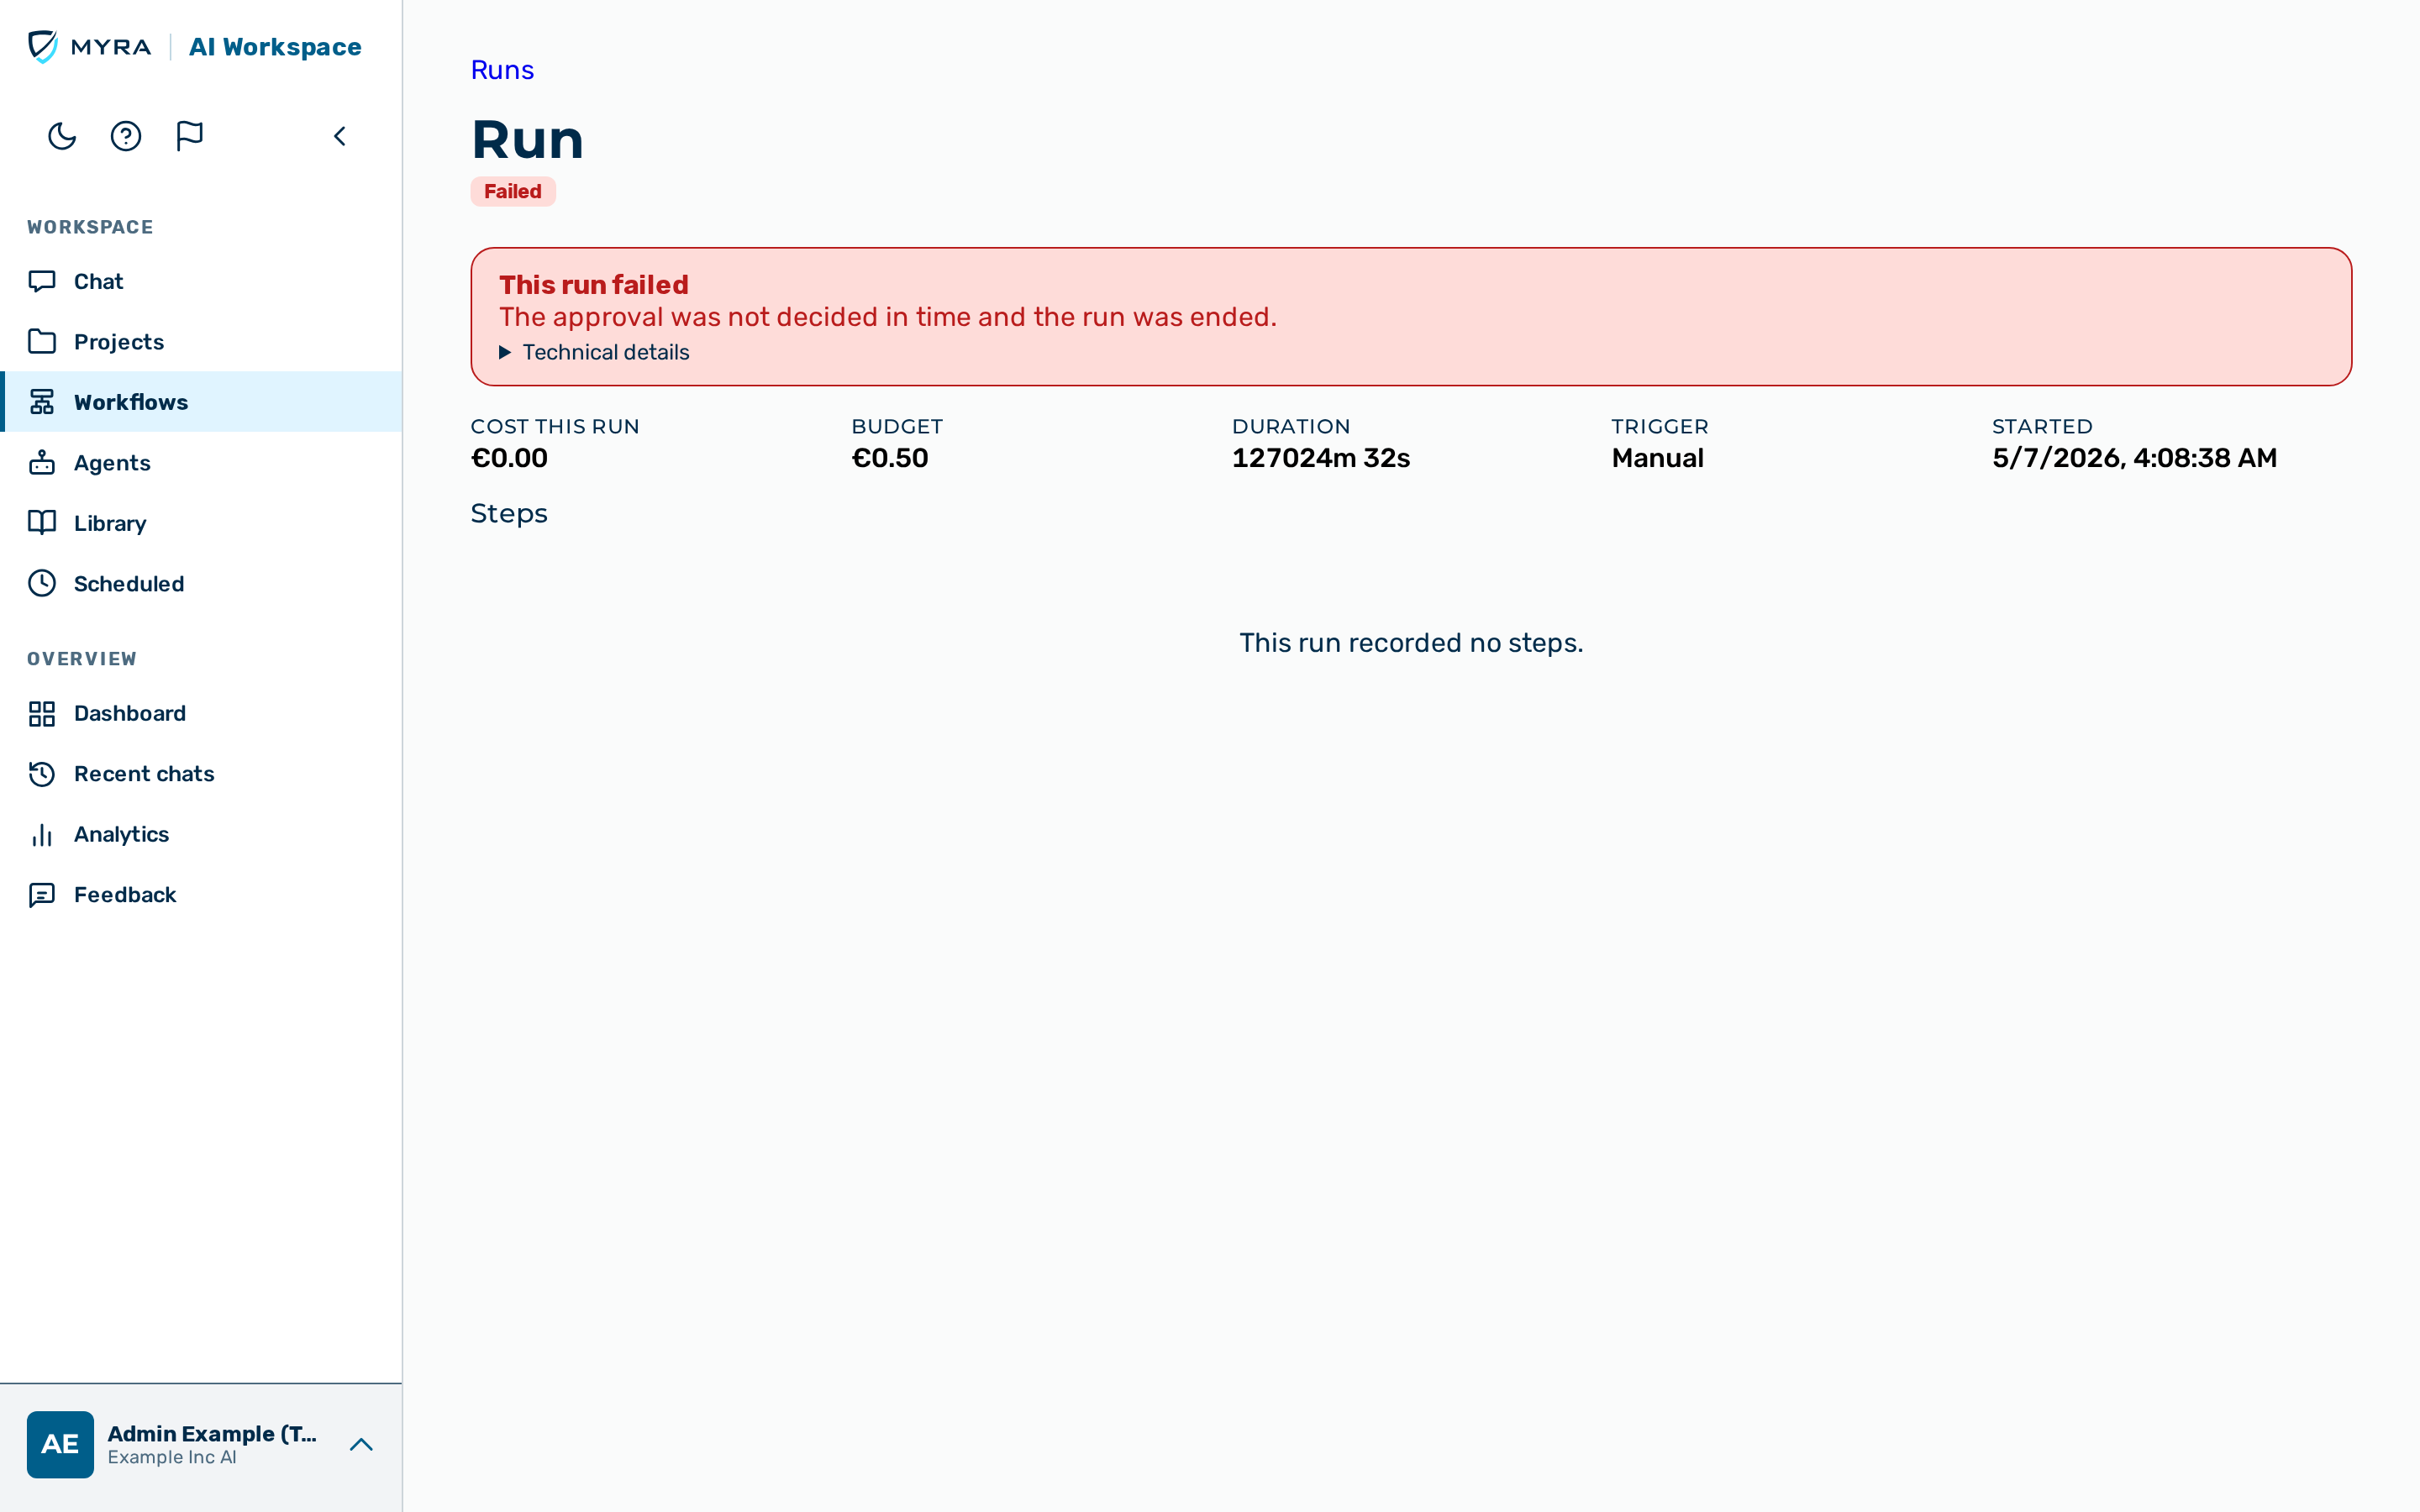
The run-detail view shows the run status, its cost against the budget, its duration, the trigger kind, and the per-step list with each step's cost, tokens, duration, and output. While a run is in flight, the view updates live and shows a Live — updating… indicator; if updates pause, a Refresh button re-arms it. If an in-flight run records no observable progress (no status or step change) for about 32 minutes — longer than any single step can legitimately take — an amber hint appears next to the live indicator: a queued run notes that runs normally start within seconds and the scheduler may be delayed, a claimed run notes when activity was last recorded and that the run may be stalled and can be cancelled.
Two guardrail outcomes are shown as protective states rather than as failures:
- Delivery blocked — personal data detected — the run handled personal data, so external delivery was refused. The status reads Blocked — data protection. For email deliveries the recipient receives a content-free notification, and the deliver step in the run detail records whether that notification was sent.
- Stopped — cost limit — the run reached its run budget and was stopped at a step boundary.
A run that is waiting at an approval step shows Waiting for approval. A genuine failure shows This run failed with an expandable technical detail. The trigger step's stored input may contain personal data and is never shown in cleartext on this review view; agent-step outputs arrive already masked and stay visible.
Cancelling a run
 Cancelling an in-flight run.
An in-flight run can be cancelled by its owner or by an administrator, from either the runs list or the run-detail view.
Proceed as follows to cancel a run:
- Click on the Cancel button on the in-flight run.
-> The run stops at its next step boundary before any further delivery, and its status becomes Cancelled. A run that has already finished cannot be cancelled.
Unsupported layouts
If a workflow's stored graph is not a shape this editor understands — for example, it was created by a newer editor — the builder shows a read-only Unsupported layout banner and refuses to autosave, so it never rewrites a graph it cannot faithfully round-trip.