Pricing
The Pricing area holds everything that decides what Myra sells and for how much: the product catalog, the self-serve plans, the voucher codes, the affiliate partners with their payouts, and the platform-wide billing switches.
The area is visible only to platform administrators. Each tab is gated by the permission that its
endpoints enforce. All of these permissions are platform permissions, so today only the admin role
holds them.
| Tab | Route | Permission |
|---|---|---|
| Catalog | /pricing/catalog |
PLANS_MANAGE |
| Plans | /pricing/plans |
PLANS_MANAGE |
| Vouchers | /pricing/vouchers |
VOUCHERS_MANAGE |
| Partners | /pricing/partners |
PARTNERS_MANAGE |
| Partner Payouts | /pricing/partner-payouts |
PARTNERS_MANAGE |
| Billing switches | /pricing/billing |
SETTINGS_MANAGE |
A user without the permission is redirected to the dashboard. The old routes /plans, /catalog and
/vouchers redirect to the matching tab.
Catalog
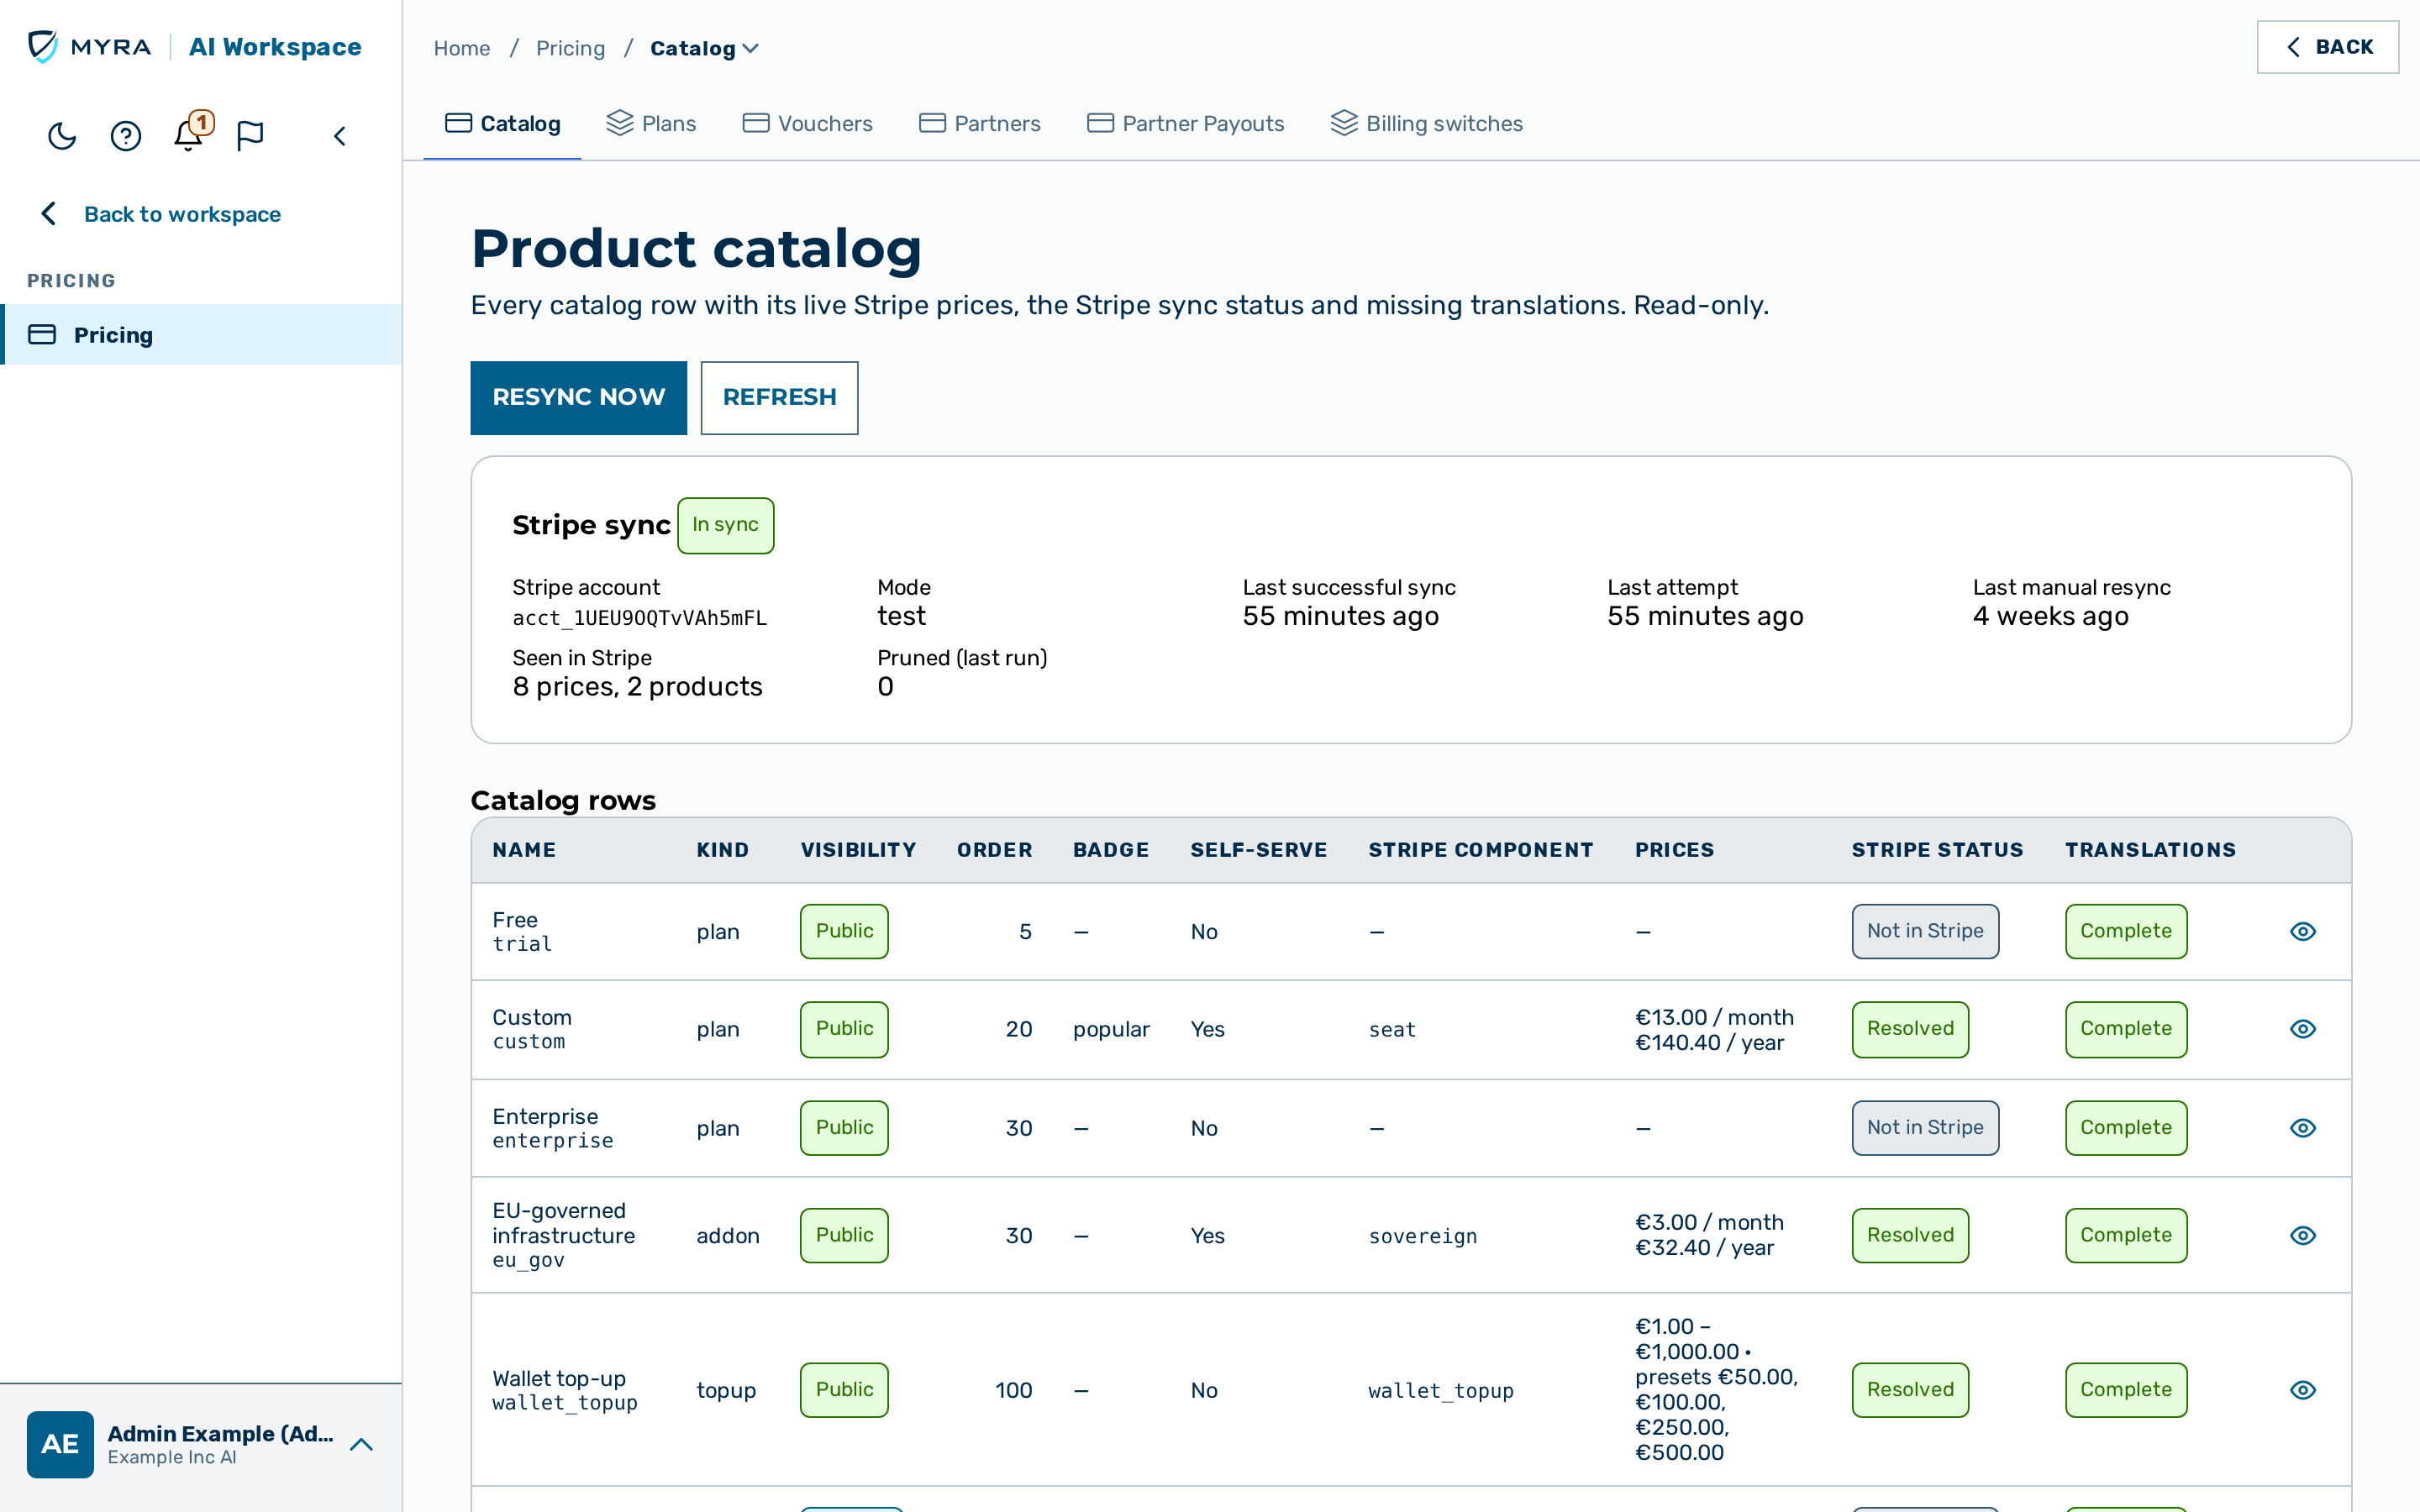
The Catalog tab (Product catalog) shows every catalog row with its live Stripe prices, the Stripe sync status and missing translations. The tab is read-only.
The Stripe sync card shows the Stripe account, the mode, the last successful sync, the last attempt and the result (In sync, Partially synced, Refused, Failed or Not synced yet). The Catalog rows table has the columns Name, Kind, Visibility, Order, Badge, Self-serve, Stripe component, Prices, Stripe status and Translations. The Details action of a row opens the grants, the entitlement, the Stripe price slots and offers, and the top-up configuration.
The following actions are available:
- Refresh reads the sync status again.
- Resync now queues a sync run. The run starts within a minute. A second resync within one minute is refused.
- Approve prune… appears when the last sync stopped at the prune breaker. The approval lets the next run remove prices from the catalog mirror and stays armed for 10 minutes.
- Revoke approval disarms an armed prune approval.
Approving a prune
⚠️ Caution: After the prune, a bound plan can have no prices and cannot be bought until its prices are tagged again in Stripe.
Proceed as follows to approve a prune:
- Click on the Approve prune… button.
- The Approve pruning the Stripe mirror dialog opens.
- Enter
prunein the confirmation text field. - Click on the Approve and resync button.
-> The notice Resync with prune approval queued — it runs within a minute. appears. The sync card shows Prune approval armed until .
The catalog rows, the accepted input and the sync rules are described in the Product catalog API.
Plans
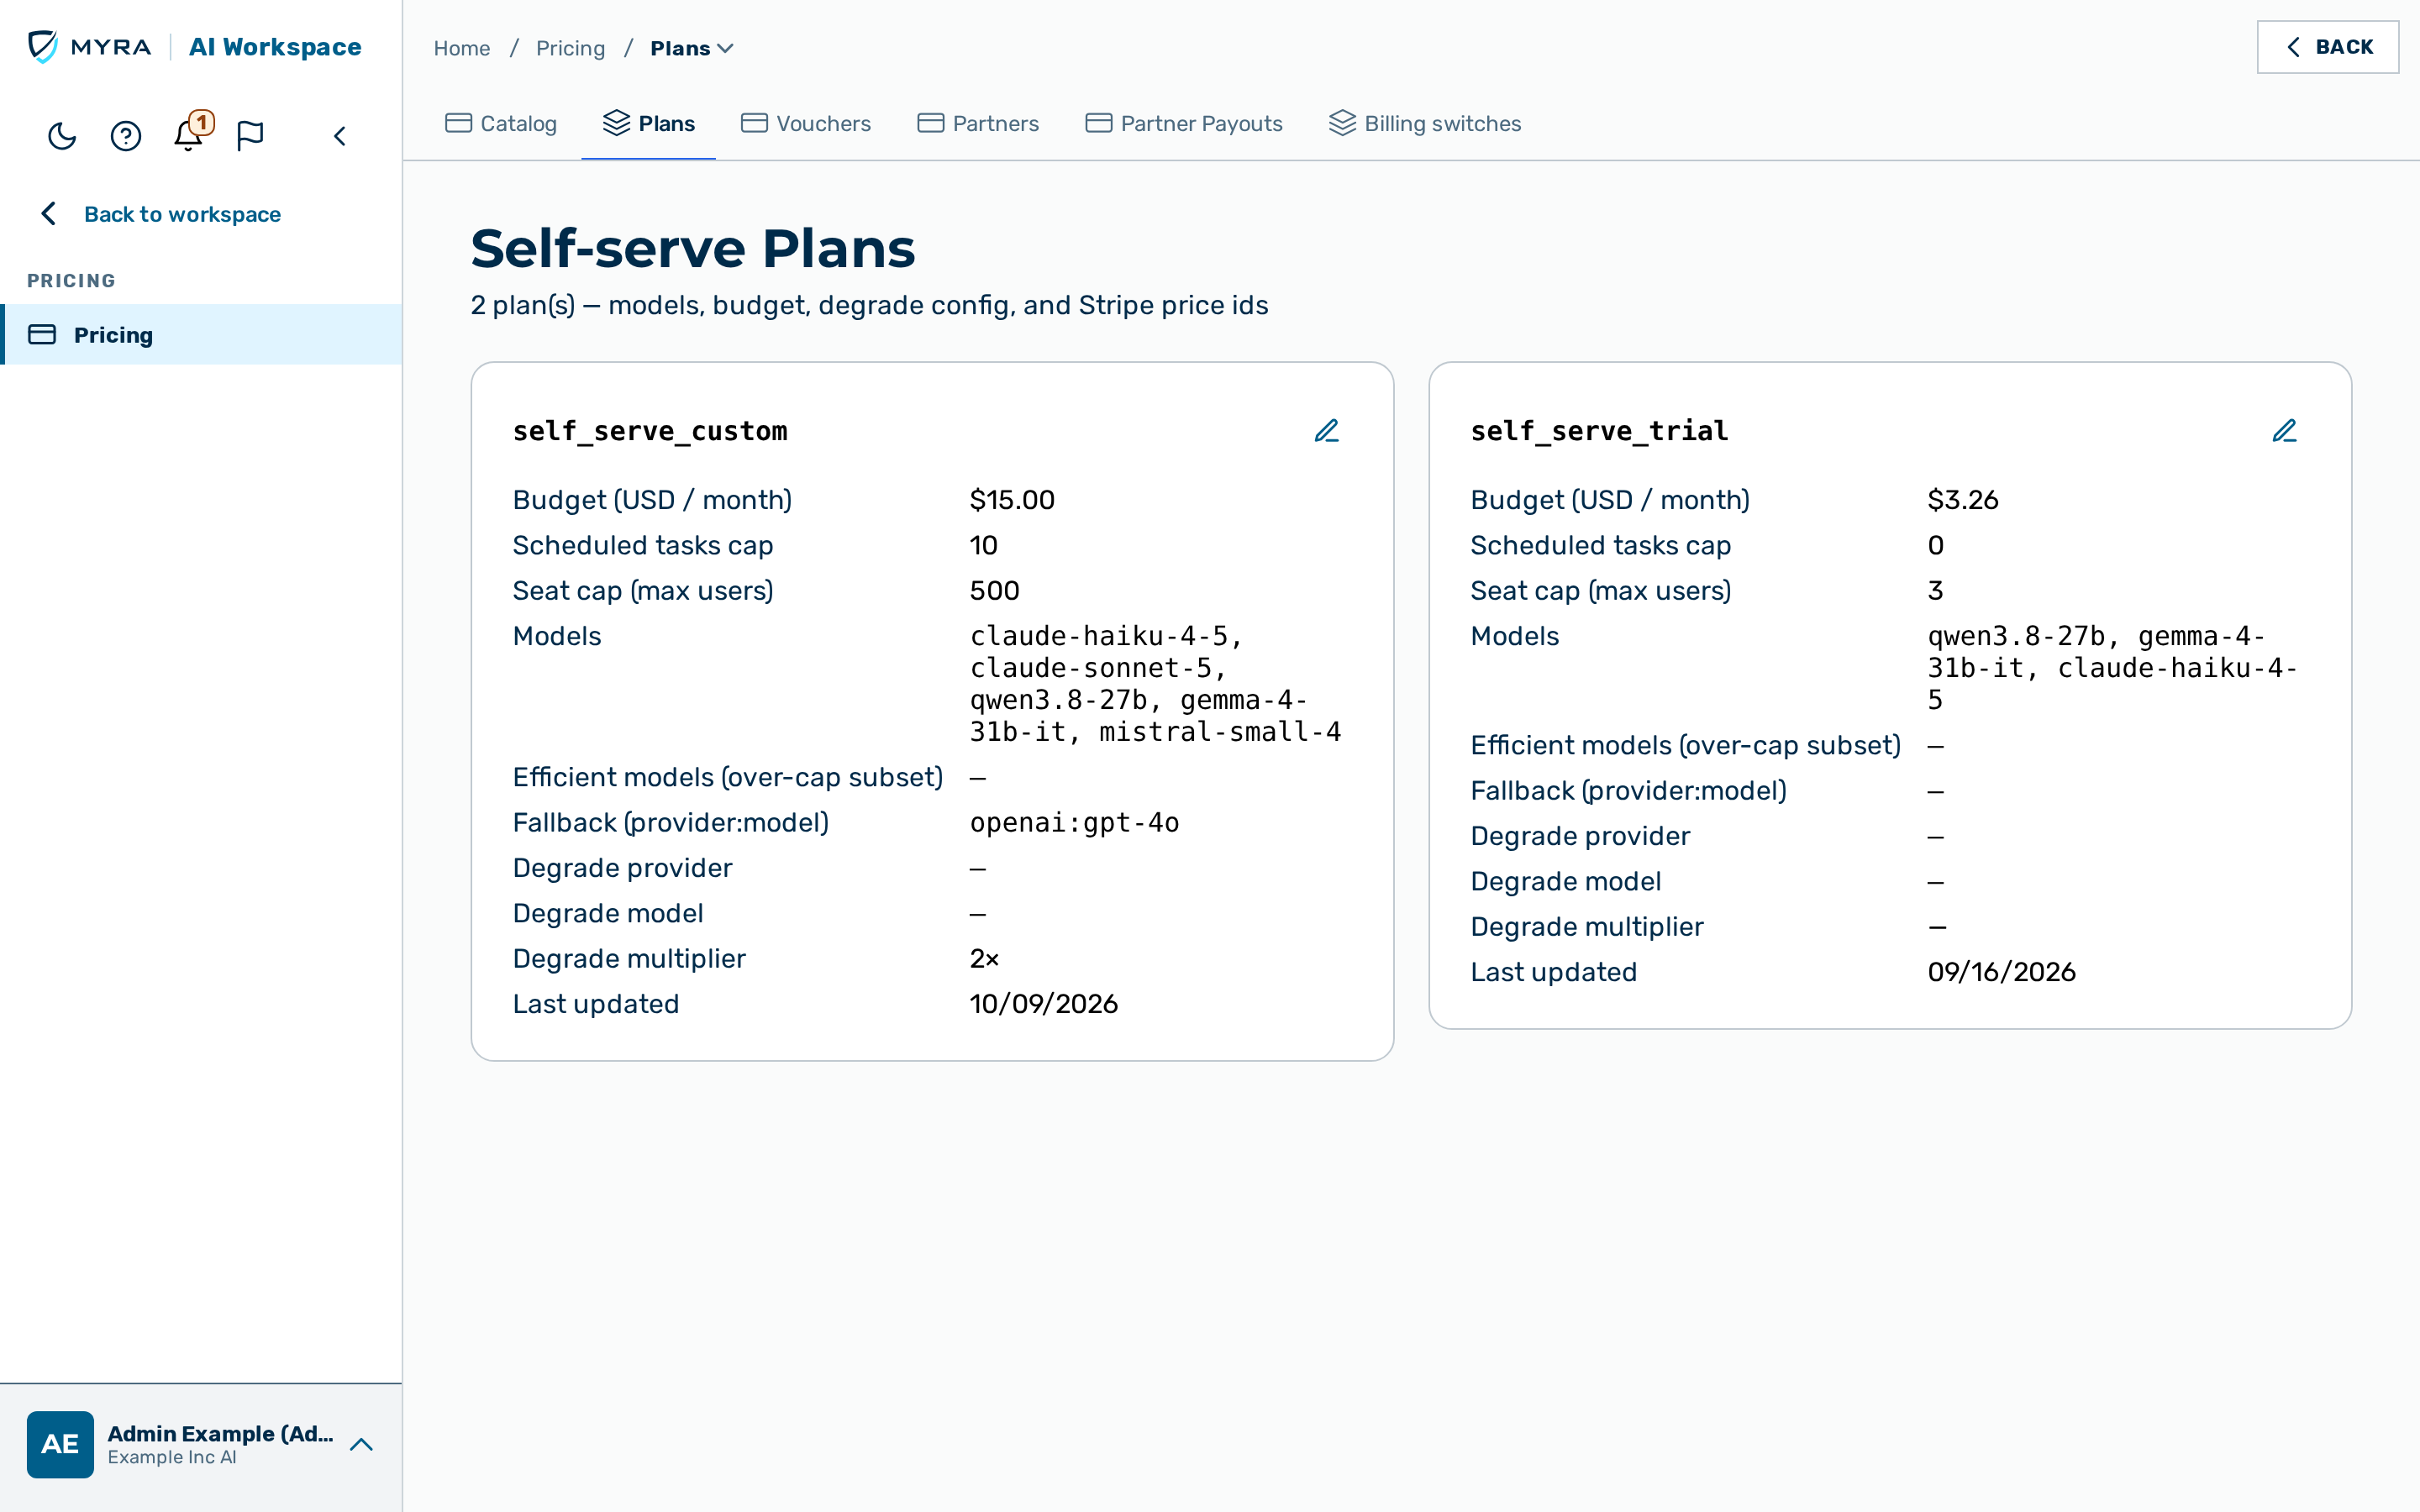
The Plans tab (Self-serve Plans) shows one card per self-serve plan. Each card lists Budget (USD / month), Scheduled tasks cap, Seat cap (max users), Models, Efficient models (over-cap subset), Fallback (provider:model), Degrade provider, Degrade model, Degrade multiplier and Last updated. Plans are not created or deleted on this tab; the plans exist as rows of the plan configuration. Prices come from the product catalog.
Editing a plan
The following rules apply to the plan fields:
- Budget (USD / month) is a number greater than or equal to 0.
- Scheduled tasks cap is a whole number of at least 1.
- Seat cap (max users) is a whole number between 1 and 10000.
- Models and Efficient models (over-cap subset) hold one model ID per line.
- Fallback (provider:model) has the form
provider:model, for examplemyra:qwen3.8-27b. Leave the field empty to disable the fallback. - Degrade provider and Degrade model are set together or left empty together.
- Degrade multiplier is greater than 1.0 and at most 10.0. Leave the field empty to disarm the degrade.
Proceed as follows to edit a plan:
- Click on the Edit action on the card of the plan.
- The Edit plan:
dialog opens.
- The Edit plan:
- Change the required fields.
- Click on the Save Changes button.
- The dialog closes.
-> The card shows the changed values.
If the dialog shows Another plan edit is in progress. Please retry in a moment., repeat the save. If the dialog shows This field no longer exists — reload the page and save again., reload the page. The server-side rules are described in the Self-serve plan config API.
Vouchers
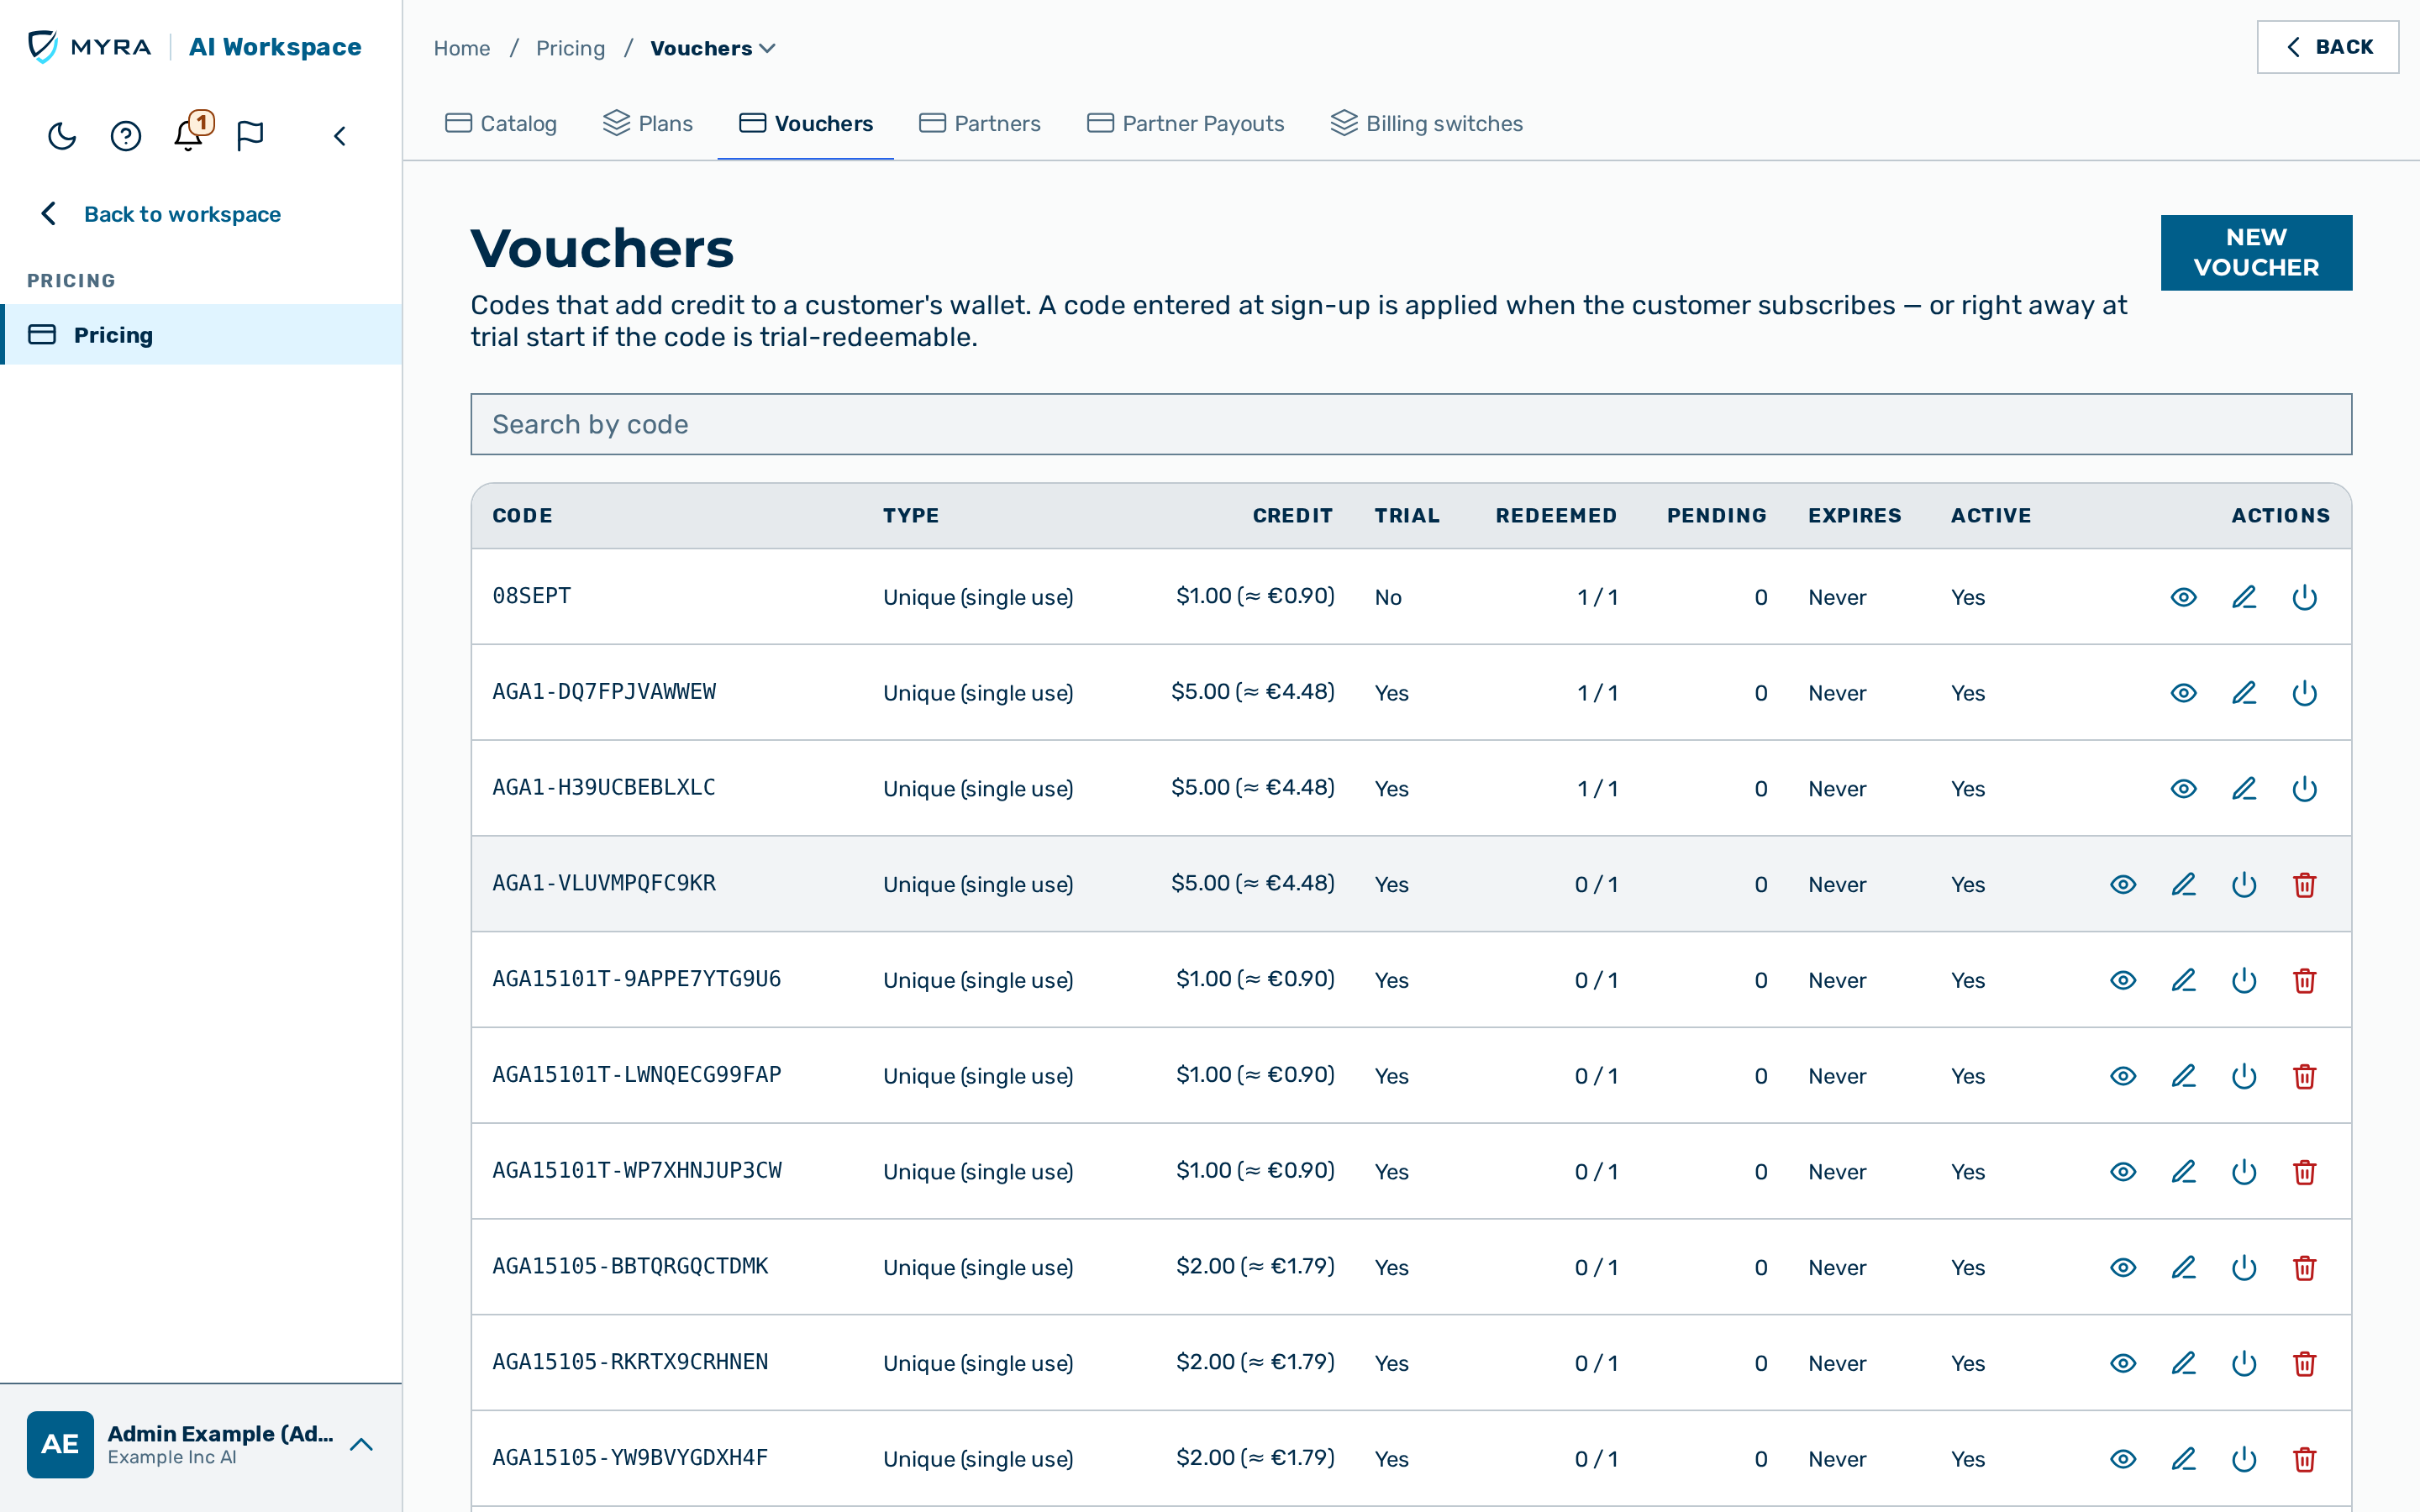
The Vouchers tab lists the codes that add credit to the wallet of a customer. A code entered at sign-up is applied when the customer subscribes, or at trial start if the code is trial-redeemable.
The list has the columns Code, Type, Credit, Trial, Redeemed, Pending, Expires, Active and Actions. Search by code filters the list. The type is Unique (single use) or Generic (campaign). Pending counts trial customers that hold the code and have not subscribed yet.
The Campaign series section lists series of single codes for printed material, with the columns Name, Pattern, Codes, Credit per code, Status, Trial-redeemable and Created.
The following rules apply to vouchers:
- A code has between 4 and 64 characters: letters, digits and
_ - ! ? .. - The credit is between 0.01 and 10000 USD.
- The amount fields accept plain numbers only, with a decimal point or a decimal comma, for example
12.5or12,5. Exponent notation (1e3), hexadecimal numbers and thousands separators are refused with a message at the field, and nothing is sent. A value that could be read two ways, such as1.500or10,000, is refused as ambiguous: write1.5or1.5000(or10000) instead. A credit has at most 6 decimal places and 15 significant digits. An empty amount shows Enter an amount. on the series form and Enter a credit amount. on the single voucher form. - A unique code is always limited to one redemption. A generic code has a maximum number of redemptions between 1 and 1000000.
- The expiry is at least 24 hours away. A voucher without expiry never expires.
- A code that is redeemable during a free trial has at least 11 characters and a credit between 1 and 100 USD.
- The credit is added to the wallet once. A later change of credit, limit or expiry applies to future redemptions only. The code and the type cannot be changed.
Creating a voucher
Proceed as follows to create a voucher:
- Click on the New voucher button.
- The New voucher dialog opens with the Single code tab.
- Enter the code in the Code text field. For example:
SPRING2027 - Select the type in the Type drop-down list.
- Enter the amount in the Credit (USD) text field.
- If you selected Generic (campaign), enter the limit in the Max redemptions text field.
- If required, select the date in the Expires (optional) field.
- If required, select the Can be redeemed during a free trial check box.
- Click on the Create voucher button.
- The dialog closes.
-> The new voucher appears in the list of vouchers.
If a field shows an error, correct the named field. For example, This code already exists. Choose a different one.
Creating a campaign series
A campaign series mints many single codes at once. Every code of a series shares one amount and one set of terms.
Proceed as follows to create a campaign series:
- Click on the New voucher button.
- The New voucher dialog opens.
- Click on the Campaign batch tab.
- Enter the name in the Name text field. For example:
Web Summit 2027 - Enter the pattern in the Code pattern text field. Each
#is one random character. For example:SCCON_!#####- The preview shows an example code and the maximum number of codes.
- Enter the number in the How many codes text field.
- Enter the amount in the Credit per code text field.
- Select the type in the Code type drop-down list.
- If you selected Generic (campaign), enter the limit in the Redemptions per code text field.
- If required, select the Can be redeemed during a free trial check box.
- Click on the Create and generate button.
-> The new series appears in the list of campaign series with the status Ready.
A series holds between 1 and 10,000 codes. If the generation stops early, the series shows the status
Generating. Click on the Resume generation button to finish it. A trial-redeemable series
needs at least 11 # in its pattern and a credit between 1 and 100 USD per code.
Downloading series codes
⚠️ Caution: The codes are bearer codes. Anyone who holds a code can redeem it. Every download is recorded against your account.
Proceed as follows to download the codes of a series:
- Click on the Download codes button in the row of the series.
- A confirmation dialog opens.
- Confirm the download.
-> The file voucher-series-<id>.csv is saved.
Editing a voucher
Proceed as follows to edit a voucher:
- Click on the Edit action in the row of the voucher.
- The Edit voucher
dialog opens.
- The Edit voucher
- Change the Credit (USD), Max redemptions, Expires (optional) or Can be redeemed during a free trial fields.
- Click on the Save button.
- The dialog closes.
-> The list shows the changed voucher.
The limit cannot be lower than the number of redemptions already granted.
Deactivating a voucher
Proceed as follows to deactivate a voucher:
- Click on the Deactivate action in the row of the voucher.
- A confirmation dialog opens.
- Confirm the deactivation.
-> The Active column of the voucher shows No. The code can no longer be redeemed.
Click on the Reactivate action to make the code redeemable again. Click on the Deactivate series button to deactivate all active codes of a campaign series. Redemptions that were already made are kept.
Deleting a voucher
⚠️ Caution: The deletion cannot be undone.
A voucher is deleted only while it has never been redeemed and no trial customer holds it. The Delete action is shown only in this case. Deactivate every other voucher instead.
Proceed as follows to delete a voucher:
- Click on the Delete action in the row of the voucher.
- A confirmation dialog opens.
- Confirm the deletion.
-> The voucher disappears from the list of vouchers.
A campaign series without redemptions is deleted with the Delete series button in the same way. The deletion removes all unused codes of the series.
Viewing redemptions
Click on the View redemptions action in the row of a voucher. The Redemptions — dialog
lists the columns Account, Workspace, Credit and Redeemed. Search by account
filters the list.
The voucher rules, the accepted input and the rejection codes are described in the Vouchers API. How a customer enters a code is described in Starting a trial with a voucher code.
Partners
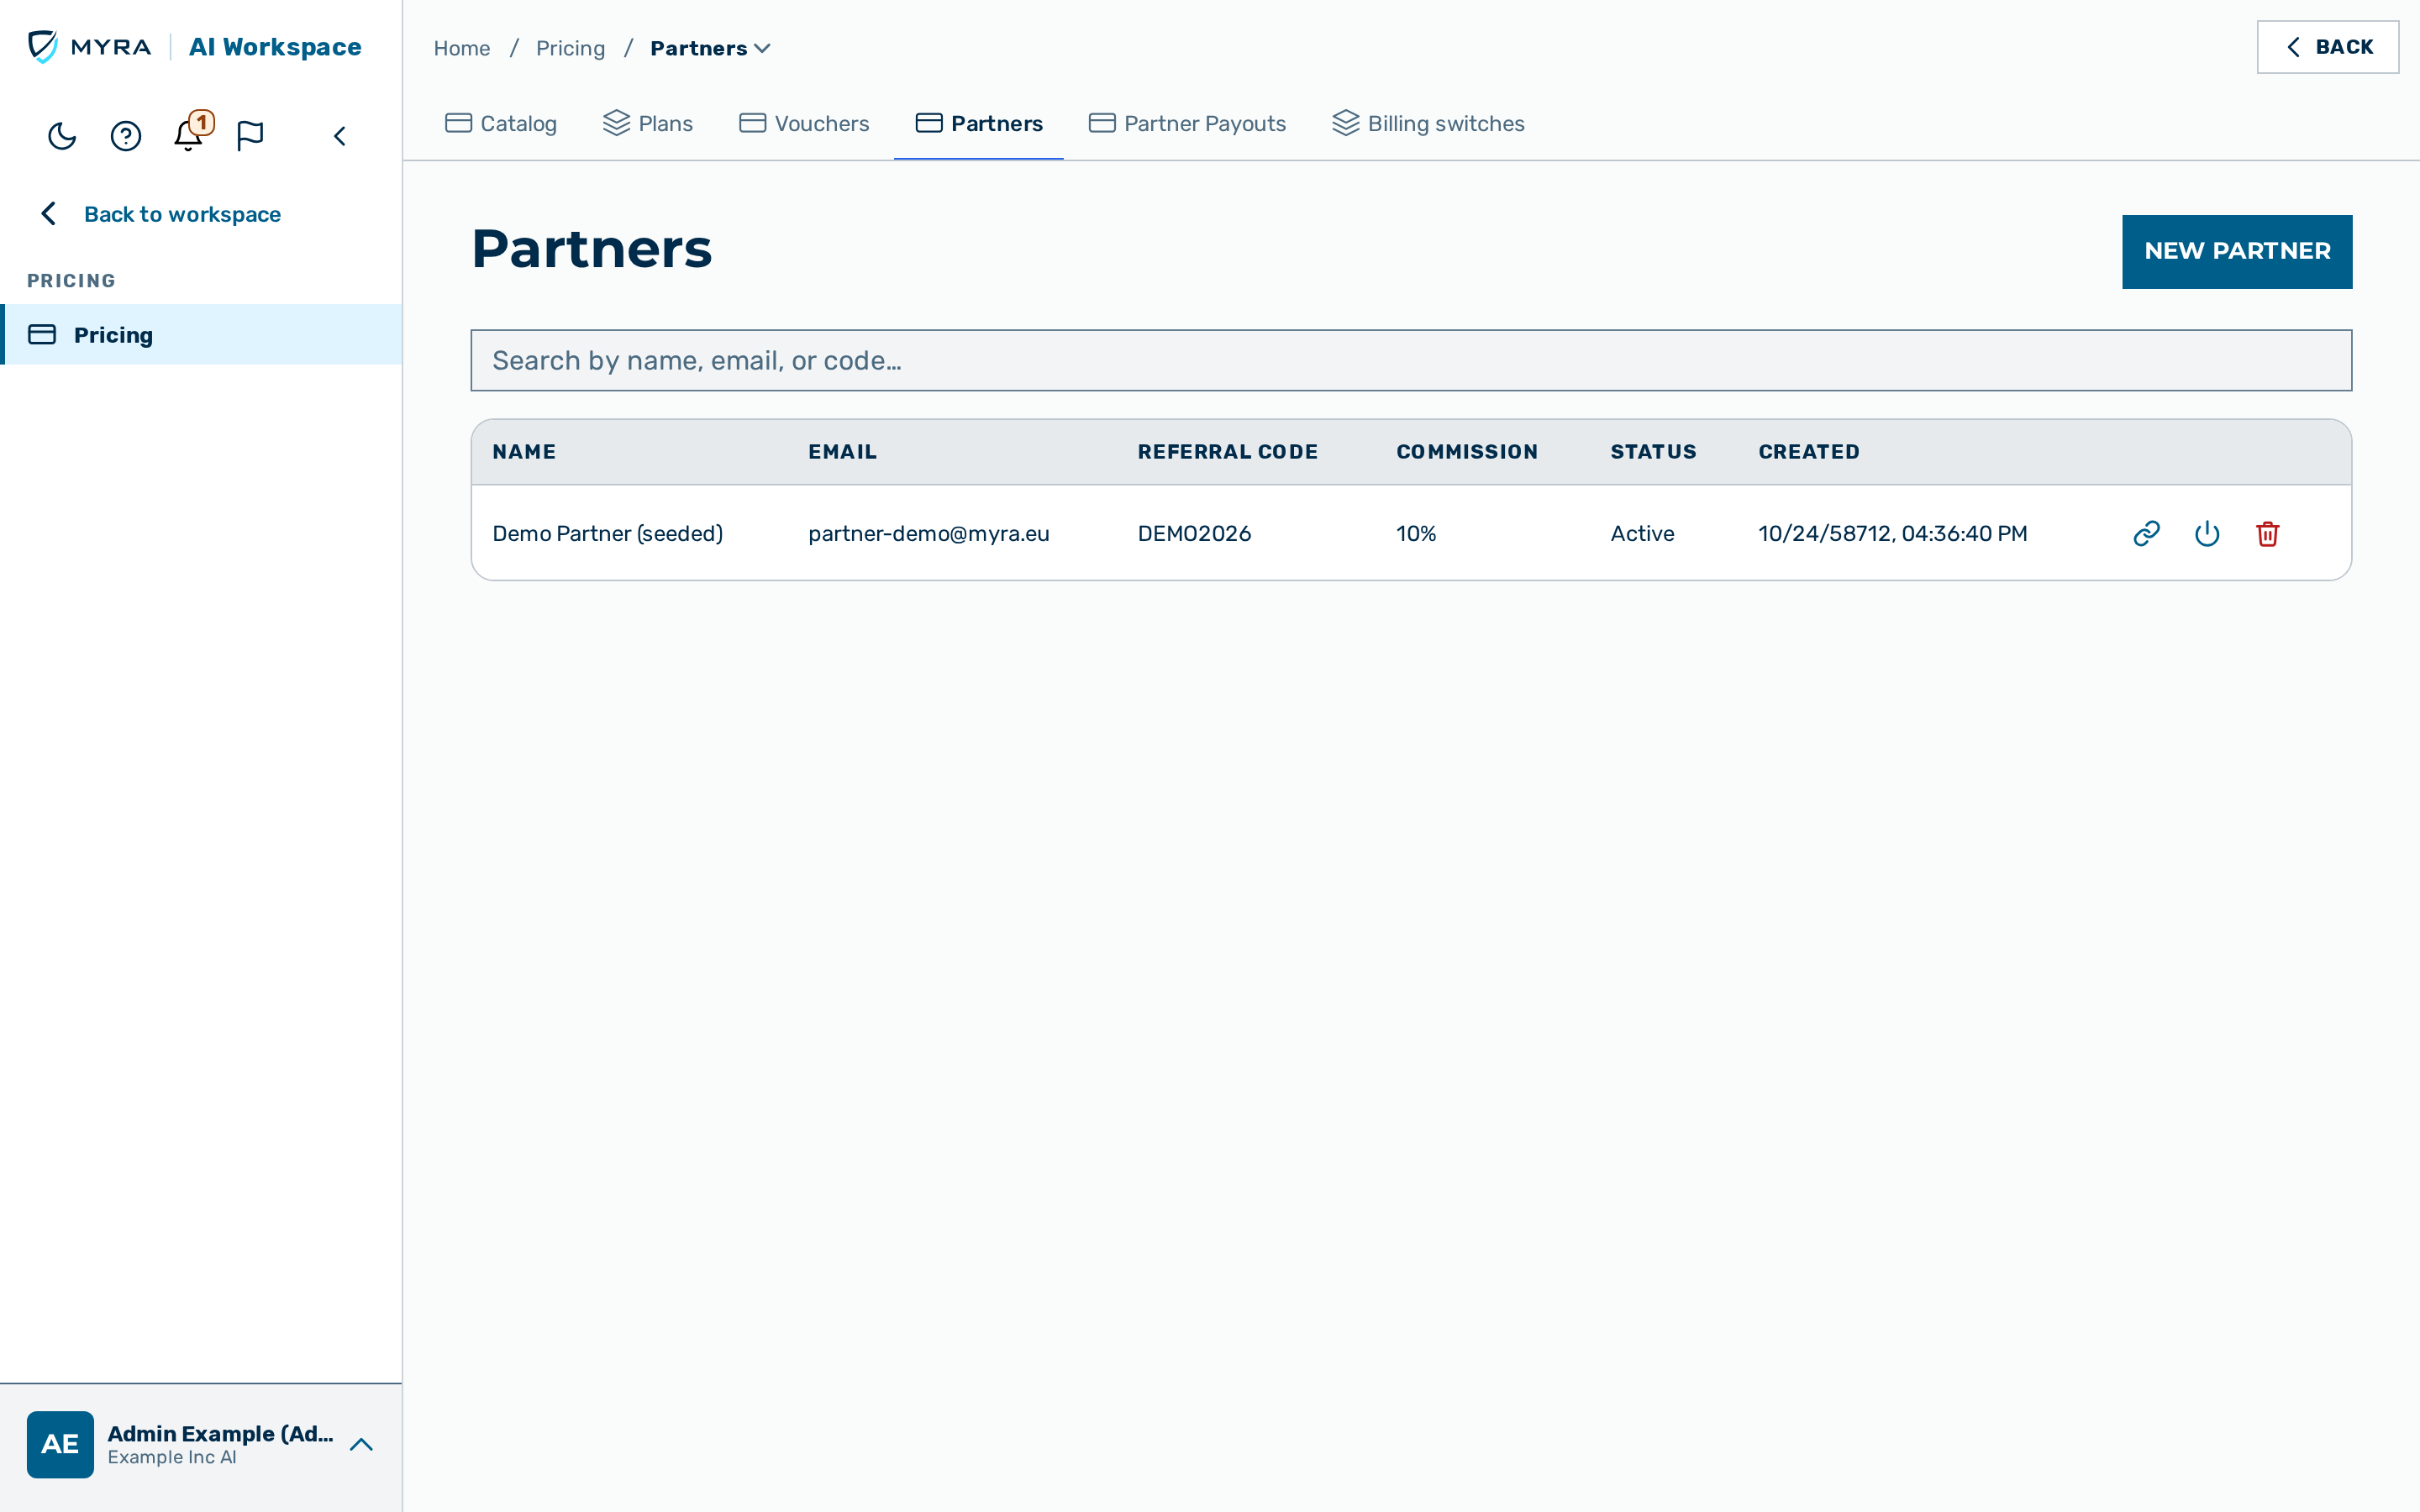
The Partners tab lists the affiliate partners with the columns Name, Email, Referral code, Commission, Status and Created. The status is Active or Suspended. Search by name, email, or code… filters the list.
The following rules apply to partners:
- The referral code has between 4 and 64 characters of
A-Z,0-9and-. The code is stored in upper case. A code or e-mail address that is already in use, or a former code of another partner, is rejected. - The commission is between 0 and 100 %. The default is 10 %.
Creating a partner
Proceed as follows to create a partner:
- Click on the New partner button.
- The Create partner dialog opens.
- Enter the name in the Name text field.
- Enter the e-mail address in the Email text field.
- Enter the code in the Referral code text field. For example:
ACME - If required, change the percentage in the Commission text field.
- Click on the Create button.
- The dialog closes.
-> The new partner appears in the list of partners.
Crediting a tenant to a partner
A sales deal credits an existing tenant to a partner. A tenant has at most one referring partner.
Proceed as follows to credit a tenant to a partner:
- Click on the Credit a tenant action in the row of the partner.
- The Credit a tenant to
dialog opens.
- The Credit a tenant to
- Enter the tenant ID in the Tenant ID text field.
- Click on the Credit a tenant button.
- The dialog closes.
-> The message Tenant credited to the partner. appears.
If the dialog shows That tenant already has a referring partner., the tenant is already credited.
Suspending a partner
Click on the Suspend action in the row of the partner. The status changes to Suspended. Click on the Reactivate action to make the partner active again.
Erasing a partner
⚠️ Caution: The erasure removes the partner permanently and removes the partner from all attributions. The erasure cannot be undone.
Proceed as follows to erase a partner:
- Click on the Erase action in the row of the partner.
- The Erase partner? dialog opens.
- Confirm the erasure.
-> The partner disappears from the list of partners.
Partner Payouts
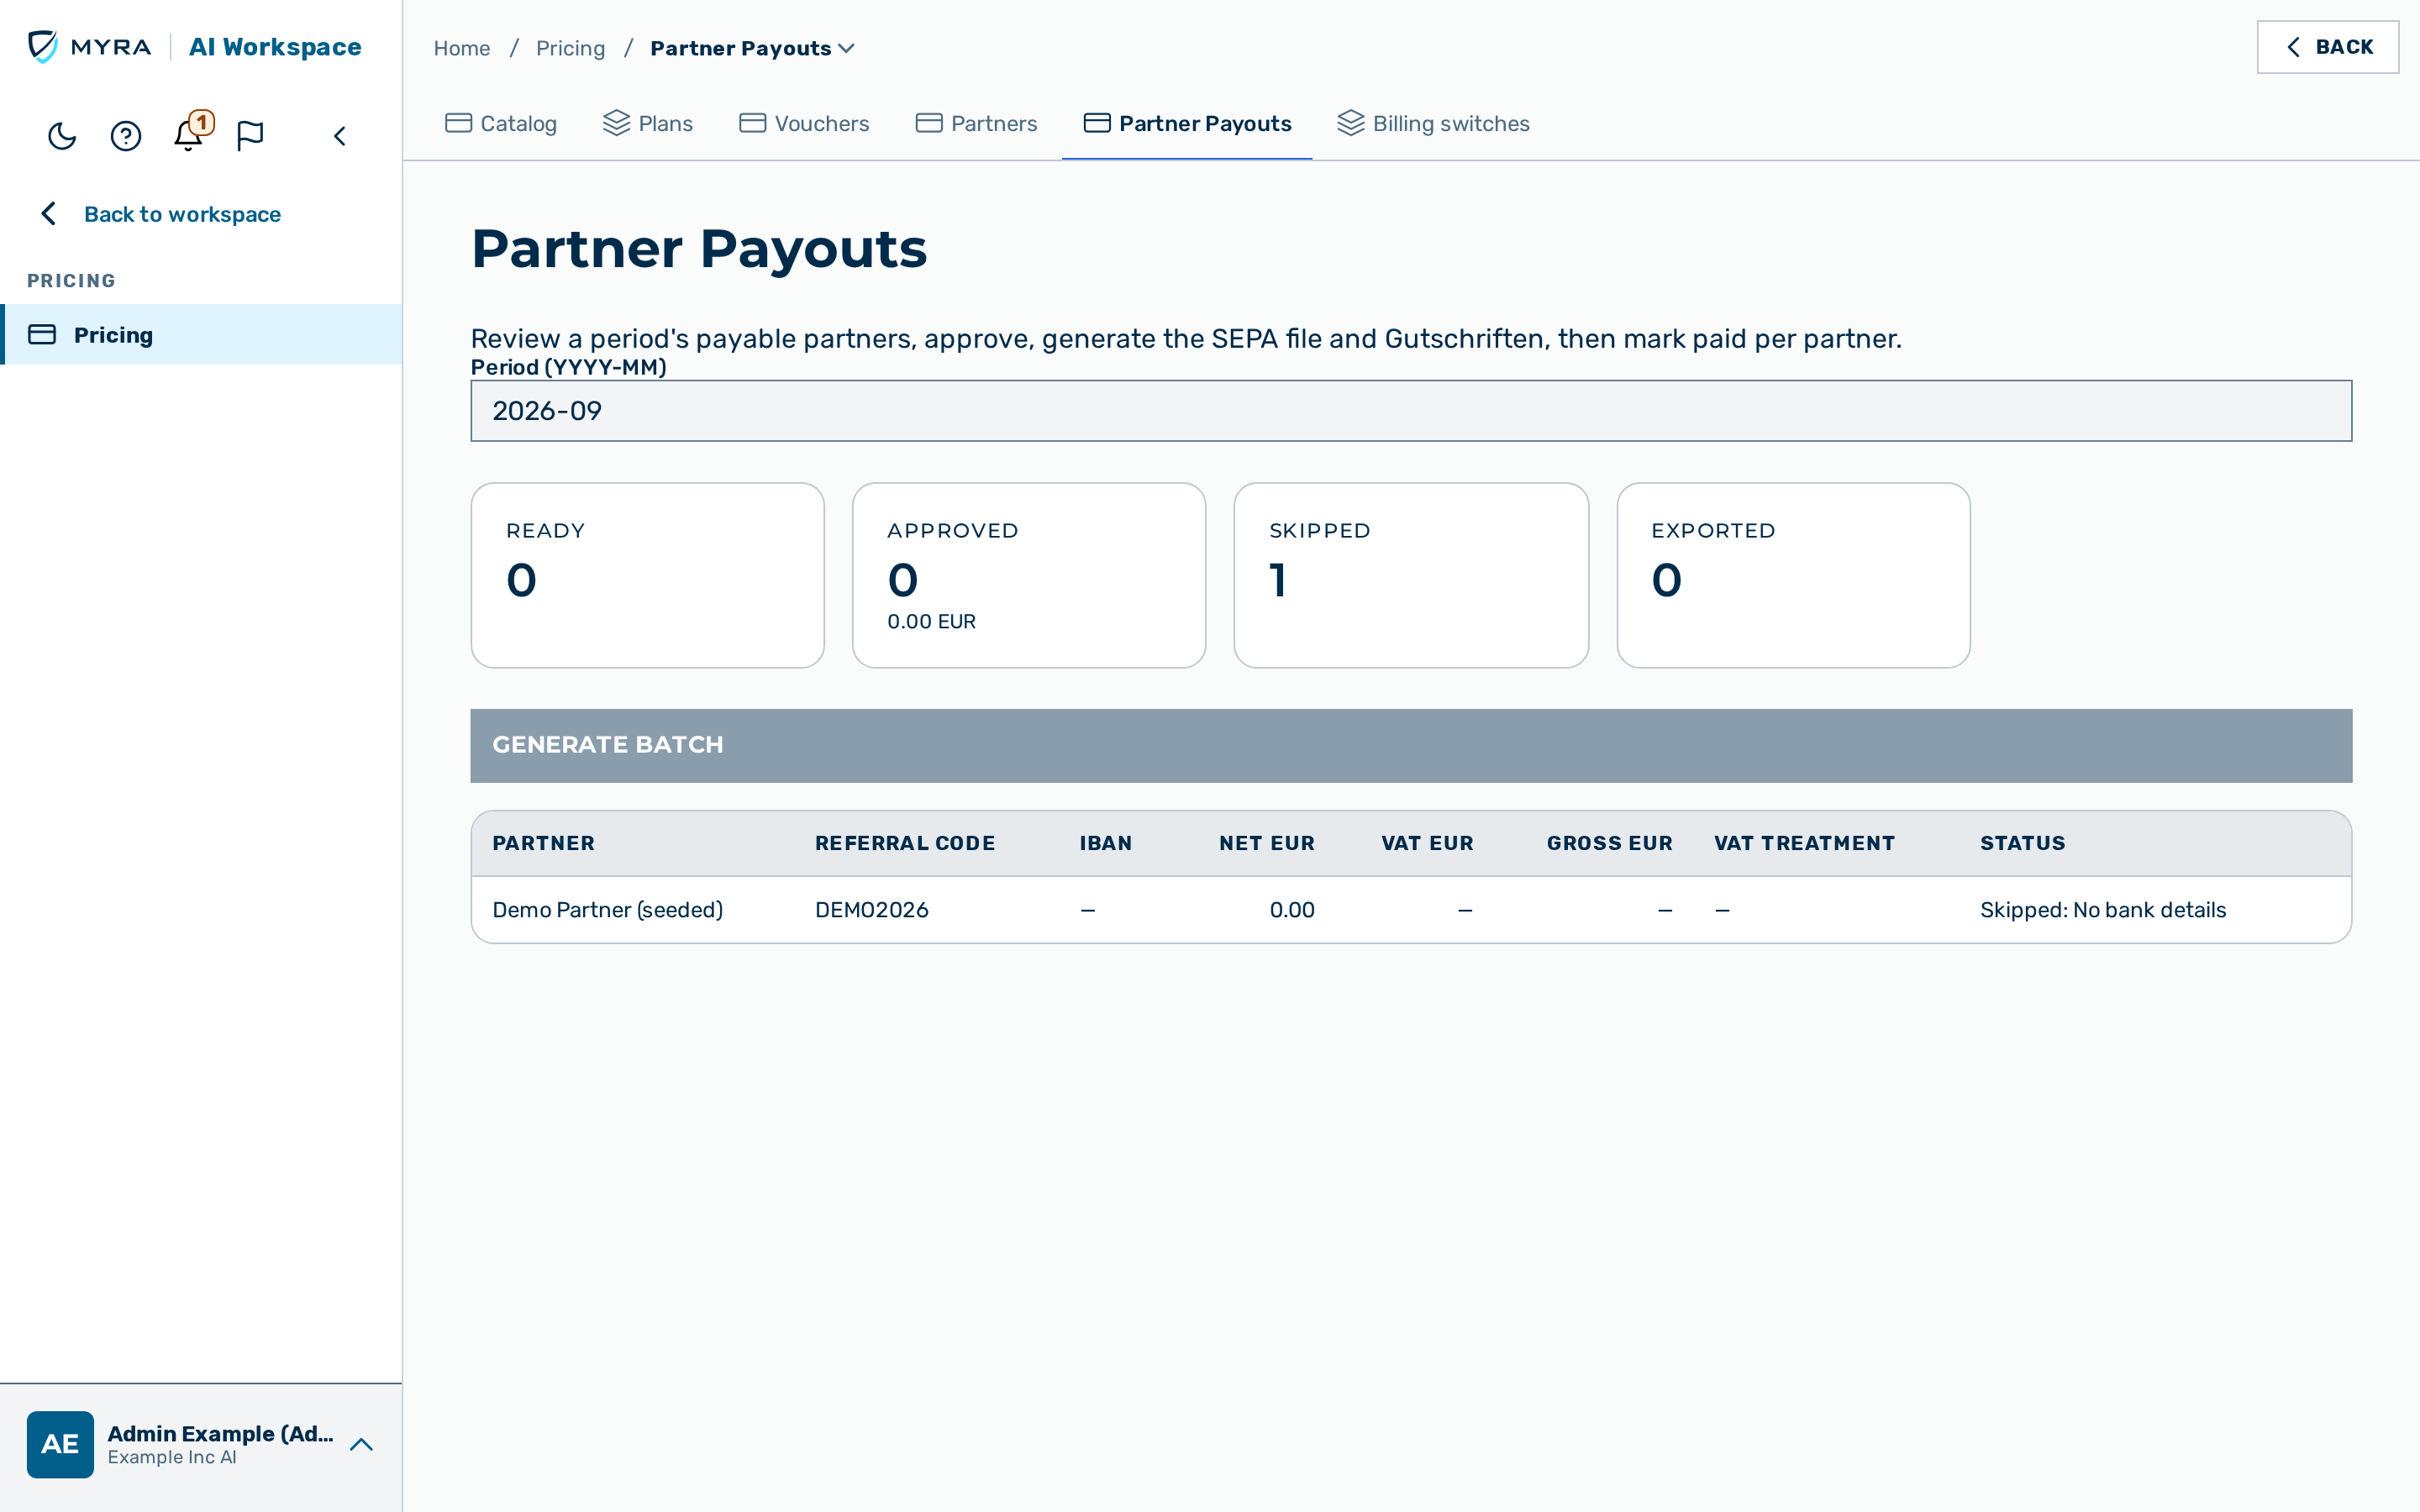
The Partner Payouts tab prepares the monthly payout to the partners. You review the payable partners of a period, approve them, generate the SEPA file and the self-billing credit notes (Gutschriften), and mark each partner as paid.
The Period (YYYY-MM) text field selects the period. The default is the month that just ended. The totals show the number of partners that are Ready, Approved, Skipped and Exported. The table has the columns Partner, Referral code, IBAN, Net EUR, VAT EUR, Gross EUR, VAT treatment and Status. A skipped partner shows the reason, for example No self-billing consent, IBAN changed <7 days ago or Below payout threshold. A skipped partner is carried forward to a later period.
The payout follows a fixed order: approve, generate the batch, mark the batch as exported, mark each partner as paid.
Approving a partner
Click on the Approve action in the row of a partner with the status Ready. Click on the Un-approve action to revert the approval while no batch exists.
Generating the payout batch
⚠️ Caution: After the generation, the approved rows move to exported and cannot be changed.
Before you begin, ensure the following conditions are met:
- At least one partner of the period is approved.
- The debtor IBAN and the buyer VAT ID of the payout configuration are set.
Proceed as follows to generate the payout batch:
- Click on the Generate batch button.
- The Generate the payout batch? dialog opens.
- Enter the period in the confirmation text field. For example:
2026-09 - Confirm the generation.
-> The batch status Generated appears with the control sum. The Gutschriften (self-billing credit notes) table lists one credit note per partner.
Click on the Download pain.001 button to save the SEPA file. Click on the Download Gutschrift action to save a credit note.
Marking the batch as exported
Click on the Mark exported button after the SEPA file is handed to the bank. The batch status changes to Exported.
Marking a partner as paid
⚠️ Caution: The action cannot be undone.
Proceed as follows to mark a partner as paid:
- Click on the Mark paid action in the row of the partner.
- The Mark this partner paid? dialog opens.
- Enter the period in the confirmation text field.
- Confirm the action.
-> The message Marked paid. appears.
The partner model, the payout rules and the accepted input are described in Partner dashboard.
Billing switches
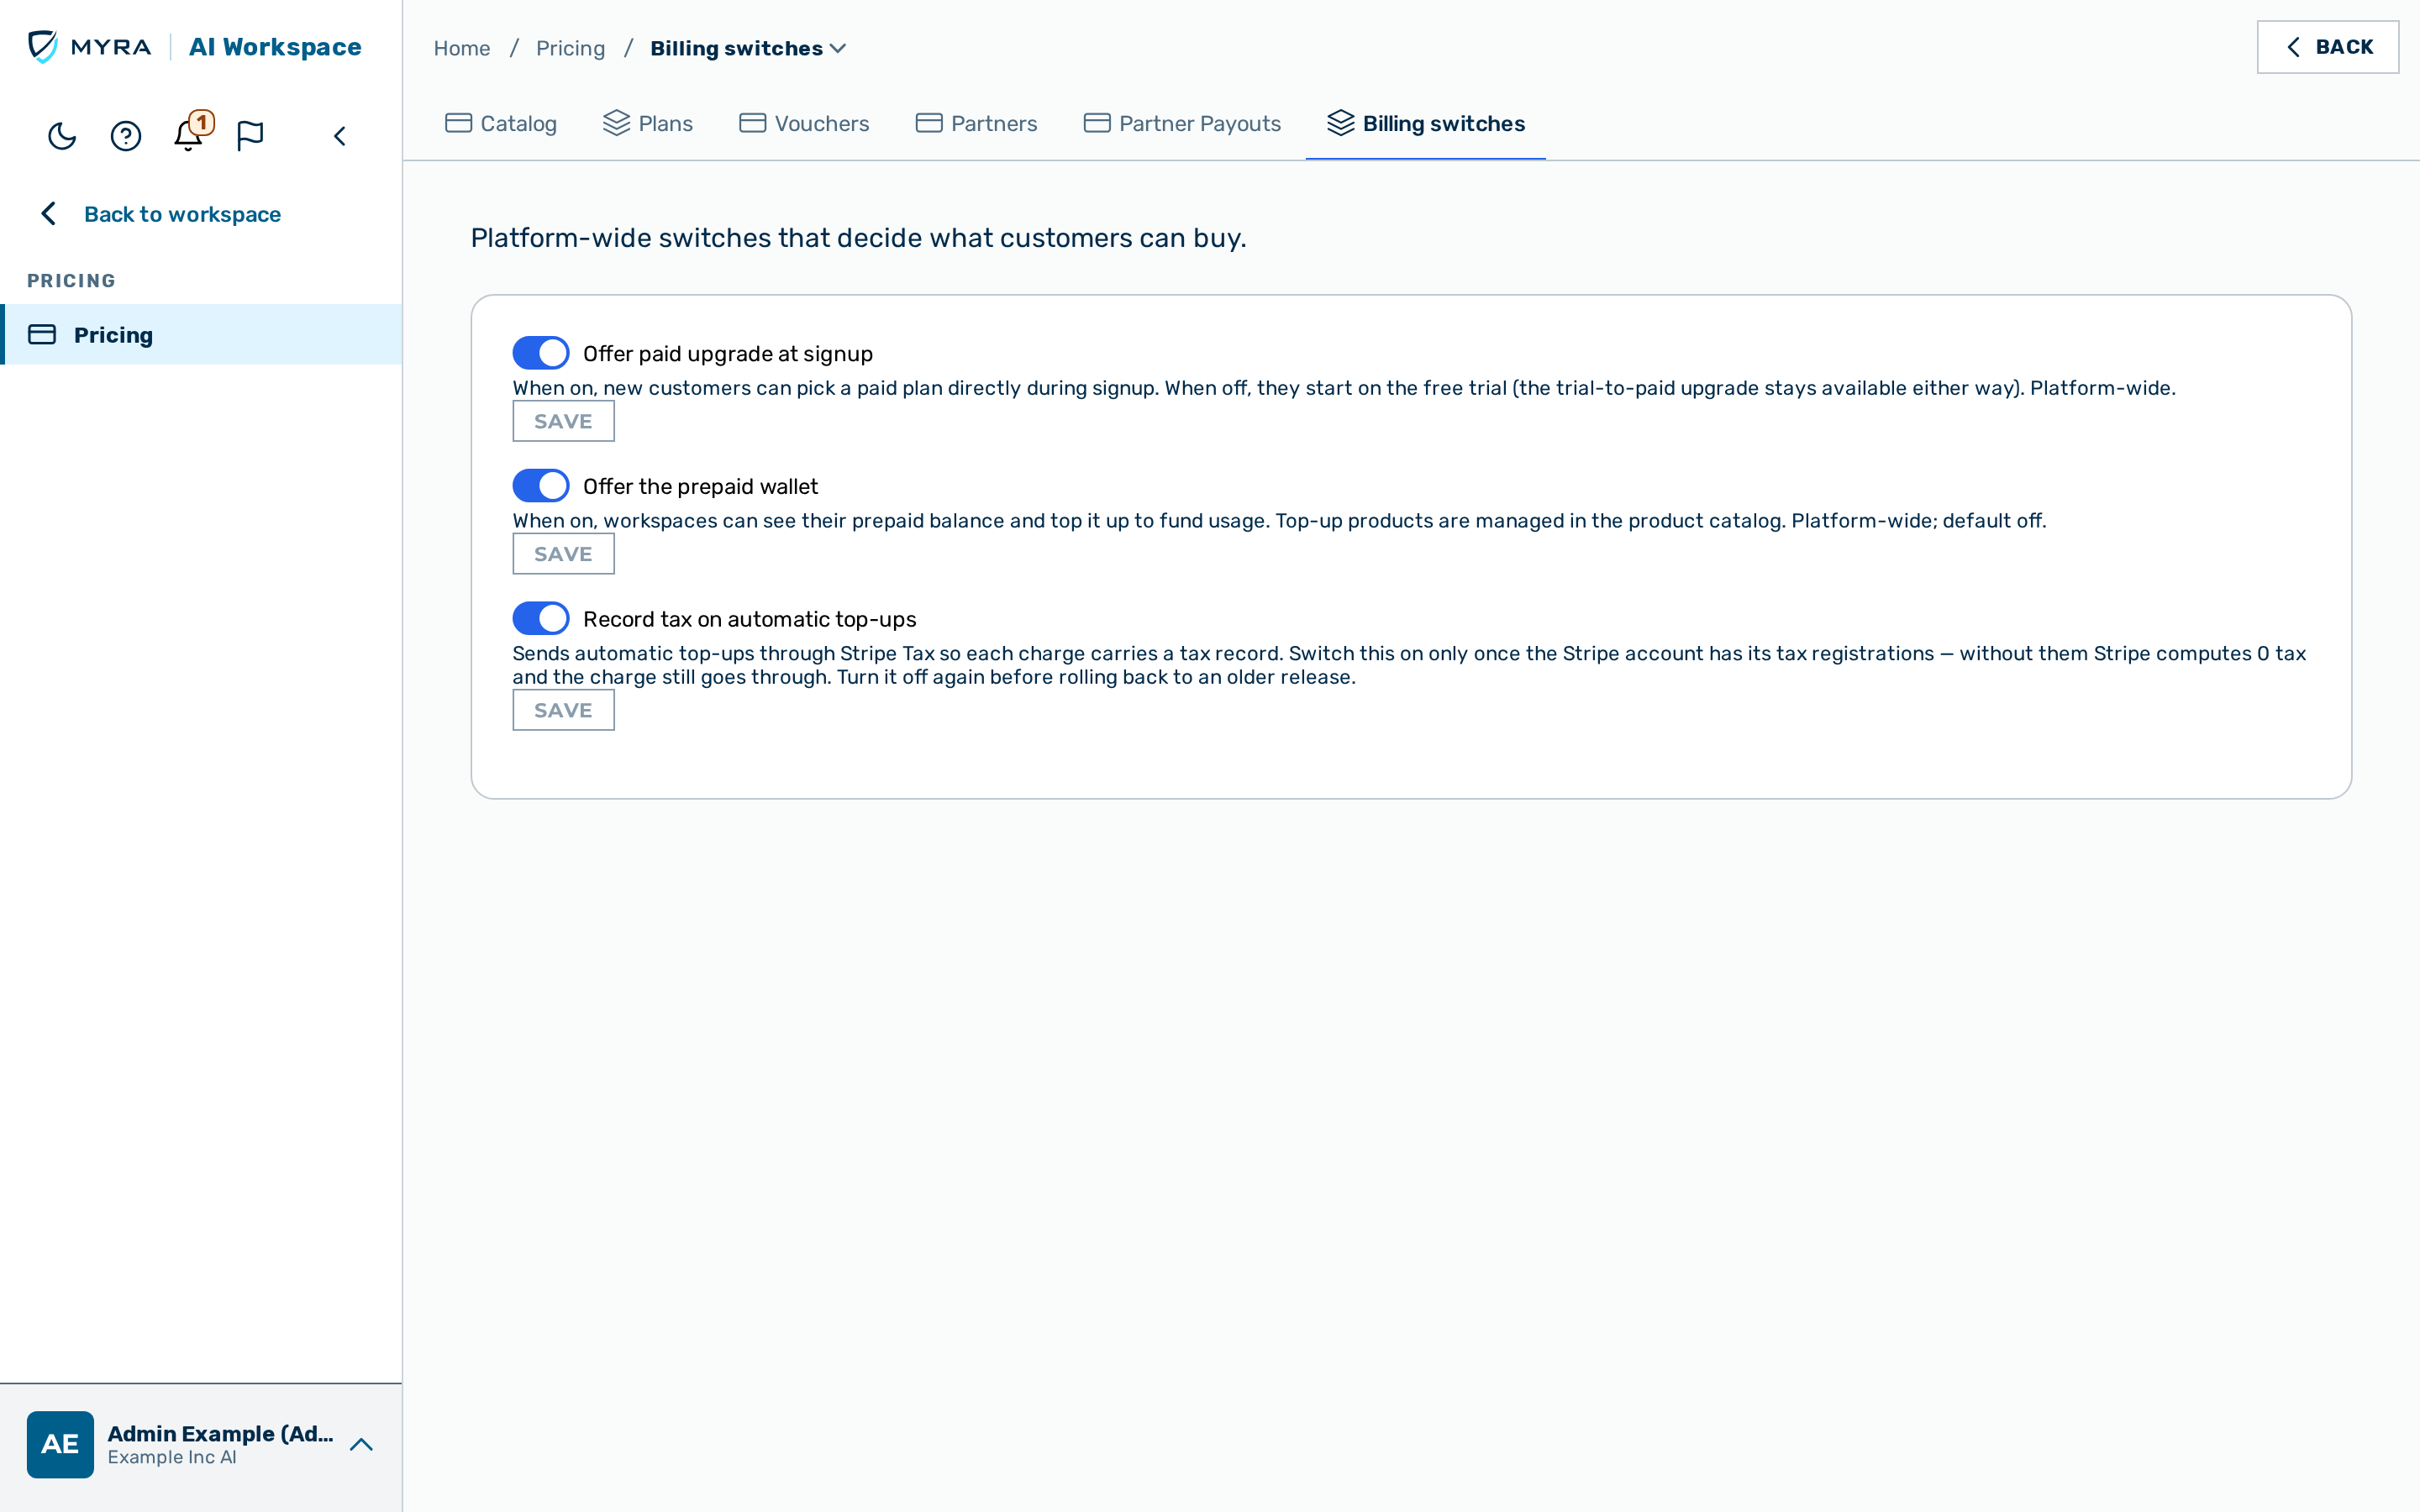
The Billing switches tab holds the platform-wide switches that decide what customers can buy. The following switches are available:
| Switch | Setting | Function |
|---|---|---|
| Offer paid upgrade at signup | paid_signup_enabled |
When on, new customers pick a paid plan during sign-up, and the Upgrade tab replaces Contact us. When off, new customers start on the free trial. |
| Offer the prepaid wallet | wallet_enabled |
When on, workspaces see their prepaid balance and top it up. Default: off. |
| Record tax on automatic top-ups | wallet_autotopup_tax |
Sends automatic top-ups through Stripe Tax so each charge carries a tax record. |
⚠️ Caution: Switch on Record tax on automatic top-ups only after the Stripe account has its tax registrations. Without them, Stripe computes 0 tax and the charge still goes through. Switch it off before a rollback to an older release.
Changing a billing switch
Proceed as follows to change a billing switch:
- Switch the toggle of the switch on or off.
- Click on the Save button of the switch.
-> The message Feature flag saved. appears.
If the switch shows This setting cannot be switched on in this environment yet., the platform refuses the value in this environment. The accepted values are described in Settings API.